Configuring network security settings
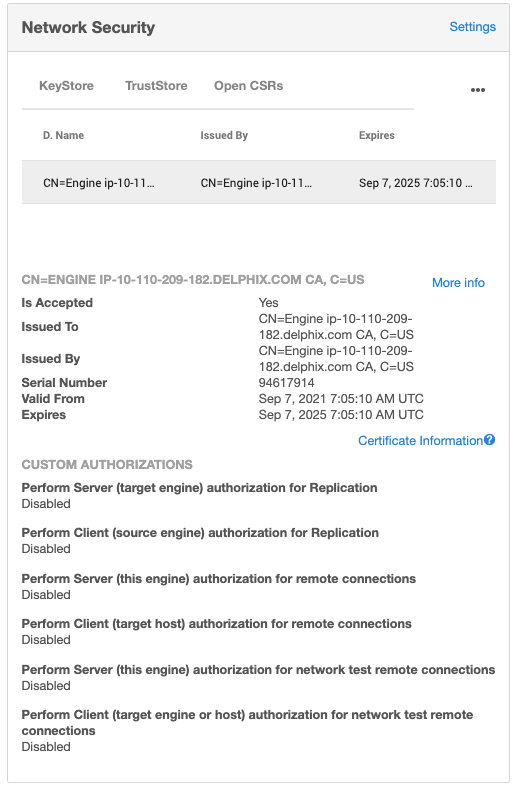
To enable and modify the extent of security settings for HTTPS and DSP (Delphix Session Protocol), click on the “Settings” button in the top right of the “Network Security” panel. This will open a new wizard where you can modify the settings.
Configuring settings for HTTPS and DSP.
The following procedure guides you through the process of enabling or modifying security settings for HTTPS and DSP.
Connect to the Delphix Engine
http://<Delphix Engine>/login/index.html#serverSetupClick on the Settings link in the top right of the Network Security panel. This will open a new wizard where you can modify the settings.

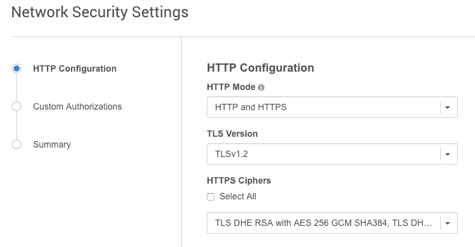
In the Network Settings wizard, you can modify the HTTP mode, TLS Version, and TLS Cipher Suites to be used.

Click Next.
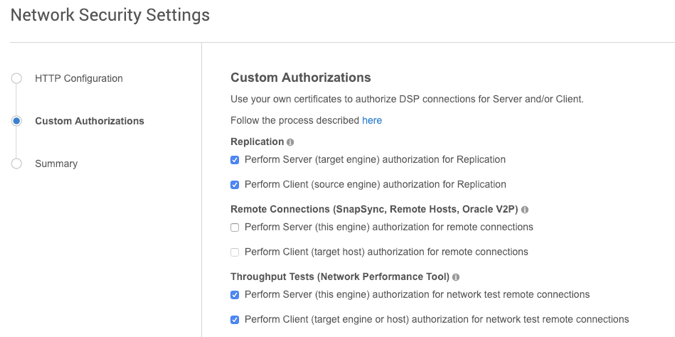
By default, self-signed certificates are used for server authentication and username/password login acts as client authorization. You can enable the use of custom certificates and modify the extent of how they are used for the following features:
Remote host connections (SnapSync, Remote hosts for Target or Server environments, and Oracle V2P)
Throughput tests using the Network Performance Tool and DSP
Info: For all three features, Server authentication must be enabled for Client authentication to take effect.Note: Any configuration change requires a stack restart to take effect. Submitting the Network Security Settings in the GUI will automatically trigger a stack restart. All jobs will be stopped, but VDBs will continue to run.

Once the HTTP and DSP configurations have been set as desired, click Next.
You will be presented with a Summary tab. Clicking Submit to accept your changes will trigger a stack restart as this is necessary for the configuration changes to take effect. Note: all jobs will be stopped, but VDBs will continue to run.
