SQL server environment and data sources
Enabling environments and dSources
Enable the proxy(staging) environments followed by the source environments.
Enable dSources on the target engine.
Delete the staging database stale mounts from the connector directories. An example directory: C:\ProgramFiles\Delphix\DelphixConnector\<Old Engine ID >-staging-<X> where X is an arbitrary id representing the staging database.
Delete the staging database from the SQL instance on the proxy host using the following convention: <Old Engine ID>-staging-<X> where X is an arbitrary id representing the staging database.
Enabling VDBs on the standalone host
Delete the VDB directories stale mounts from: C:\ProgramFiles\Delphix\DelphixConnector\\<Old Engine id>-vdb-<X> where X is an arbitrary id representing the virtual database.
From the SQL instance delete VDB databases that are in recovery pending state.
Enable VDBs. New mounts will be created and a new engine ID will reflect on those mounts.
Enabling VDBs on failover cluster as target
Once the source Engine is powered down login to Failover cluster.
Go to Windows Administrative Tools and select Failover cluster manager
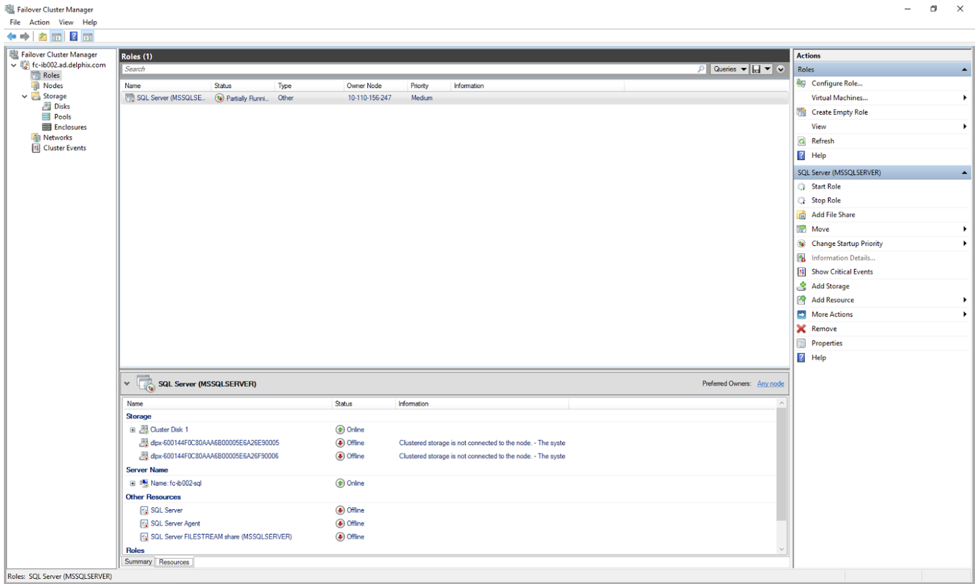
On the left pane of the Failover cluster manager go to the Roles. As shown in the image below you will see the Failover cluster in the following state with the indicated status.
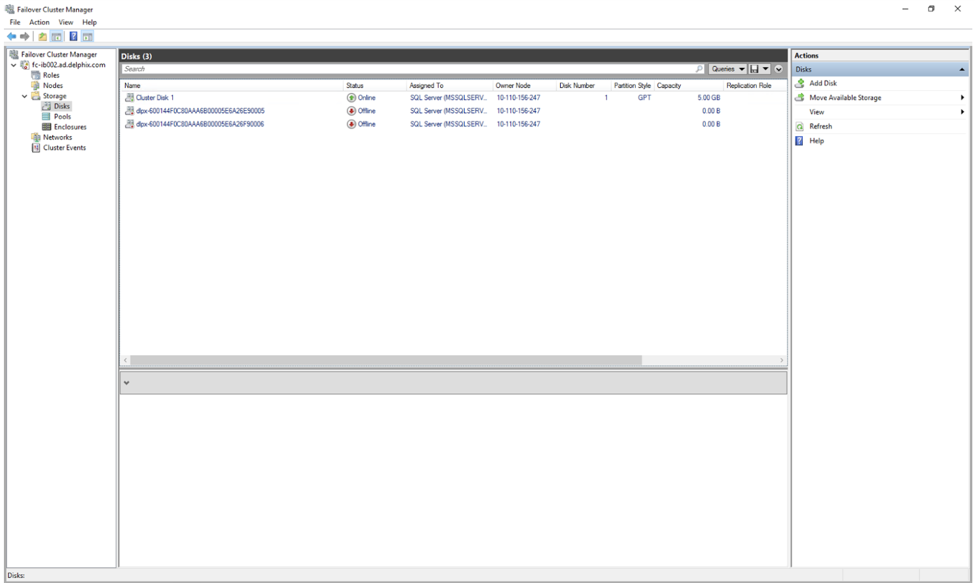
In order to fix the state go to the Storage section and select Disks. The dlpx-XXXXXXXXX mounts attached to the Cluster Disk will be in offline states. These mounts will be equal to the total number of VDBs provisioned on that cluster as the target.
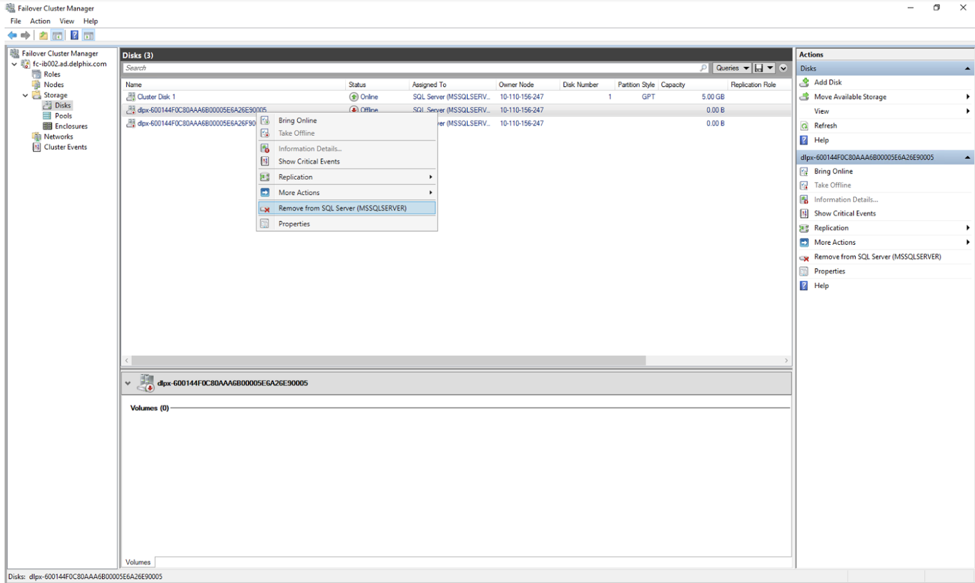
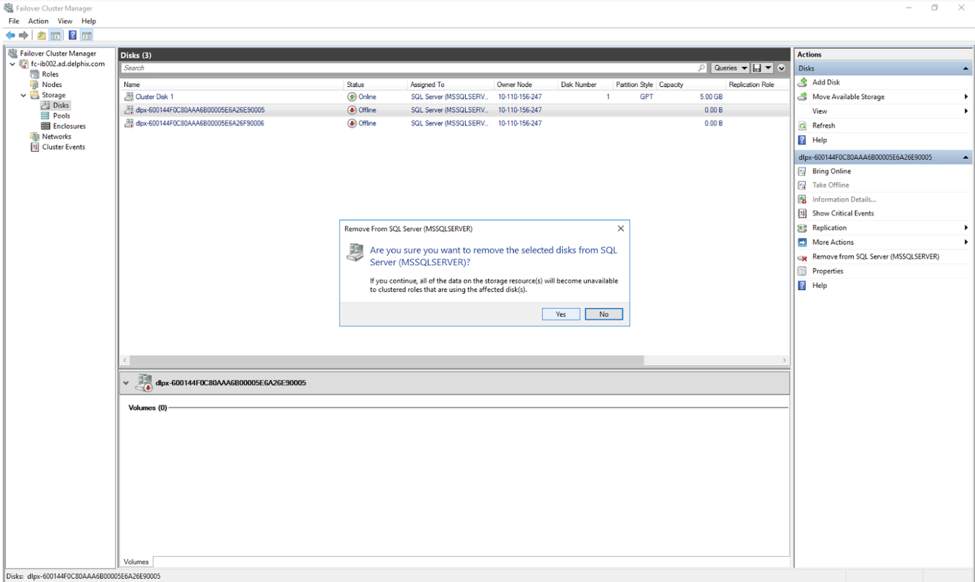
Right-click on the dlpx mount, and select Remove from SQL Server (Instance Name).
Click Yes.
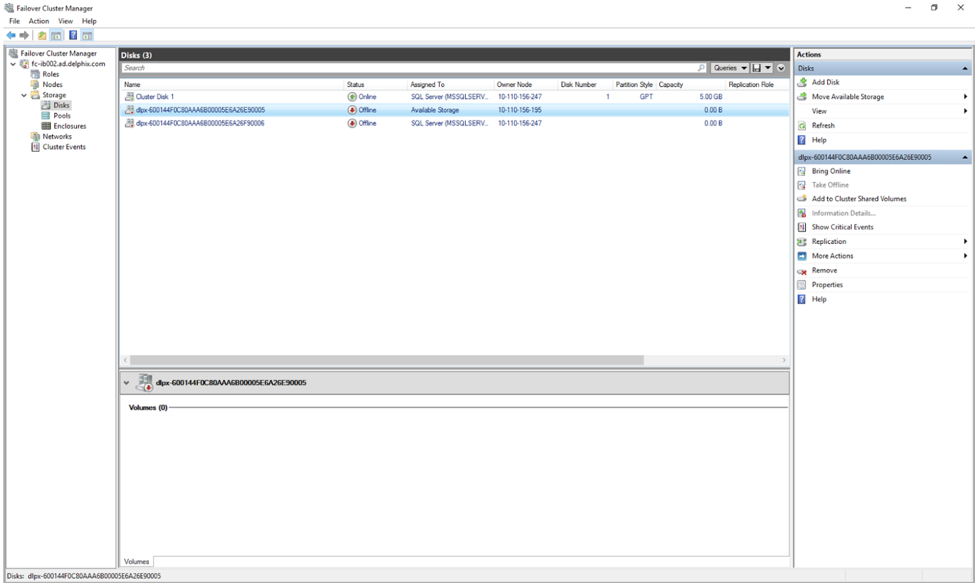
In the Assigned To column, you will see Available Storage.
Right-click on the dlpx mount and click on Remove.
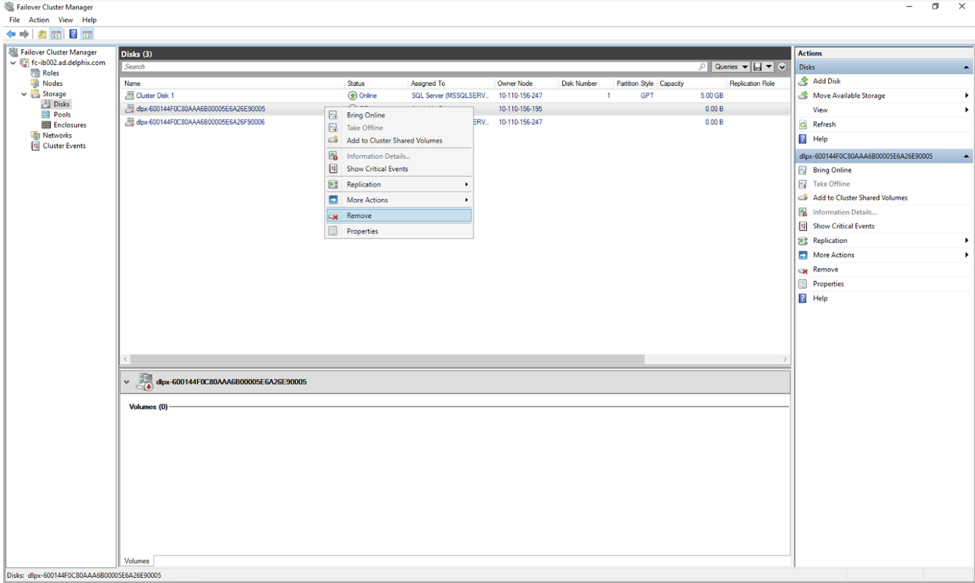
The dlpx mount will be deleted. Repeat the same process with other dlpx mounts assigned to Available Storage.
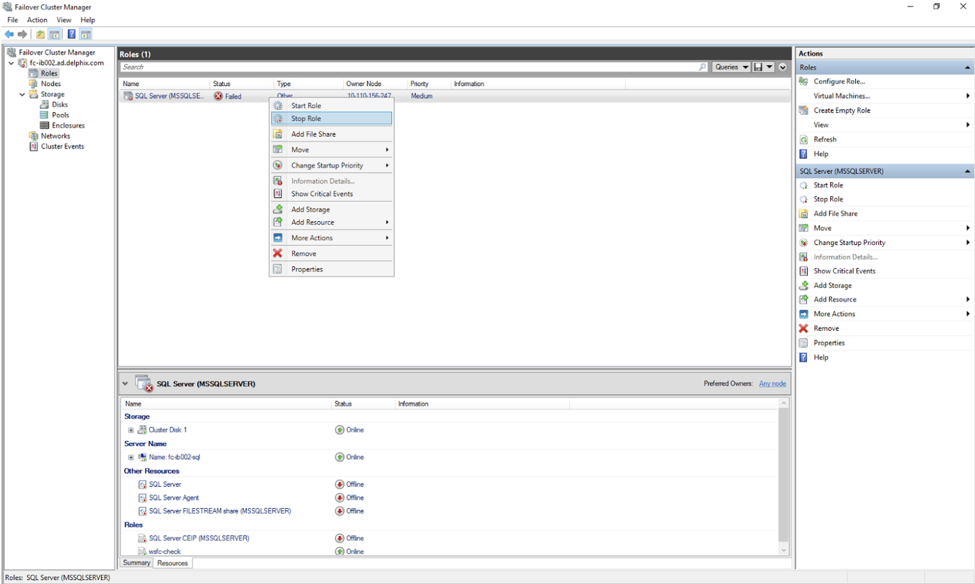
Under Roles, you would see that the SQL Server service is now in a Failed state.
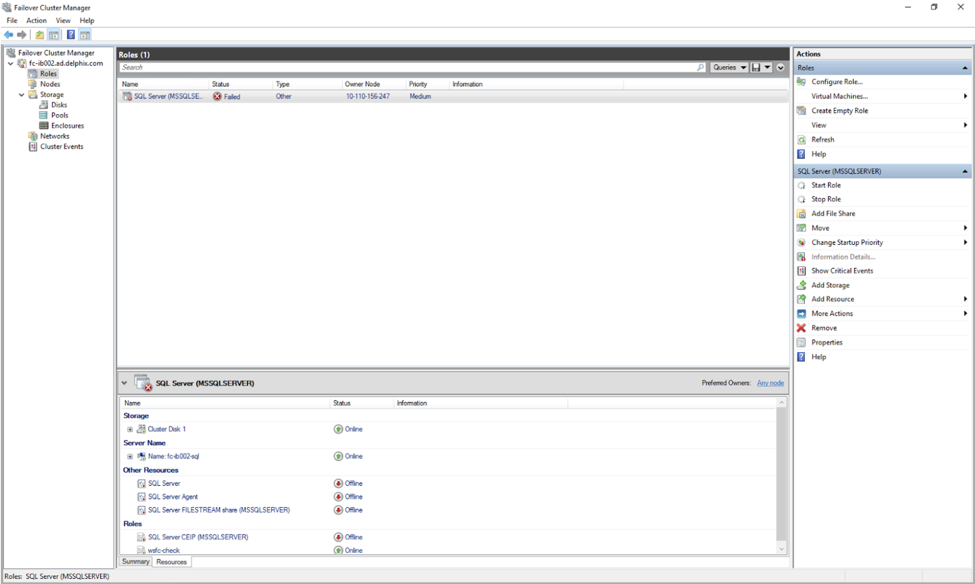
In order to fix it right-click on the service and click Stop Role.
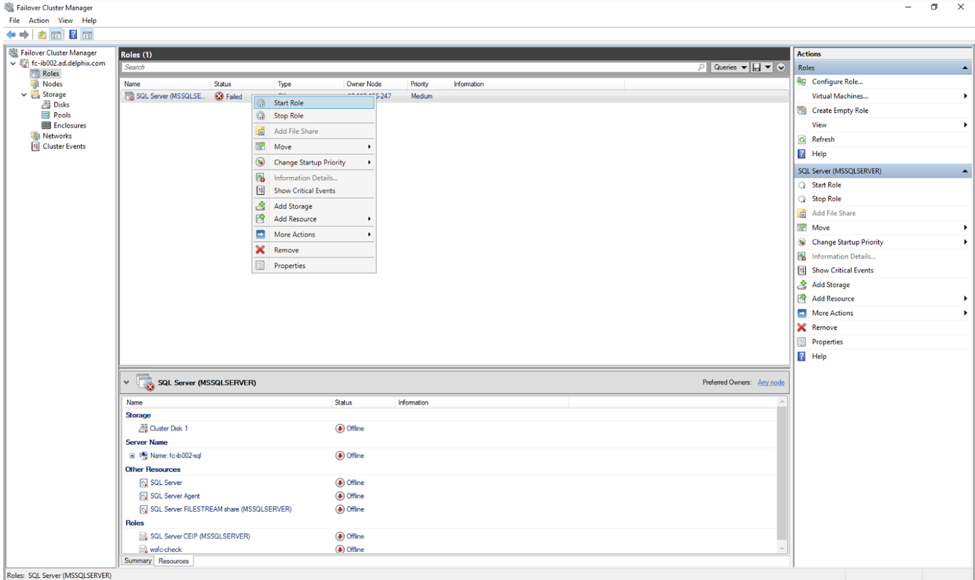
Once the Stop role is executed properly, right-click on the SQL cluster service and click on Start Role.
The SQL cluster service should now be online. Under the Resources tab the Storage, Server Name, Other Resources and Roles should have Online status. Ensure that the Disks and Nodes are also in an online state.
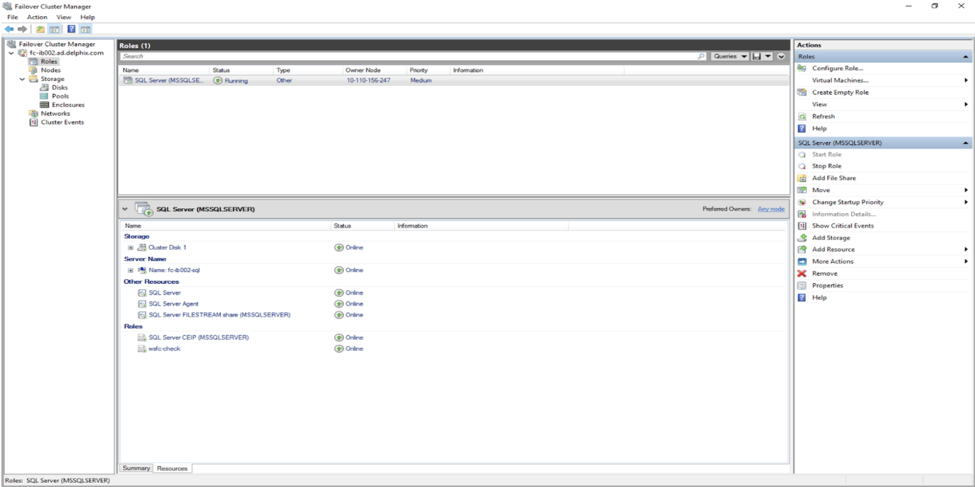
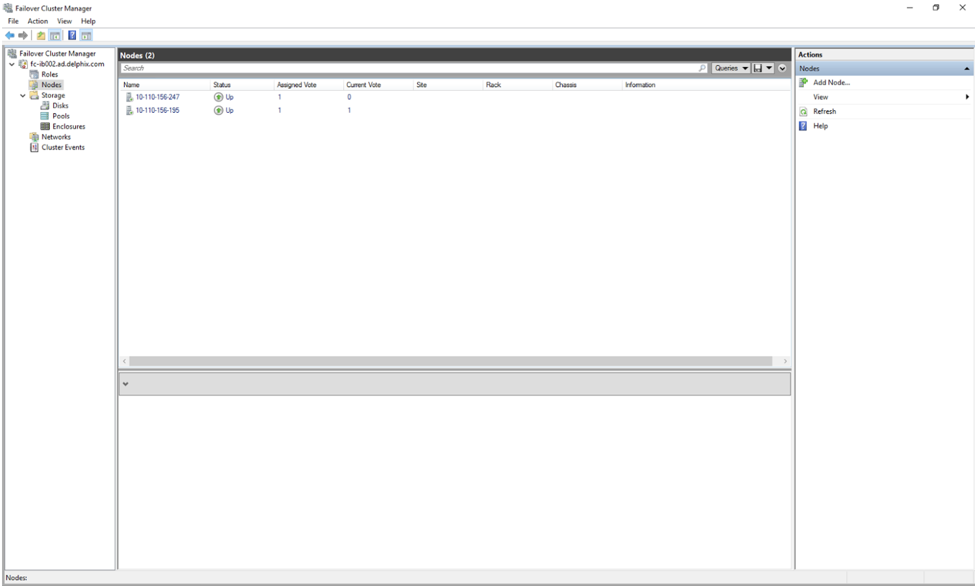
Make sure that both the nodes are in a healthy state.