
This topic describes how to provision a virtual database (VDB) from a HANA dSource.
Prerequisites
-
The provision requires a linked dSource built off a physical source tenant, as described in Linking a HANA dSource, or a VDB.
-
The HANA target environment should adhere to the Requirements for HANA Hosts and Databases
-
Operating system users and database users should be configured.
VDB creation UI
Procedure
-
Login to the Delphix Management application.
-
Click Manage.
-
Select Datasets.
-
Select a dSource.
-
Select a snapshot from which you want to provision.
Info:If the first or empty dSource Snapshot that was created using the Staging Push mechanism is detected by the plugin and an error message is displayed. This check is done for every VDB creation operation.
-
Click the Provision VDB icon to open the Provision VDB wizard.
-
Select a target environment from the left pane.
-
The HANA 2.0 Plugin supports one installation on the same host, hence the value in the Installation dropdown will be already populated. Multiple drop-down options should not be available.
-
Set the Environment User to be the Instance Owner. Note: The picking of instance owner is only possible if you have multiple environment users set on that host.
-
Click Next.
-
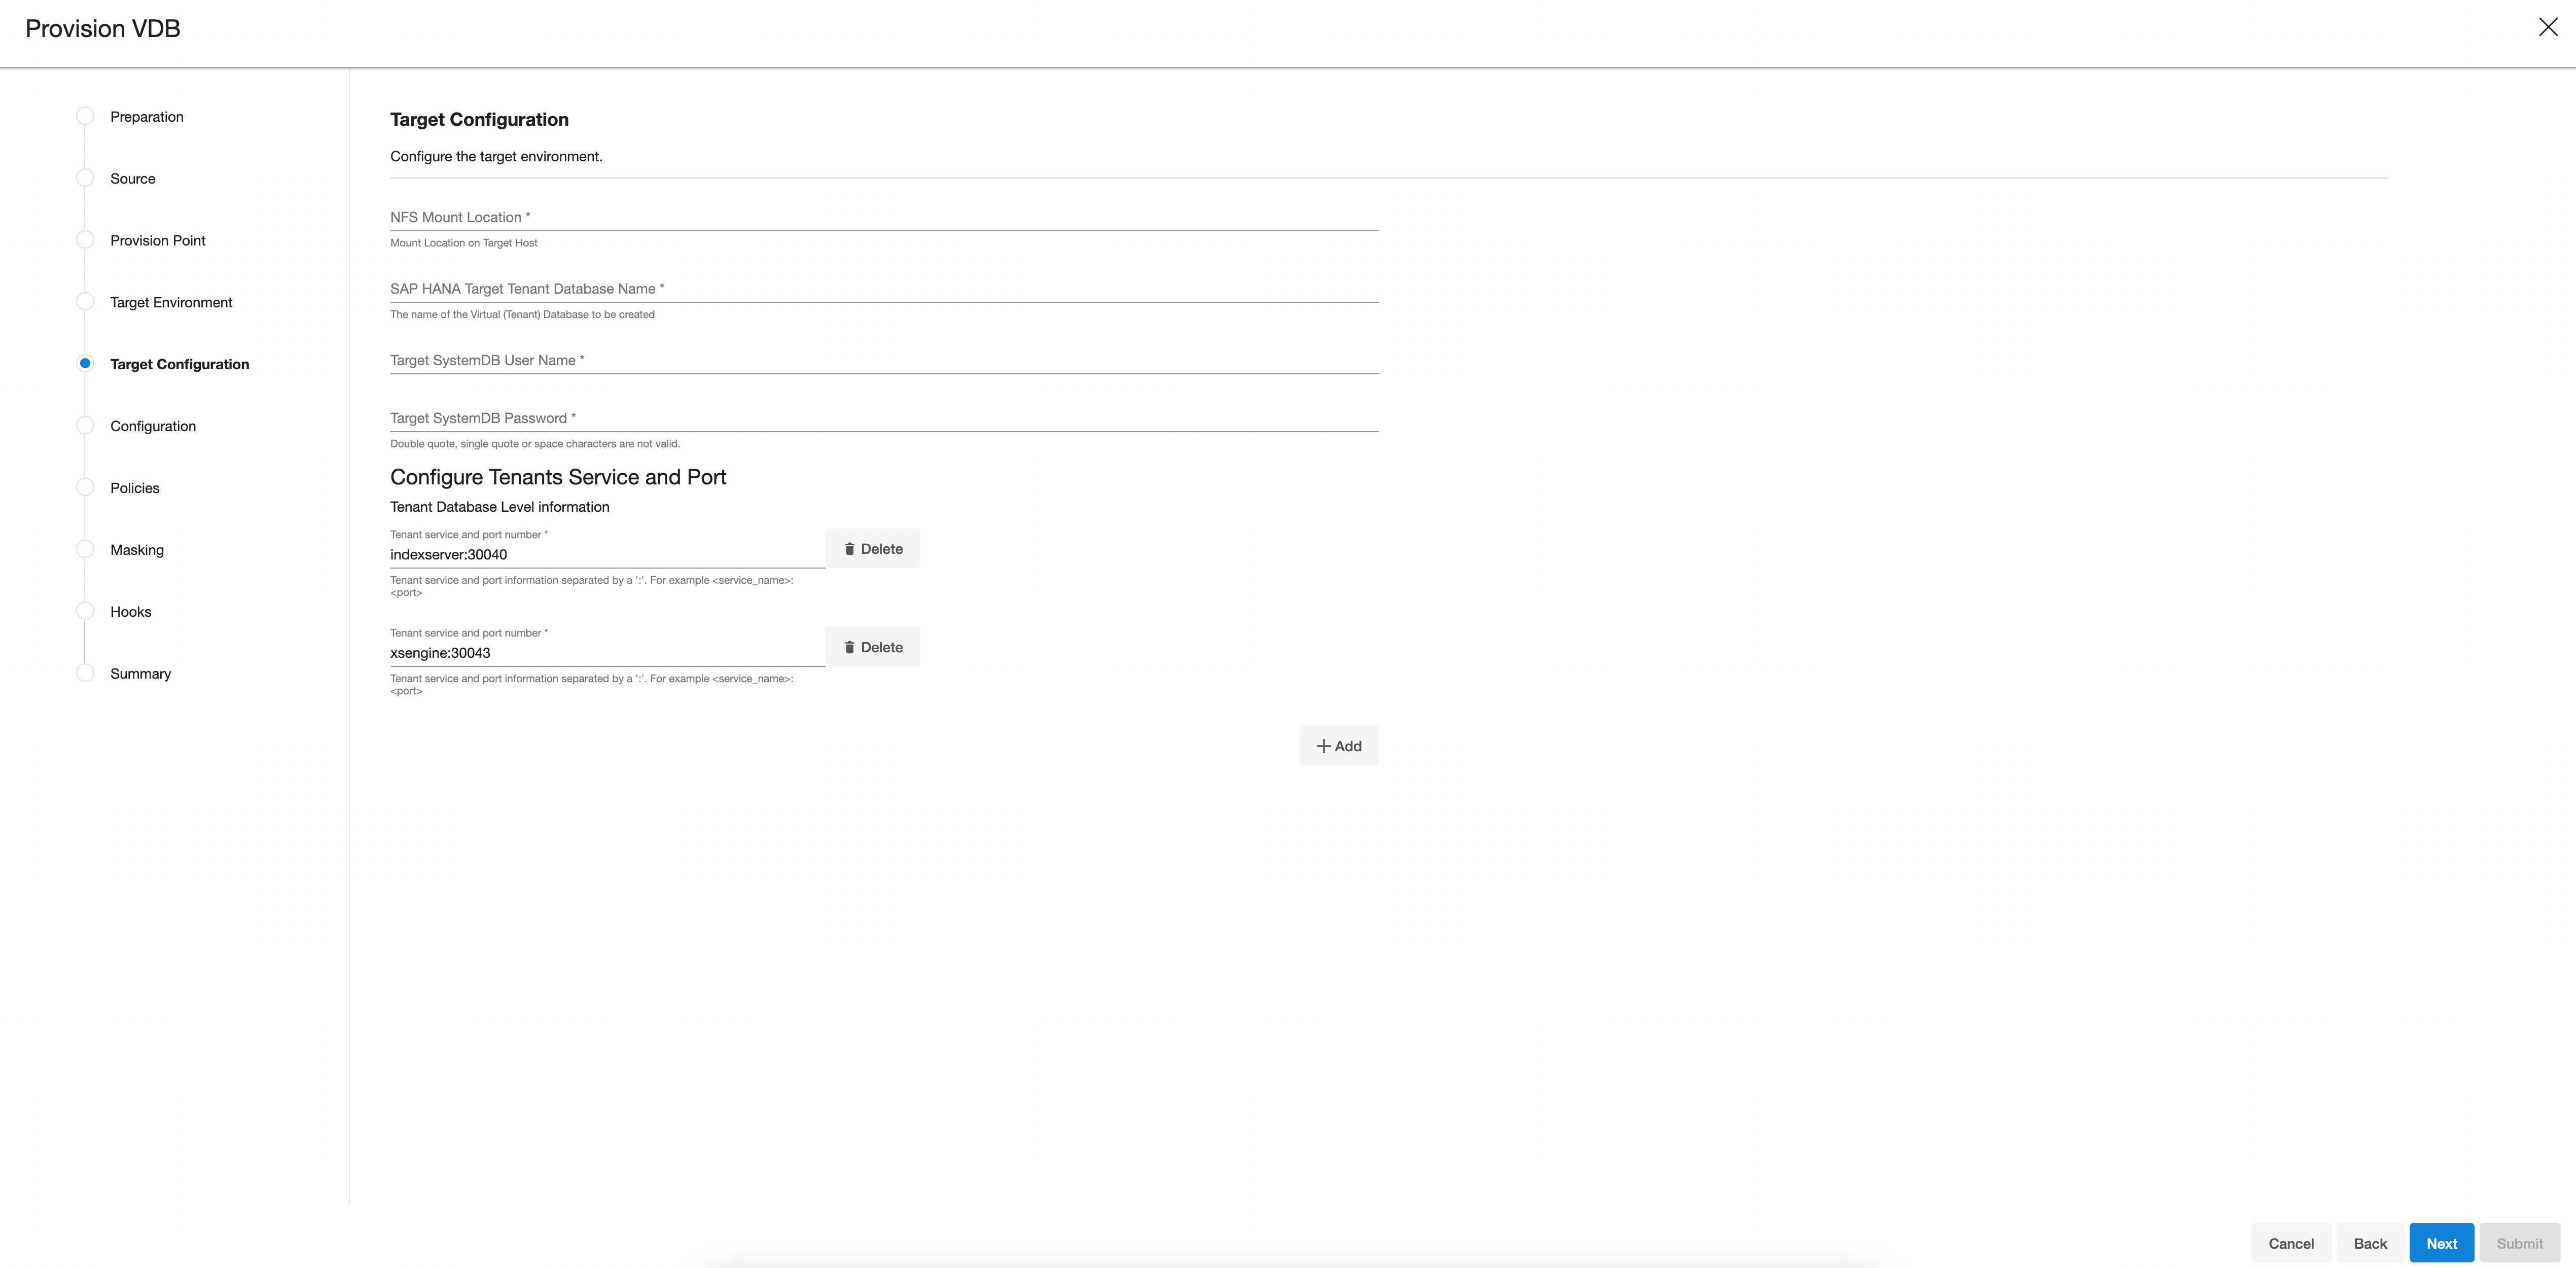
In the Target Configurationpane you will need to specify the following:
Info: '*' indicates the mandatory fields.
-
NFS Mount Location *: Delphix recommends setting the trailing directory to match the VDB name to delineate mount points and support administration and troubleshooting. In the example shown, the NFS Mount Location is /mnt/provision/dev where dev matches the SAP HANA Target Tenant Database Name.
-
SAP HANA Target Tenant Database Name *: This refers to the target tenant database name which will be created upon VDB creation.
-
Target SystemDB User Name *: This refers to the SystemDB username in the target database.
-
Target SystemDB Password *: This refers to the SystemDB password in the target database.
Note:
The SYSTEM username and password derived from the physical source database should be entered during the provision of a VDB because those credentials will be recovered during provisioning.
-
Configure Tenants Service and Port: This refers to the list of tenant services and port numbers in the following format.
<service>:<port>For example, indexserver:30043You can click "+Add" to add more services.
Info :-
This is not a mandatory field. If a user doesn't provide a value to this, then the plugin will proceed with the above fields and it will allocate the service and port on its own.
-
If an invalid service is provided, the plugin will proceed with input, but will eventually fail while creating the service and will display an error on the Delphix Engine UI.
-
-
-
In the configuration section
-
Set the vFile Name or accept the default, which is a random string. Delphix strongly recommends applying a consistent naming convention. We suggest this name should match the Target Tenant Name from the previous pane. Maintaining a consistent naming convention will support administration and troubleshooting activities. In the example shown, the vFile Name “dev” matches the actual tenant name and mount point from the previous pane.
-
Select a Target Group for the VDB.Click the Add Dataset Group icon to add a new group if required.
-
Set Auto VDB Restart option to automatically restart the VDB, where the target host is rebooted. Delphix recommends enabling this setting.
-
-
Click Next.
-
VDB Snapshot Policy. Select the Snapshot policy if an automated VDB snapshot schedule is required. Optionally, the Snapshot policy may be disabled by selecting “None”.
-
Click Next.
-
Masking. This page offers the opportunity to link the provision job to a masking job. At this time, Delphix Masking does not support HANA. Please do not use this option. “Mask this VDB” should remain deselected.
-
Hooks. Run a customized shell script via a hook operation at a particular moment in the provision operation.
-
Click Next.
-
Summary. Presents an opportunity to review all the information as a part of the initial provision workflow.
-
Click Submit.Once a provision job is submitted it is possible to monitor its progress by selecting “Active Jobs” in the top menu bar. On successful completion, VDB will be visible in the list of Datasets under its assigned group.