Provisioning a Yugabyte VDB
Navigate to Manage, and select Datasets.
Select the dataset and the snapshot that you want to provision from. Click the provision VDB icon to open the provision VDB wizard.
Select the target host from the dropdown on which VDB needs to be created.
Enter the following values for the target configuration:

VDB Name: A unique database identifier.
Mount Path: NFS mount path where dSource snapshot will be mounted by Engine ( ex.
/mnt/provision/targetdemo)Run Restore from the provided backup: Select the checkbox if the restore needs to be performed on the created cluster. Unselect the checkbox in case of a seed (empty) database.
Database Name: Database to be restored from backup.
Enable Authentication: Check to enable authentication on the created cluster.
Database Password: This field will be available if authentication is enabled. Fill in the desired password corresponding to the Yugabyte user.
Create cluster on YBA: Enables the creation of a cluster on Yugabyte Anywhere (YBA). When set to true, the system will create a new cluster using YBA.
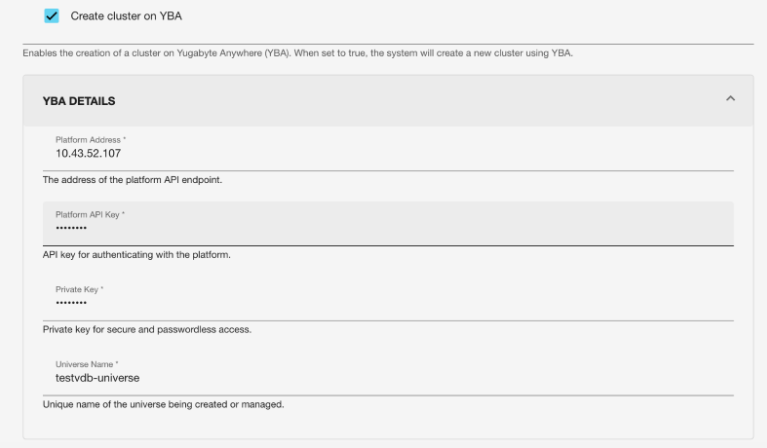
Platform Address: The address of the platform API endpoint.
Platform API Key: API key for authenticating the platform.
Private Key: Private key for secure and passwordless access.
Note: The appropriate permissions must be granted to manage the YBA Universe instance.Universe Name: Unique name of the universe being created or managed.
Number of Nodes in Cluster: Enter the number of master and tserver pairs in the cluster to be created.
Server Details: Enter each server (master / tserver) details.
Custom Node Identifier: A custom identifier for easy identification for the user (not used by the connector).
Server Type: Select the type of server: master or server
Host Environment: Select the host on which the master/tserver has to be provisioned.
Host Environment User: Select the user corresponding to the host.
Node IP: IP using which the node could be reached from other nodes. It needs to be a public IP specifically in the case of multinode architecture.
Host BindIP / Hostname for Cluster: Listen to address for the node
Port List: Specific ports required by the master/tserver for the server to be initiated.
Server Tuning Parameters: Custom tuning parameters that are optional to the customer and are used to configure the instance.
Provision connector-based VDB. Enter the following value:
VDB Name: Delphix target cluster name
Target group: Delphix target cluster group
Select a policy for VDB, and select Next.
Select masking for VDB if needed, and select Next.
Add hooks for VDB if needed, and select Next.
Preview the summary and select Submit.
Once the VDB is created successfully, you can review the datasets on Manage > Datasets > vdb Name.
Accessing Yugabyte target VDB cluster
Use an IP/hostname of the target environment and VDB port defined above to access the target cluster VDB. The admin user name and password are defined based on input from point 4.
An example screenshot of the Yugabyte console of the provisioned VDB can be found below: