
Using the Double Sync option for Oracle SnapSync
When Oracle SnapSync is performed, all archive logs generated during the runtime for the SnapSync operation must be fetched from the source and applied during any provision from this snapshot. For initial, force full or long running Snapsync operations, this can result in slow provisioning times as a large amount of Oracle redo logs need to be applied.
Double Sync can be used to improve the provisioning time of snapshots following an initial force full SnapSync operation, or in cases when there has been large amounts of change in the source database between SnapSync operations.
When Double Sync is selected, LogSync will be automatically paused and the first Snapsync will be started. The resulting snapshot will not be provisionable. Once complete, LogSync will be restarted and a second SnapSync operation will be performed. All archive logs required to provision the second snapshot will be collected and the resulting snapshot will be provisionable with less amount of Oracle redo logs required.
If LogSync is disabled on a dSource, the Double Sync operations are the same, however only logs required to make the second snapshot provisionable will be collected.
It is possible to request during Linking that a Double Sync is performed if linkNow is set to true. (This is available in the GUI for linking starting in 5.0, and for manual Snapshots in 5.3.4.0, see notes below for a CLI example).
When two Double Sync snapshots are created, the older snapshot will not be provisionable. Therefore, you should not attempt Timeflow repair operation as the logs required to make it provisionable, were not retrieved by design. Use the new snapshot for provisioning or refreshing operation.
Note that the Double Sync option is not available for Oracle multitenant databases.
Linking with the Double Sync option via the GUI
Login to the Delphix Management application.
Navigate to the Environment with a Data Source you want to link. Or, from the Datasets page, click the plus icon and select Add dSource.
In the Add dSource wizard, select the source database with the correct environment user-specified.
Enter your login credentials for the source database and click Verify Credentials. If you are linking a mounted standby, see the topics under Linking Oracle Physical Standby Databases for more information about how the Delphix Engine uses non-SYS login credentials. Click Next.
Enter a name for your dSource.
Select a Database Group for the dSource. Adding a dSource to a database group lets you set Delphix Domain user permissions for that database and its objects, such as snapshots. See the topics under Users and Groups for more information.
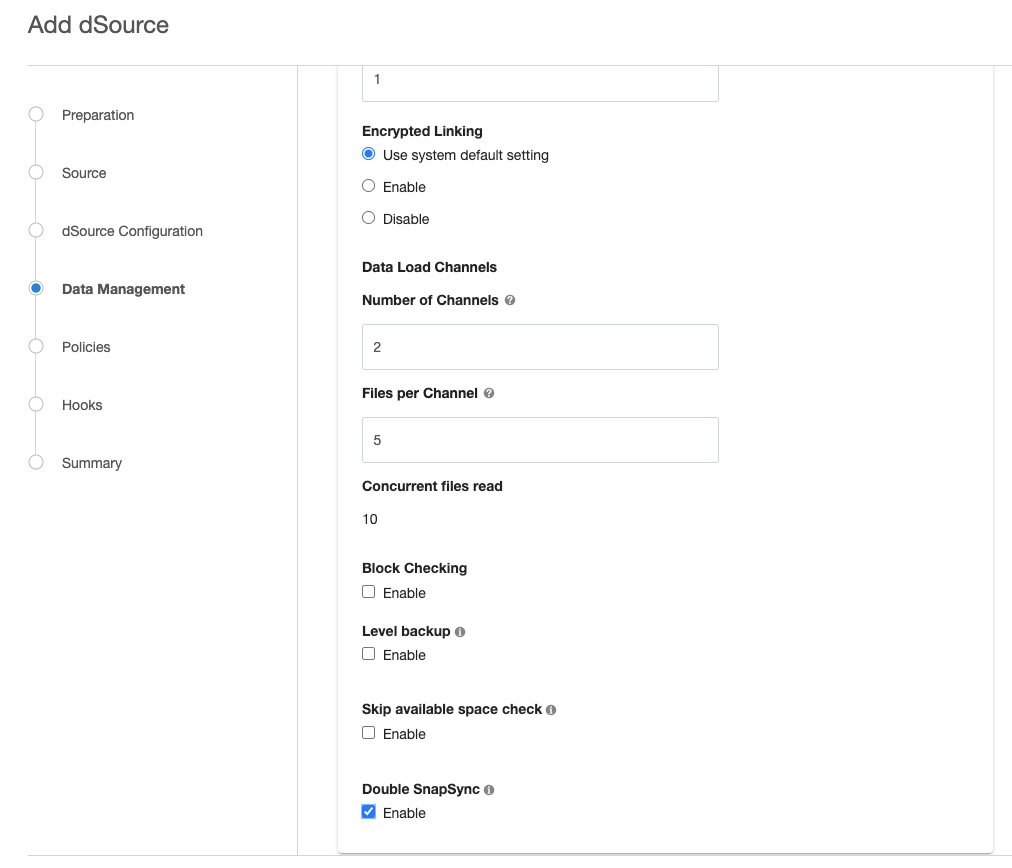
In the Data Management page select Show Advanced and then select Enable Double SnapSync. For more information, visit Data Management Settings for Oracle Data Sources
Assign existing policies to the new dSource. New policies can be created and associated later.
Enter any scripts that should be run using the Hooks page.
Review the dSource Configuration and Data Management information, and then click Submit.
Linking with the Double Sync option via the CLI
ssh delphix_admin@your engine
delphix> database
delphix database> link
delphix database link*> edit source.operations
delphix database link*> edit postSync
delphix database link*> add
delphix database link*> set command=""
delphix database link*> back; back
delphix database link*> edit preSync
delphix database link*> add
delphix database link*> set command=""
delphix database link*> back; back; back
delphix database link*> set source.config=XXXX
delphix database link*> set container.name=XXXX
delphix database link*> set container.group=XXXX
delphix database link*> set container.sourcingPolicy.logsyncEnabled=true
delphix database link*> set container.sourcingPolicy.logsyncMode=ARCHIVE_REDO_MODE
delphix database link*> set linkNow=true
delphix database link*> set doubleSync=true
delphix database link*> set dbUser=XXXX
delphix database link*> set environmentUser=XXXX
delphix database link*> set dbCredentials.password=XXXX
delphix database link*> commit
Syncing with the Double Sync option via the GUI
Login to the Delphix Management application.
Navigate to the Datasets page, select the Dataset you want to SnapSync.
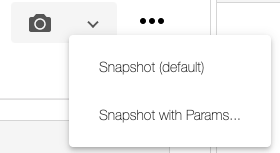
Click on the arrow next to the camera button.
Select Snapshot with Params.
Select Double Sync (and if so desired Force Full Backup) from the available parameters.
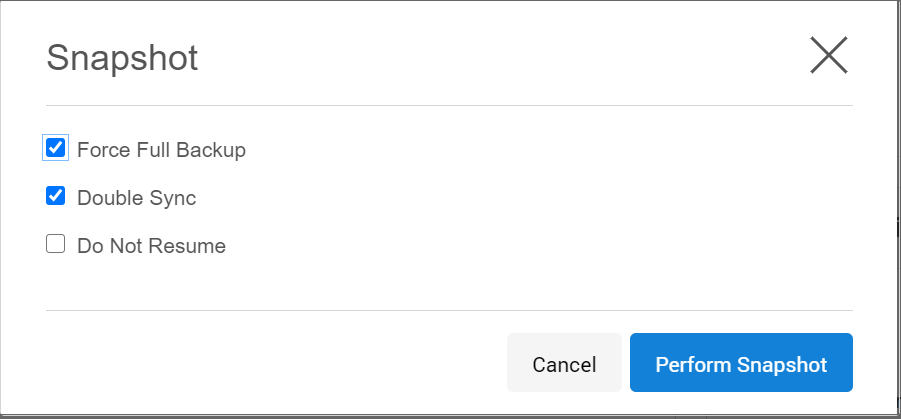
Select Perform Snapshot.
Syncing with the Double Sync option via CLI
ssh delphix_admin@yourengine
delphix> database
delphix database> select XXXX
delphix database 'XXXX'> sync
delphix database 'XXXX' sync *> set doubleSync=true
delphix database 'XXXX' sync *> commit