
System events overview
The event log interface has been improved to provide filtering, sorting, and exporting.
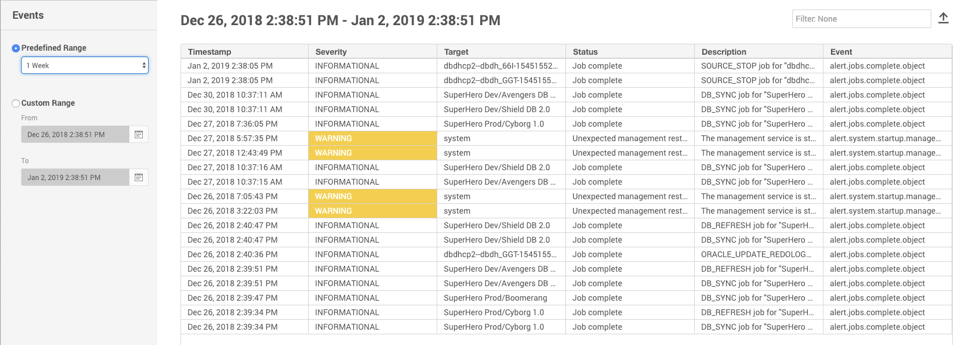
Event Viewer screen
As shown above, the Event Viewer window provides information about all the events that occurred for the selected time period. Text matching is limited to the following columns:
-
Action
-
Description
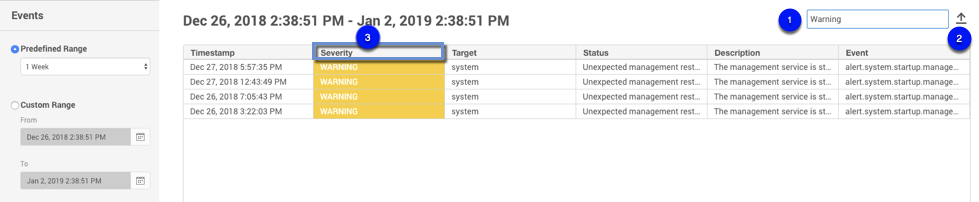
Event Viewer screen filtered for warning events
In the Event Viewer window, you can:
-
Enter filter text to reduce the results to only those rows matching the text entered. In the example above, we are filtering for “warning.”
-
Click the Export button to export your results to a .csv file.
-
Click a column header to sort rows by the values found in that column.
The first time you click a header, rows will sort in ascending order. Clicking the same header a second time will sort the rows in descending order. Clicking the same header a third time will restore the results to their default sort order.
Procedure
-
Launch the Delphix Management application.
-
Click System.
-
Select Events.
-
Select a time range.
Sorting and filtering
Optional: You can enter filter text to reduce the results to only those rows matching the text entered.
Text matching is limited to the following columns:
-
Severity
-
Status
-
Description
You can click on a table column header to sort rows by the values found in that column.
The first time you click a header, rows will sort in ascending order. Clicking the same header a second time will sort the rows in descending order. Clicking the same header a third time will restore the results to their default sort order.
Click the page navigation buttons to advance through large result sets.
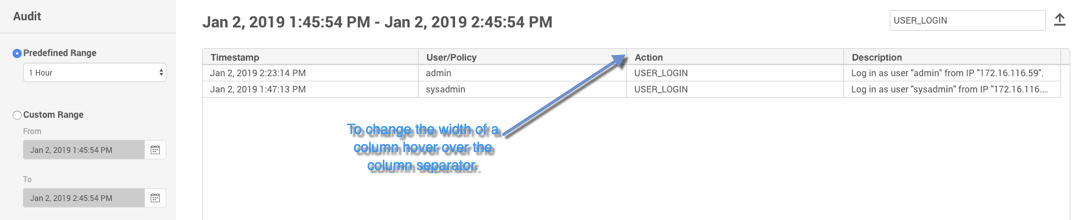
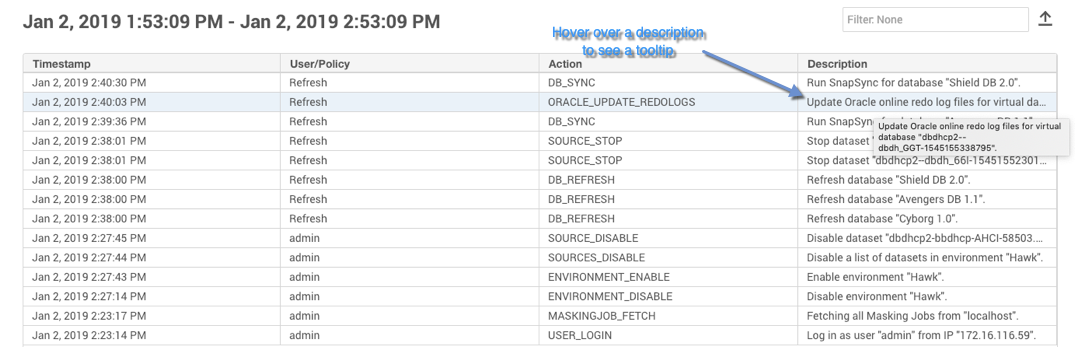
Column resizing and tooltips
If you wish, you can resize column widths to better fit the data to the available screen space. To resize a column:
-
Hover the mouse over a column separator found in the header. This will cause the mouse pointer to change shape.
-
Click and drag and the column separator to the desired position. Dragging to the left will reduce the column width. Dragging to the right will increase the width.
-
Release the mouse button.
Alternatively, you can auto-size a column to fit the widest value of the current page:
-
Hover the mouse over a column separator found in the header. This will cause the mouse pointer to change shape.
-
Double click the column separator.
Values that do not fit within their column will be truncated with an ellipses (...). Hover the mouse over any value to see a tooltip rendering the complete, non-truncated value.
Exporting results
Click the Export button to download the current page of results to a file of comma-separated values (CSV).