
Backup with archived logs
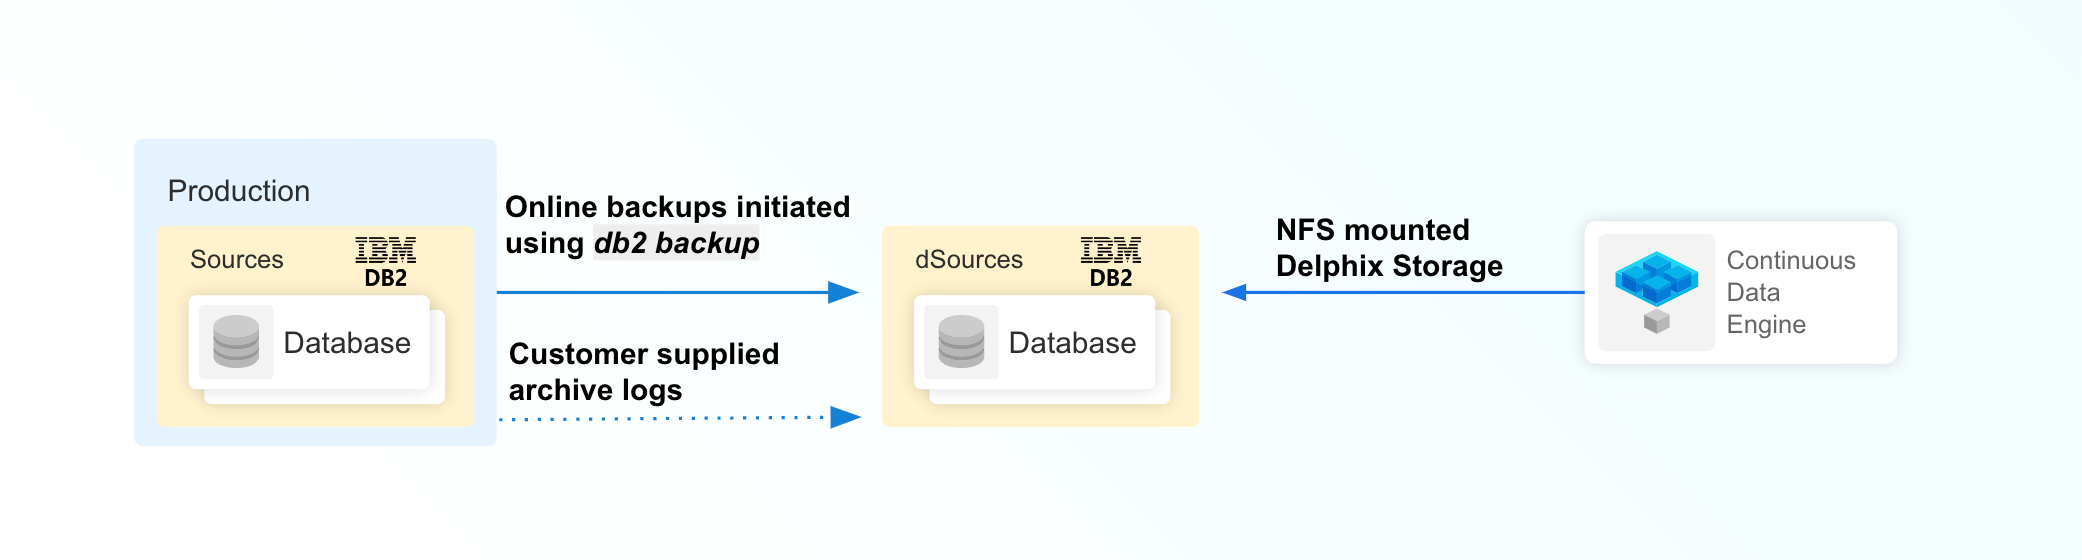
The following diagram demonstrates the architecture of the Delphix Continuous Data Engine support for the IBM Db2 database with full online backup with end user-supplied archive logs ingestion between source and staging database.
With archived logs, either the database can be roll forwarded to the current time or to a specific point in time using the Rollforward to PIT (RFPIT) checkbox during ingestion. In case DPF is enabled, you need to place archive logs inside a folder with a name as NODE<Partition number> where <Partition number> is a four-digit number. For example, if the source environment has two partitions, then the user-provided log path will have folder names NODE0000 and NODE0001. Both these folders will have respective archive logs. Snapshot operation will be used to apply the archive logs.
Prerequisites
Be sure that the source and staging instances meet the host requirements and the databases meet the container requirements described in the requirements section.
The environment user or the privileged user must be able to run mount, unmount, mkdir, and rmdir.
The Instance owner/user must have
dbadmandsecadmpermissions.The instance owner/user must have a common group with the primary/os user.
A full backup must be accessible on the staging server, it could be a shared location but must be mounted on the staging host and visible as a file system.
Archived logs must also be accessible on the staging server
The following command can be used to generate archive logs from the source database.
db2 archive log for database <database name>
Instance users must have read permissions on logs so that Delphix-managed recovery can apply the logs.
Instance users must have read permissions on logs and additional write permissions on end user-provided log locations if the Delphix Continuous Data Engine is planning to use end user-provided log locations for applying the logs.
If the user has placed the archive logs at a user-provided log location, then the logs must be valid and the first active log of the staging database must be present in the user-provided log location.
If the database configuration parameter LOGINDEXBUILD is set to OFF, do the following:
update db cfg for <DB_NAME> using LOGINDEXBUILD ONForce off all connections to the database and reactivate the database.
The end user does log purging from the provided log location. Delphix Continuous Data Engine only provides the list of logs that are eligible for purging.
Limitation
Continuous updates to the dSource are not available. The snapsync operations apply new logs from the log location and keep the dSource updated with changes on the source.
Read access to the staging database is not available.
RFPIT timestamp is supported only with UTC timezone. If no time zone is provided, a local time zone will be applied.
Procedure
Login to the Delphix Management application.
On the Databases tab of the Environment Management screen, add a source config against the discovered staging instance.
Then, click Manage and select Datasets.
Click the Plus (+) icon and select Add dSource, you’ll get a list of available source configs using which you can go for dSource creation.
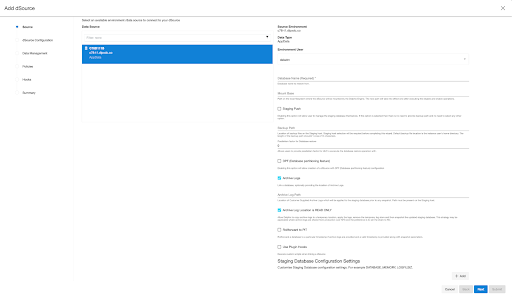
In the Add dSource wizard, select the required source configuration.
Provide the Database Name.
Optionally, provide a custom mount base using the Mount Base parameter.
Enter the complete Backup Path where the database backup file resides. If no value is entered, the default value used is the instance home directory. If there are multiple backup files for a non-DPF database on the backup path, the most current one will be used. If there are multiple sets of backup files for a DPF database on the backup path, the most recent one will be used.
Optionally, provide multi-part backup using Additional Backup Path.
Optionally, you can add the Parallelism factor for Database restore.
If you want to roll forward a snapshot to a user-specified timestamp, then you must select the Rollforward to PIT checkbox. You can also manually do this through the snapshot option. This option is visible only if you have selected the Archive logs checkbox since DB2 requires archive logs to rollforward to a specific timestamp.
Info: The user-specified timestamp needs to be provided along with the timezone. For example, 2021-11-14-04.15.00 UTC. If the timezone is not entered, then the user's local timezone is applied.If you are using Archive Logs for dSource creation complete the following fields:
Check the Archive logs checkbox.
Provide the log location of the archive logs. In this location, you can supply load copy files by appending schema and table name to it so that connector can process those load copy files during the rollforward process. Archive logs will be used for applying the logs during the snapshot operation. This location must be a part of the staging server and this location must be different from a full backup location.
The Archive Log Location is READ ONLY( default) option indicates whether Delphix should copy the log files to the dSource’s file system prior to the log apply process. If this is not selected the staging database will read the log files directly from the user-provided log location and perform the log apply operation.
Note:(Special considerations for Archive Log Location is READ ONLY) If this operation is performed on the source database and the user wants the Connector to process the load files, place the load copy files in your location and append the schema and table names (for example:
<DB Name>.<Number>.<Instance>.DBPART<partNumber>.<Timestamp>.001.<schema name>.<table name>) to the load copy file names. If you do not want to process load copy files via the Connector place the load copy files in a similar structure as it is on the source or set a DB2 registry parameterDB2LOADREC.Special consideration during dSource upgrade from older version connector to Archive Logs feature enabled connector. Suppose you have a dSource with an older version of the connector and now you want to upgrade that dSource to Archive Logs feature, then you need to perform the following steps :
Go to the configuration tab of dSource and then click on the custom sub-tab.
Click on the edit icon.
Check the Archive Logs and Archive Log Location is the READ ONLY checkbox.
Click on submit and then go for RESYNC operation to upgrade the dSource.
Optionally, you can set the database configuration parameters using Staging Database Configuration Settings.
Optionally, users can provide a bash script using the Use Plugin Hooks parameter.
Click Next.
Enter a name and select a group for your dSource. Adding a dSource to a dataset group lets you set Delphix Domain user permissions for that database and its objects, such as snapshots. See the topics under Users and Groups for more information.
Click Next and set the Staging Environment to be the same as the dSource host. Select the Staging Environment User to be the same as the instance owner of the dSource instance.
Info: If you need to change or add an environment user for the dSource instance, follow the instructions here.
Ensure that the staging environment must be the environment that you have chosen to create the source config.
Select the User from the drop-down and set the SNAPSHOT PARAMETERS for the dSource snapshot.
Click on the Timestamp input field to enter the timestamp at which the snapshot will be taken.
The user-specified timestamp needs to be provided along with the timezone in YYYY-MM-DD-HH.MM.SS format. For example, 2022-03-12-04.15.00UTC. If the timezone is not entered, then the user's local timezone is considered.
Providing the timestamp will only work if the user has checked the Rollforward to PIT option.Select Resynchronize dSource to resynchronize the dSource. This will force a non-incremental load of data from the source similar to when the dSource was created. This action avoids duplicating storage requirements and maintains a Timeflow history.
In the Policies tab, apply policy details to the dSource if needed, and then click Next to continue.
In the Hooks tab, select a Hook Point and then click + to add a script that you want to run at that hook point. You have the flexibility to define scripts to run at multiple hook points in the process.
In the Summary tab, review the configuration profile for your dSource.
Click Submit. The Delphix Continuous Data Engine will initiate two jobs, namely DB_Link and DB_Sync to create the dSource. You can monitor the progress of these jobs on the Running Actions section on the top right panel, or by navigating to System > Jobs. Upon successful completion of the jobs, the database icon will change to a dSource icon on the Environments > Host > Databases screen. The dSource will also be listed under Datasets within its assigned group.