
Creating CSR
Perform the following steps to provide an HTTPS or DSP (Delphix Session Protocol) or stunnel-server certificate chain for a key pair created by the Delphix Continuous Data Engine.
-
Connect to the Delphix Engine HTTP://< your engine>/login/index/html#serverSetup.
-
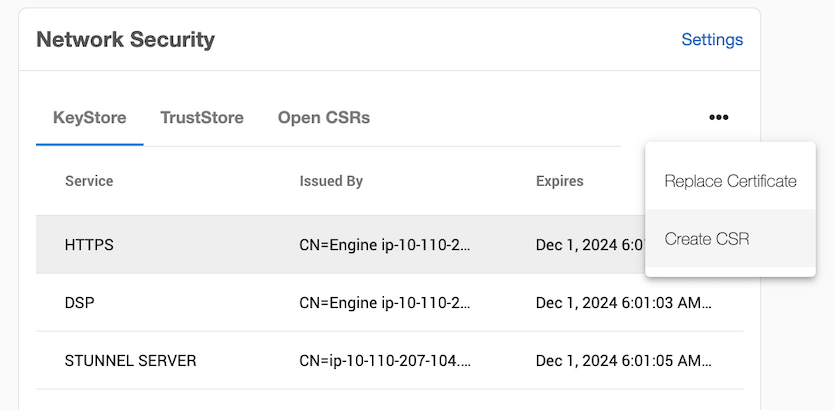
From the Network Security panel, select the Actions (...) menu, and select Create CSR.
-
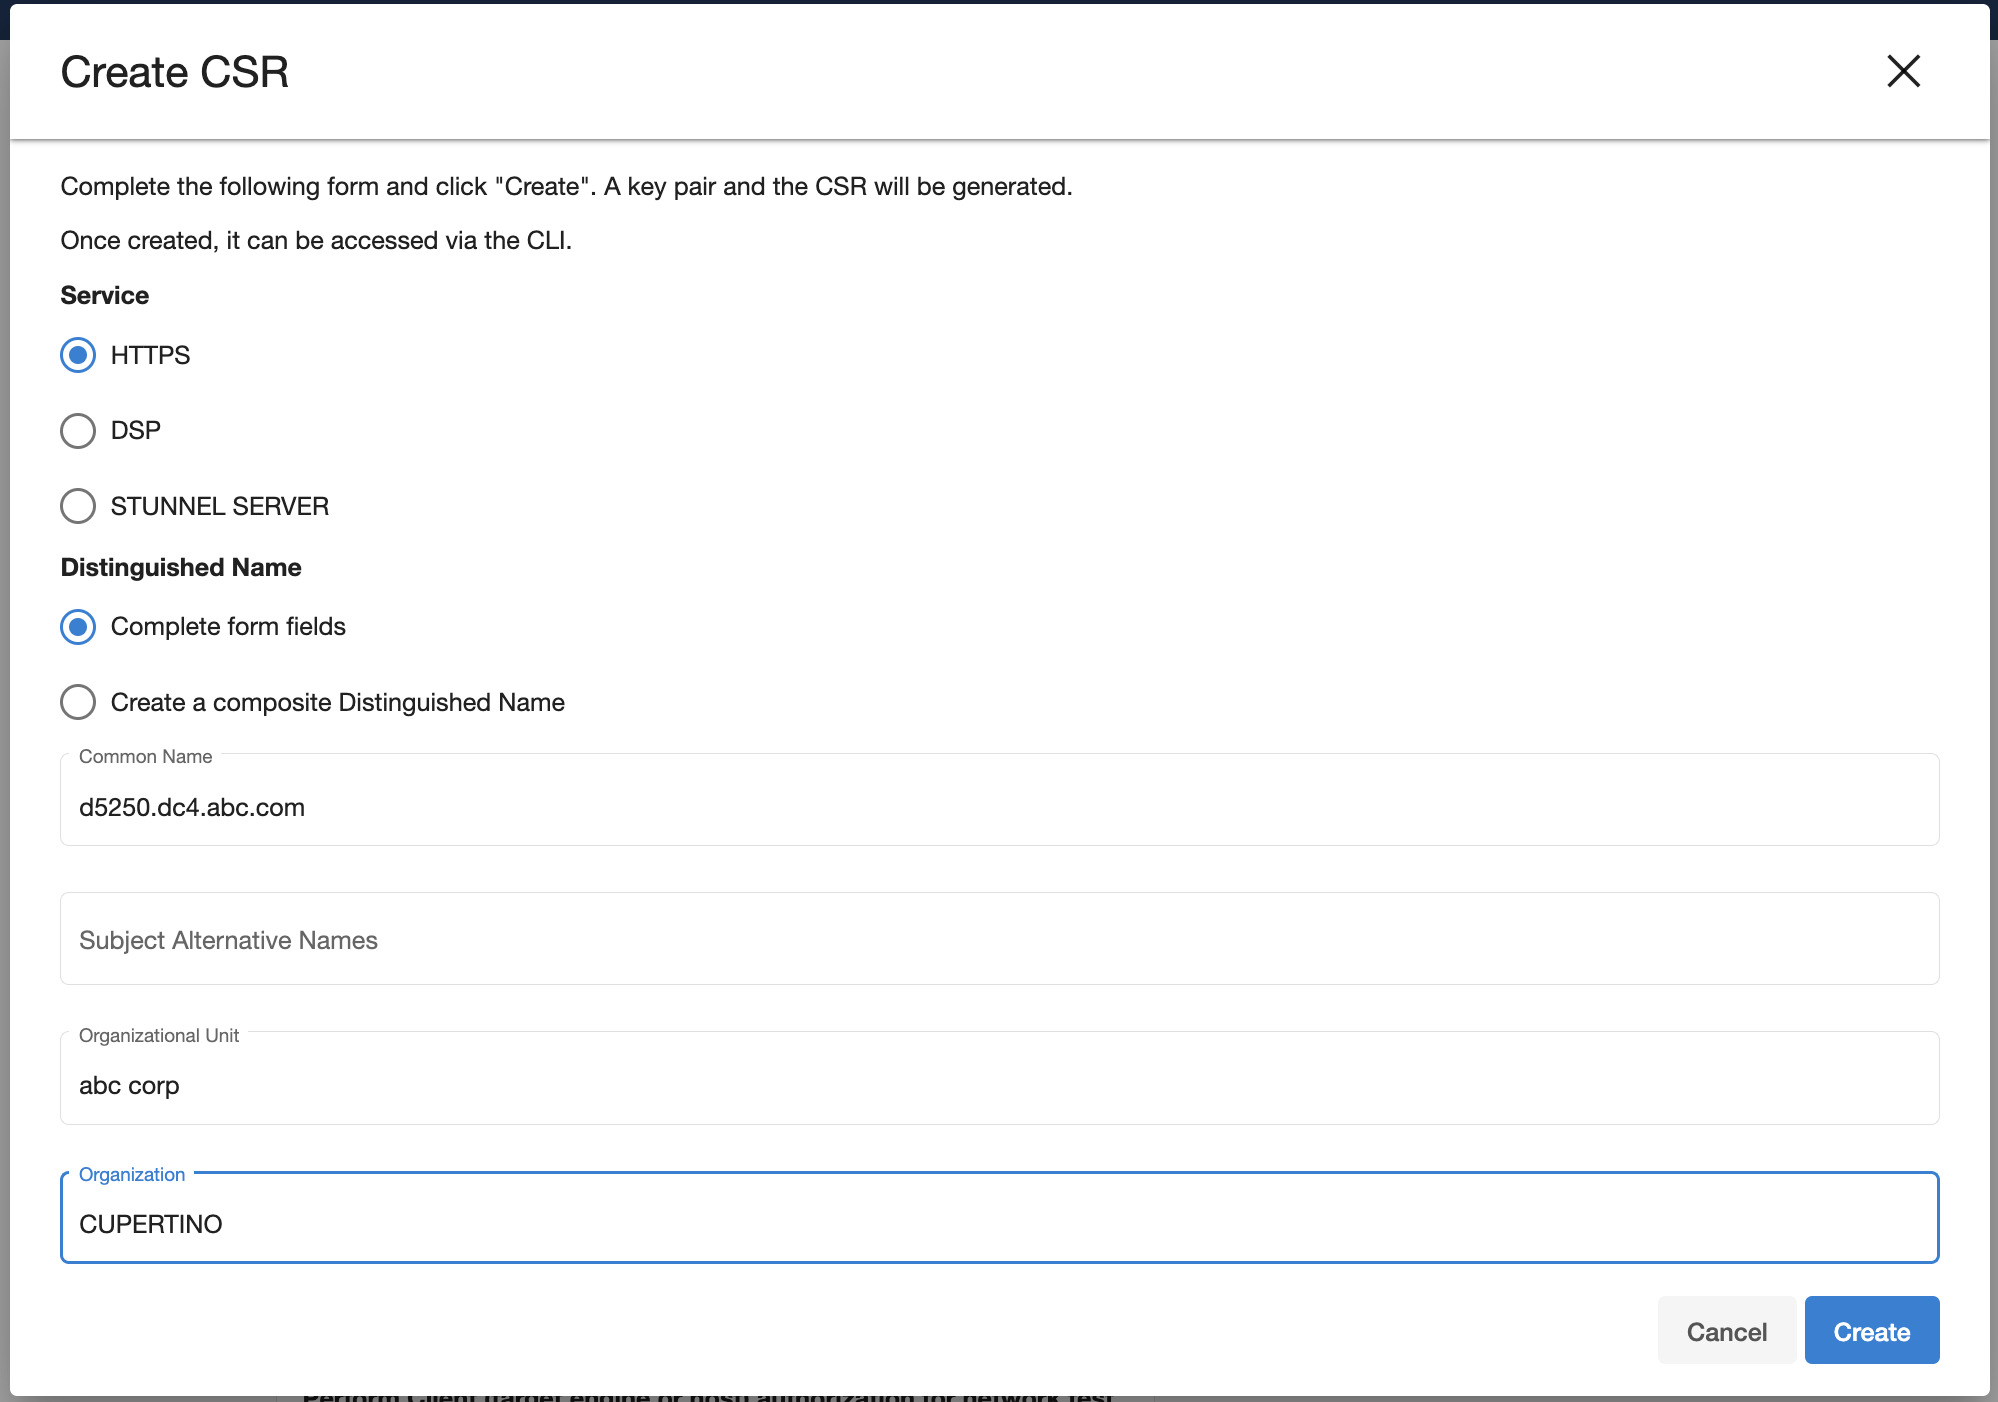
In the Create CSR window provide options for your CSR (certificate signing request). Fill up the following fields:
-
The Common Name (CN) is required. If the CN is a valid hostname, then the Subject Alternative Name (SAN) can be left blank, otherwise a SAN should be provided. When the CN is a wildcard Common Name (e.g. *.abc.com), the SAN must be populated with every possible domain name covered by the certificate as a comma delimited list. A valid SAN is required for most browsers to accept the certificate.
-
Select the service you want to create a CSR for (HTTPS or DSP).
-
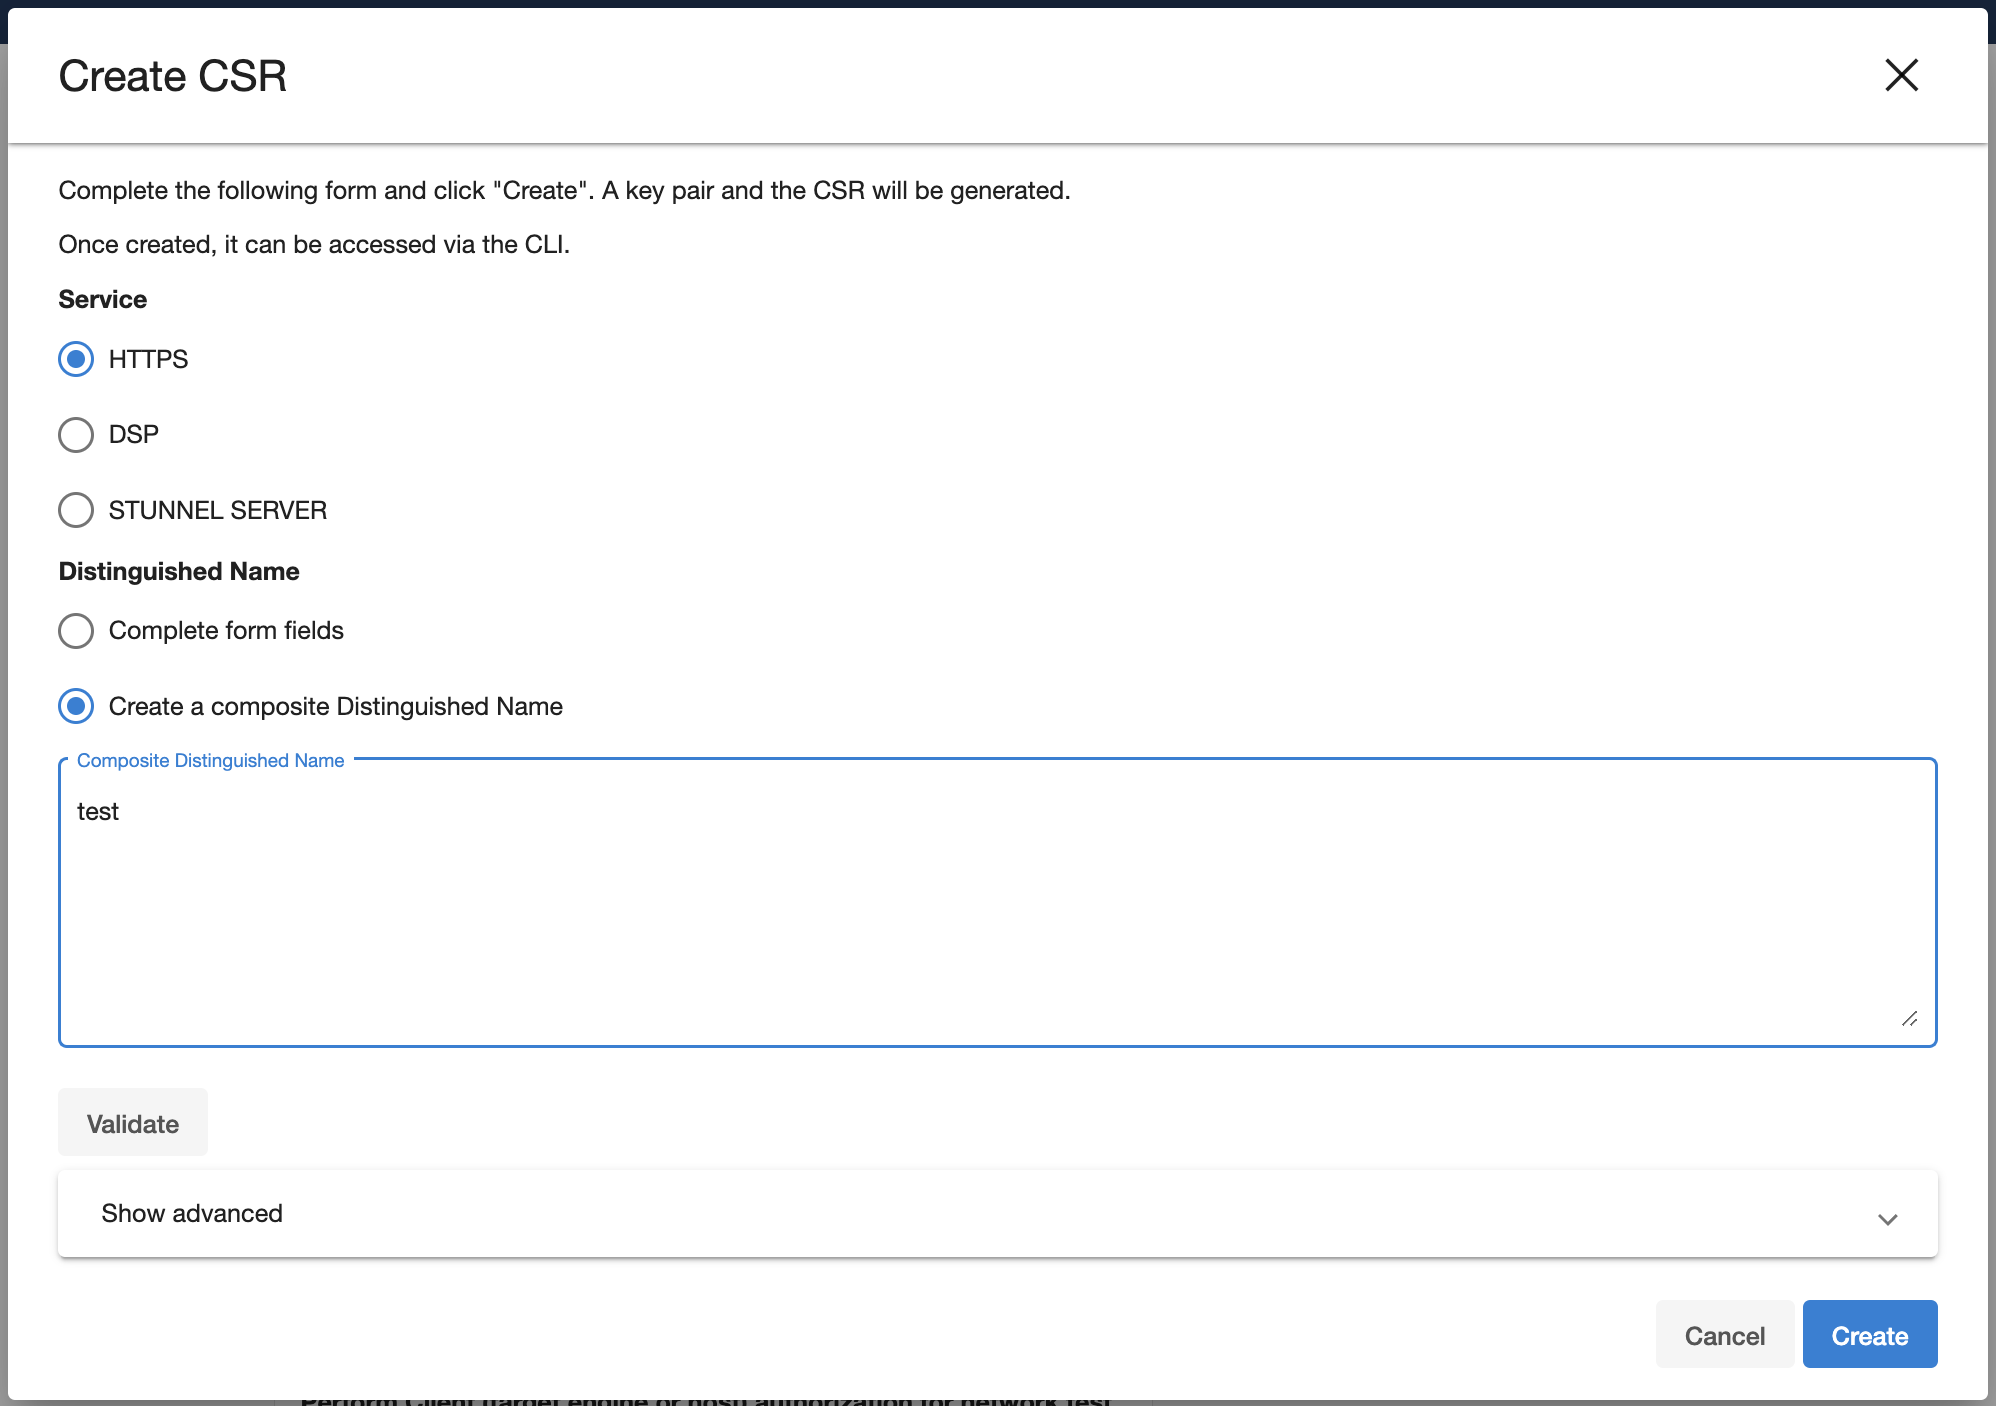
Select how to enter the distinguished name (using the provided fields, or as a composite string).
-
-
The Validate button will verify that your provided distinguished name follows a legal format.
-
[Optional] Select the Show advanced link to provide extra options.
-
Force Replace: By default, this is false and means Delphix will not replace the active key pair and certificate with the newly generated key pair and self-signed certificate. If you want to replace the active key pair right away before the signed certificate has been created this can be set to true.
-
Keypair Algorithm: Choose whether the created keypair will use the RSA or ECDSA algorithm. Once an algorithm has been chosen the user can customize the key size and the signature algorithm used.
-
Key size: The valid sizes for RSA are between 2048 and 4096 inclusive. The valid sizes for ECDSA are between 256 and 571 inclusive.
-
Signature algorithm: The available signature algorithms for RSA are "
SHA256withRSA", "SHA384withRSA", "SHA512withRSA". The available signature algorithms for ECDSA are "SHA256withECDSA", "SHA384withECDSA", "SHA512withECDSA".
-
-
-
Click Create. Once submitted, the CSR is created, and will show up in the Open CSRs tab. You can select the CSR and click on View PEM to obtain the CSR in a PEM format.
If creating a CSR for the DSP application, note that when the DSP Server or Client authenticates each incoming DSP connection (if enabled), it will validate that each certificate of the incoming connection's identity chain has a "Valid From (or Not Before)" date that is after its own time.
Thus, if your Delphix Engine or host environments are running off of an incorrect (slow) time configuration, then your DSP connections will not work until the offending engine or host's time advances past all incoming certificate's "Valid From (or Not Before)" time.
If correcting the Delphix Engine's or host environment's time configuration may cause issues, then you can workaround this issue by signing the CSR with a "Valid From (or Not Before)" date which is before your slowest Engine or host.
Replacing a certificate
After the CSR has been signed and turned into an X.509 Certificate, you can replace the certificate using the Replace Certificate option.
-
From the Network Security panel select the Actions (...) menu and select Replace Certificate.

-
In the Replace Certificate window, select PEM file contents. You can then paste the PEM response in the text box.
The PEM contents must contain a list of the entire trust chain from the newly generated end-entity certificate to the root CA. You can do this by just pasting each certificate back to back in the text box as long as they are separated by the begin and end cert tags. The order that the PEM certificates are added to the list does not matter
3. Click Next.
-
The Summary tab describes your selections. Click Submit.