
Linking the AppsTier
Prerequisites
The AppsTier must meet the source requirements outlined in Requirements for Source AppsTier. These requirements are generic to all source Unix environments added to the Delphix Continuous Data Engine.
Linking the AppsTier from the primary server
Follow these steps to link the AppsTier.
Login to the Delphix Management application using Delphix Admin credentials.
Click Manage.
Select Environments.
Select the source AppsTier environment. Linking from multi-node AppsTier
Note: If you are linking from a multi-node AppsTier, select the environment for the node on which EBS admin WLS services reside.
Click the Environment Details tab.
If the applmgr environment user described in Requirements for Oracle EBS source databases for linking is not already added to the Delphix Continuous Data Engine, add the user.
Note - The account is not required to be named applmgr on the source environment. You can use the account that can runadpreclone.plsuccessfully and ingest the RUN filesystem directory into the Delphix Continuous Data Engine.Click the Databases tab.
Click the Plus icon within the E-Business Suite R12.2 AppsTier section under installations.
Add Database dialog box pops to add source config for AppsTier.
Provide a user-defined name to the 'Database Name' field and $APPS_BASE directory in the 'Path' field.
$APPS_BASE path is where the EBSapps.env file is located.Click on the Add button to successfully add the source config.
Re-check the E-Business Suite R12.2 AppsTier section under installations for the Add dSource option mapped to the source config that is added in the above step.
Click Manage > Datasets.
Click the Plus icon next to Datasets and select Add dSource.
In the Add dSource wizard, select the Linked dSource as the type.
In the Add dSource wizard, select the AppsTier files source you created.
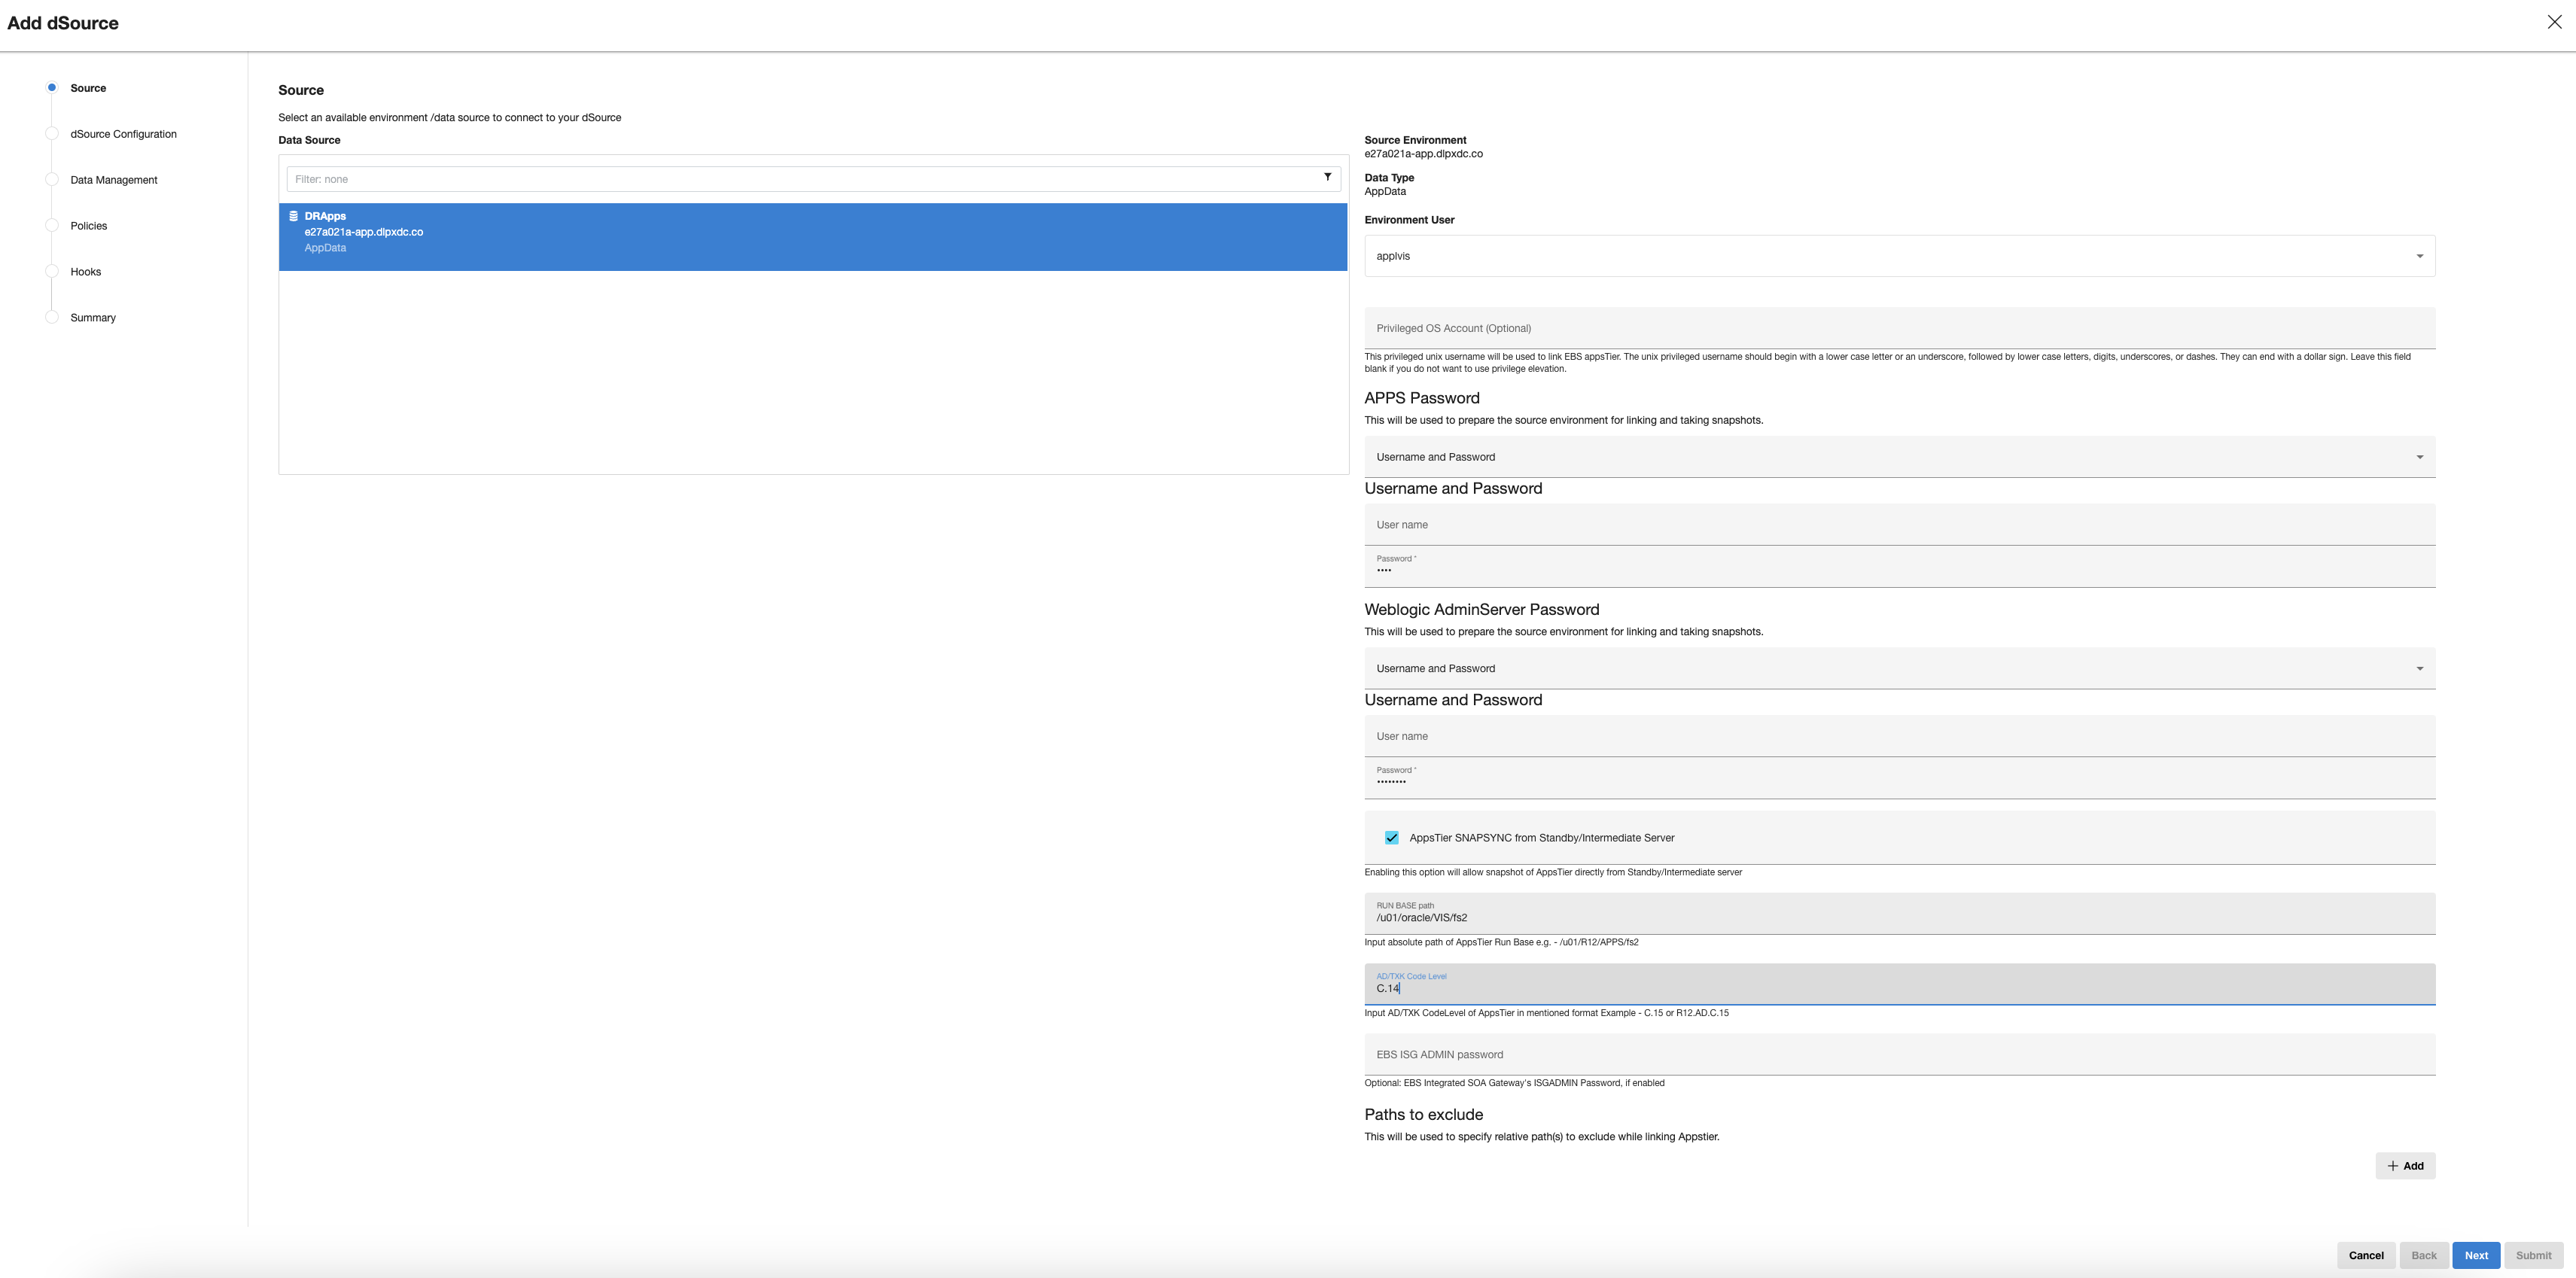
Enter the EBS-specific parameters for your AppsTier.
These parameter values will be used whenadpreclone.plis run.Select an Environment User.
Privileged OS Account (Optional) field should contain a high-privileged user when the low-privileged user is being used for linking.
Provide the Apps schema password in the Apps Password section by choosing the Username and Password from the dropdown, leaving the username field empty.
Provide the weblogic password in the Weblogic AdminServer Password section by choosing the Username and Password from the dropdown, leaving the username field empty.
To complete AppsTier configuration, follow steps 10 to 18 in the Linking the AppsTier from the standby/intermediate server section below.
Note: In the EBS plugin v4.3.0 or later, the user does not need to specify the "relative paths" of files to exclude in the Paths to Exclude list. Delphix Continuous Data Engine will automatically detect the RUN FS.
Linking the AppsTier from the standby/intermediate server
Starting from the EBS plugin v5.0.0, the user can enable the AppsTier ingestion from the standby/intermediate server.
Prerequisites
Remember to run the “
perl adpreclone.pl AppsTier”on the Primary AppsTier server and sync the run file system of the primary AppsTier with Standby/Intermediate server before every SnapSync of the AppsTier on Standby/Intermediate server.
When linking AppsTier from a standby server, the EBS connector will not execute “adpreclone.pl” command. Hence the responsibility of running the perl adpreclone.pl AppsTier command on the primary server lies with the user.
To configure the AppsTier, complete steps 1 to 22 in the Linking the AppsTier from the primary server section above.
In the AppsTier linking wizard, select the AppsTier SNAPSYNC from Standby/Intermediate Server check box that is associated with the dynamic UI input fields. By default, it is unset.
Note: In engine versions below 14.0.0.0, the UI input fields are static. In engine versions 14.0.0.0 or above the UI input fields are dynamic, meaning, when we set the AppsTier SNAPSYNC from Standby/Intermediate Server checkbox, the new input fields are displayed, otherwise, these fields are hidden.
On the primary server, to retrieve the values of these input fields, run the following query:
CODEsource EBSapps.env RUN echo $RUN_BASEIf the Primary source and standby/intermediate server have the same directory structure, enter the $RUN_BASE value in the Input absolute path of AppsTier Run Base UI field. Otherwise, complete the absolute path of the RUN file system from the standby/intermediate server.
To retrieve the AD/TXK code level, run the SQL query below using the APPS schema on the primary server.
CODEselect 'PATCH_LEVEL : ' ||PATCH_LEVEL from apps.fnd_product_installations where PATCH_LEVEL like 'R12.AD.%';The user can input AD/TXK CodeLevel in mentioned format, e.g. - C.15 or R12.AD.C.15.
If the primary server has integrated SOA gateway with EBS, it is mandatory to enter the ISGADMIN password. Else, leave the field blank.
Run the query below to retrieve the ISGADMIN password.
CODEselect fnd_vault.get('ISG','ISGADMIN') from dual;If the above query returns zero rows, EBSISG is not implemented.
Click Next.
On the dSource Configuration page, enter a dSource Name.
Select a Target Group for the dataset. Adding a dataset to a target group enables you to set Delphix Domain user permissions for dataset objects, such as snapshots.
Click Next to select policies.
Select a SnapSync policy.
Click Next to move to data management. No changes are required on this page.
Click Next to review the dSource Configuration and Data Management information, and then click Submit.
The Delphix Continuous Data Engine will initiate two jobs, namely DB_Link and DB_Sync to create the dSource. You can monitor these jobs by selecting System>Jobs or by selecting System >Events in the top menu bar. Upon completion of the DB_link job jobs, the database icon will change to a dSource icon on the Environments > Host > Databases screen. The dSource will also be listed under Datasets within its assigned group.
Scenario 1: The Primary AppsTier server role is switched to the Standby server
In case the AppsTier was linked from a server that was primary but is switched to a standby server, to continue utilizing the same server through Standby ingestion, follow the steps below:
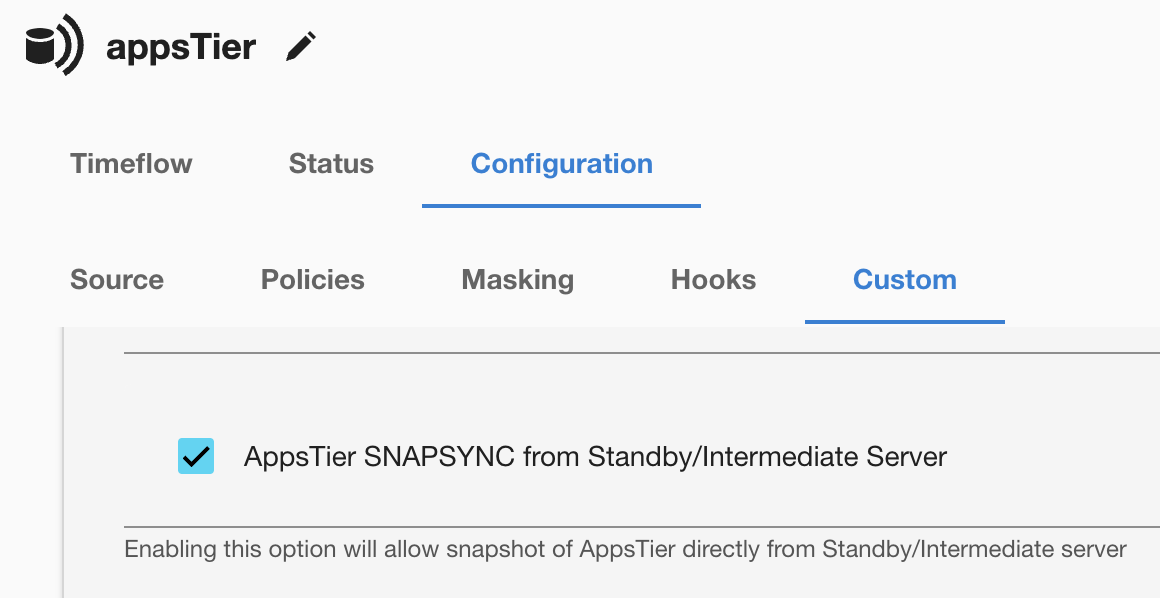
Select the AppsTier dsource dataset, go to Configuration > Custom, and click the Pencil icon to edit the settings.

Tick the AppsTier SNAPSYNC from Standby/Intermediate Server checkbox.
Enter the RUN BASE path and the AD/TXK Code Level field values to enable the ingestion from the standby server. Follow steps 3 to 8 in the Linking the AppsTier from the standby/intermediate server section.
Take a snapshot of the dSource.
Scenario 2: Standby AppsTier server role is switched to Primary AppsTier
In case the AppsTier was linked from a server that was standby/intermediate but is switched to a primary server, to continue utilizing the same server through primary ingestion, follow the steps below:
Select the AppsTier dsource dataset, go to Configuration > Custom, and click the Pencil icon to edit the settings.
Untick the AppsTier SNAPSYNC from Standby/Intermediate Server checkbox.
Take a snapshot of the dSource.
Note: The apps and Weblogic password are mandatory in all cases.