
The following screenshots provide a roadmap for how to navigate the primary screens and places a user will go within the Delphix Self-Service application. The application includes screens such as the Management Overview, Data Platform Management, Users and Permissions, and Data User Management.
Overview screen
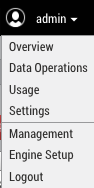
The Overview screen is the homepage for Delphix Self-Service. To reach this page from the Management application as an admin user, select Self-Service in the user login drop-down.

Data management overview page
On this page, you can:
-
You can delete one or more templates at one time by selecting the checkboxes and clicking the Delete button.
-
You cannot delete replicated templates or templates that have containers.
-
-
From this column, you can see which replica the template belongs to if it is a replicated template. You can sort by this column and see all templates from the same replica.
-
This column lists replica names, not replication sources. You can view a list of replicas in the Management application at System > Replication > Received Replicas.
-
-
The number of containers associated with the template.
-
Shows the last time the template was updated.
-
Create a new data template.
Users screen
By selecting the Users Button you can view users, whom you can then assign to data containers that you create from existing data templates.
-
List of all configured users. You can click on a user to see their details, such as what containers they are assigned to.
-
The number of containers assigned to the user.
-
The Role column indicates whether a user is a Jet Stream Only user or a Delphix Admin.
-
Lists the associated email address for the user.
-
Select this link to add a new user or manage users.
Data template management
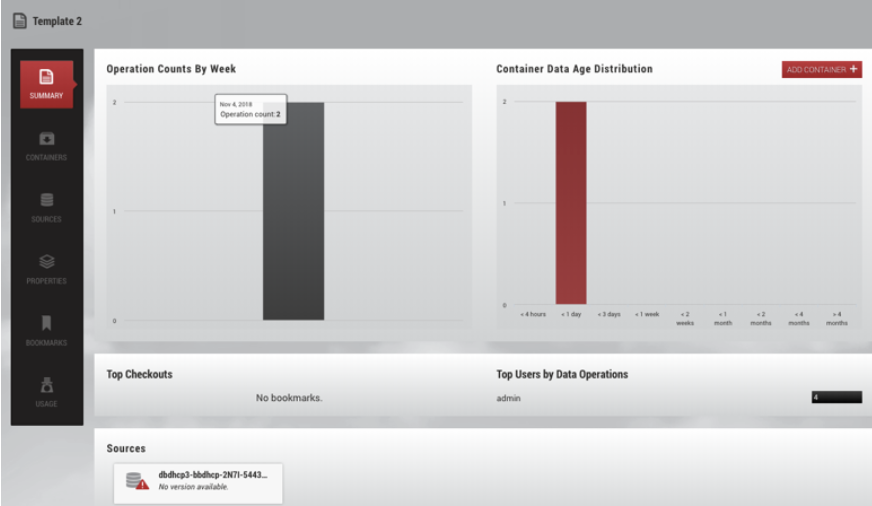
The Data Template Management page contains a view panel of 6 tiles on the left-hand side of the screen. Each tile reports on a variety of useful information, such as user activity, data sources, data capacity, specific details about data containers, and data templates. They also help you navigate to areas where you can complete specific tasks, such as creating a new template or container, working with data timeflows, assigning users to containers, and bookmarking important points in time.
User roles in admin App
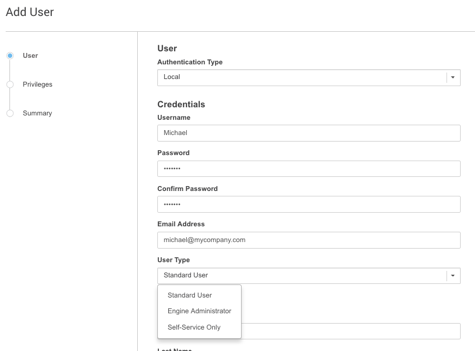
To add or manage user roles and permissions, select the Add or manage users link from the Users Overview screen.

The Users screen in the Management application will open. From this screen, you can add a new user, edit a user, suspend a user, or delete a user.

Selecting the + icon opens the Add User window. Use this window to add a user and select the user role and permissions.
Data operations interface for Delphix administrators
The Overview page is the only interface to which Delphix Self-Service data users have access and with which they interact. The user interface is the environment in which a data user works with data in an assigned data container, using data sources from a data template.
As shown below, the Data Operations screen contains a list of available templates. Select a template to view details.
The following screen allows users to complete tasks using self-service operations.
For more details about how to use this interface, refer to the Delphix Self-Service Data User Guide.
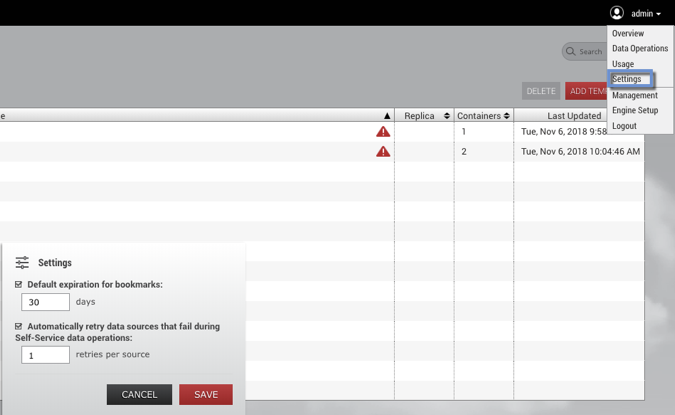
Administrator settings
You can open the Administrator Settings dialog from the user drop-down menu. Here you can edit various settings that apply globally to all Delphix Self-Service users.

Default bookmark expiration
You can set a value that controls the default expiration time, in days, for Bookmarks. This setting only applies to new bookmarks that are created through the Delphix Self-Service application, not the CLI or API. Note that this only controls the default selection; users can still disable expiration or pick a different date for a specific bookmark if they wish. This setting is disabled by default.
Automatic retry for data operations
To make operations on data containers more robust, Delphix Self-Service supports automatically retrying failed sources during data operations. You can specify a maximum number of retry attempts so that if an operation fails on any individual data source within a data container, it will be automatically retried until it succeeds, or until the retry limit is reached.
Automatic retry applies to any Delphix Self-Service operation that changes the data in the data container, such as Refresh, Restore, Reset, or Create Branch. This setting can be especially useful in scenarios where there are a large number of sources in a data container, and some sources fail to update the first time. If the reason for the failures was intermittent, an automatic retry may allow the sources that failed to succeed, and the operation can still complete successfully. The default number of retry attempts is 1.
To change the number of automatic retries:
-
Click the user icon in the upper right-hand corner of the screen.
-
From the drop-down menu, select Settings.
-
In the field Automatically retry data sources..., enter a new maximum; alternatively, use the arrows to increase or decrease the number.
-
Click Save.