
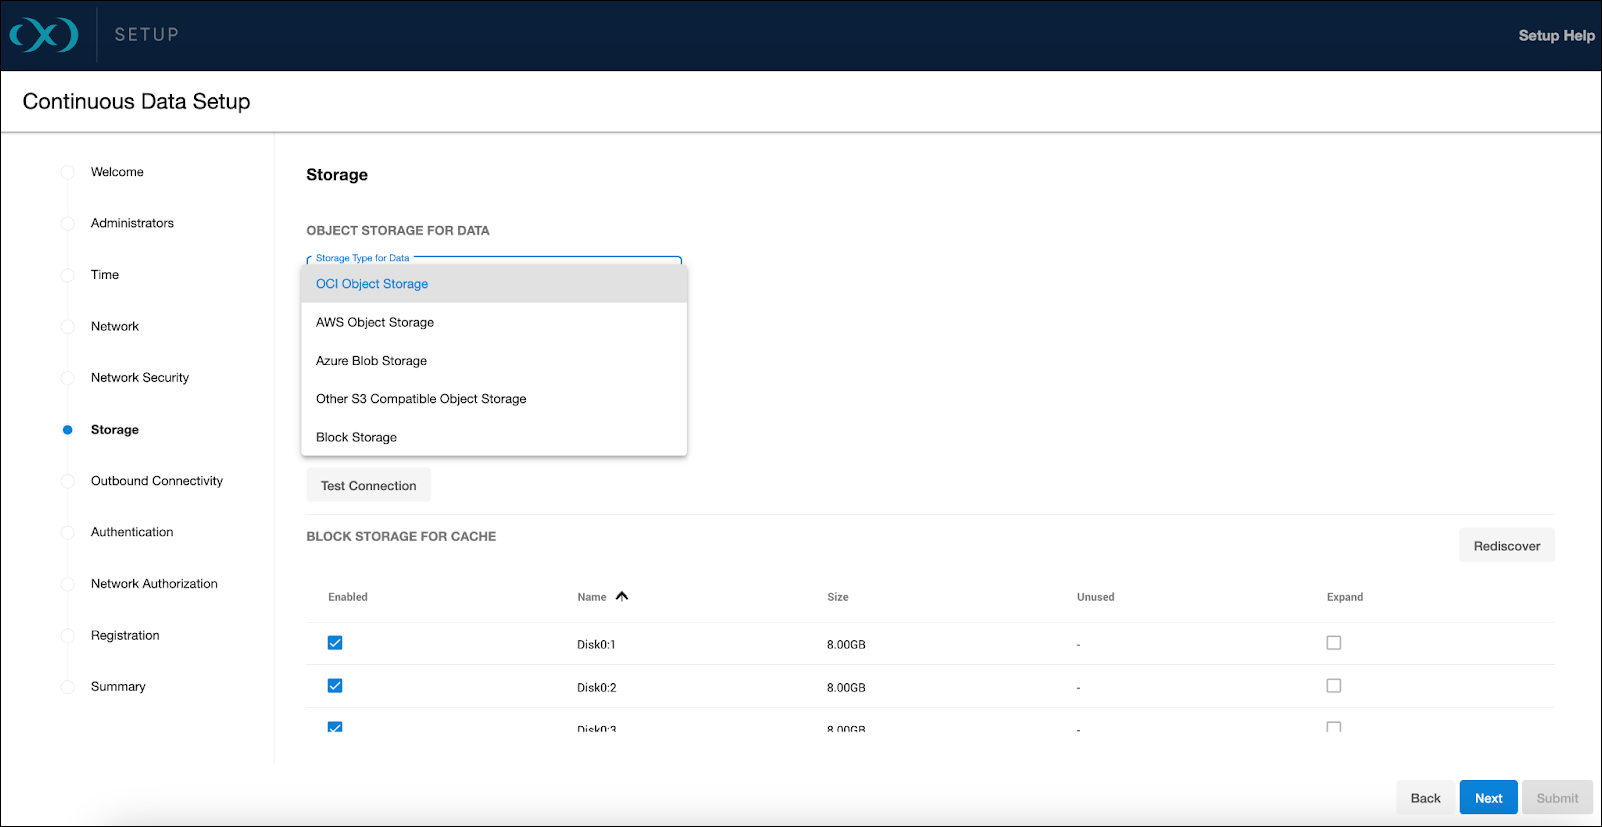
From the Storage setup page, select OCI Object Storage from the Storage Type for Data dropdown menu.
Access method
For accessing the object storage, OCI supports Role (Instance Principals) as the sole method. This approach parallels the role-based access of AWS IAM, promoting secure and low-maintenance access to the object storage.
Storage capacity
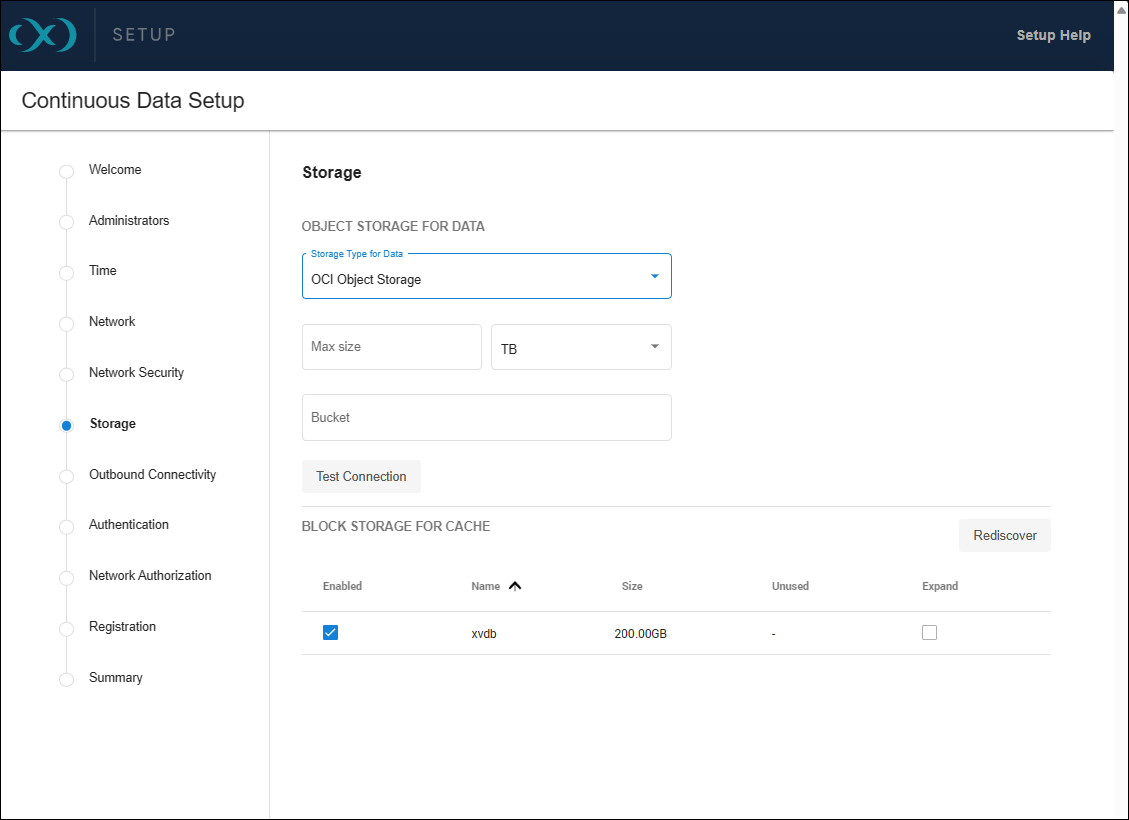
When specifying storage capacity, note that OCI charges based on the actual storage used. Thus, if you provision for 10TB but only utilize 1TB, billing will reflect the 1TB of actual usage. Adjusting this capacity is manageable through the sysadmin login or Setup UI, but cannot be decreased below what the Delphix engine is currently utilizing. The specified number also serves as a quota to limit the object storage from expanding beyond an unforeseen point.
Ensure that the bucket name is correctly entered in the Bucket field and test the connection to verify the VM's access to the bucket.
Block storage for cache
Block devices are utilized as cache, reducing latencies for frequently read data and acting as temporary storage for synchronous writes before the writes are persisted to object storage. The cache size should be equivalent to the size of the frequently accessed data, plus an additional 10% for overhead. If the data size is unknown, initiate with a cache sized at 50% of the dSources to be added to the engine.
For detailed block storage requirements, refer to the General storage configuration section in the Deployment for OCI documentation.
It is important to configure the disks to support the engine's throughput, such as using Ultra High Performance or Higher Performance volumes, which are supported. The maximum IOPS and throughput will be proportional to the volume size, requiring a minimum size of 200GB for Higher Performance volumes.
Permissions and setup
Setup
The OCI IAM allows for access to various services from an OCI instance without API keys or customer secrets. Instance principals provide a secure method for service access, similar to AWS IAM Roles.
To create a dynamic group in the OCI Console, navigate to Identity → Dynamic Groups → Create Dynamic Group. Specify the Name and Description the group and choose if you want all the rules or just one to match for the dynamic group.
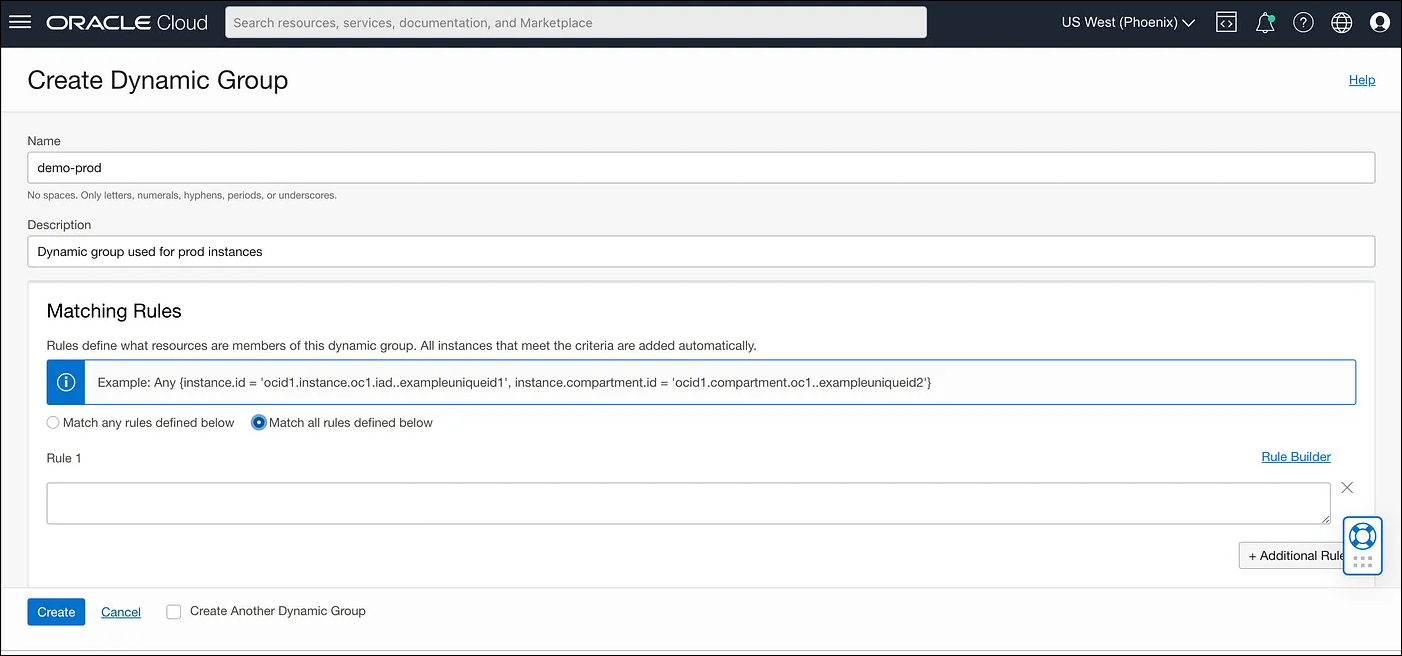
Creating rules
Dynamic groups require rules to identify which instances belong to them. For instance, rules can be based on the tag value of an instance or the presence of instances in a specific compartment. Here are examples of rules:
-
tag.InstanceType.value='prod': Check the tag value on the instance and match it with some defined value. -
instance.compartment.id = 'ocid1.compartment.oc1..aaaaaaxx': All the instances present in a specific compartment.
Policy
Post group creation, it is necessary to define a policy specifying the access level for the service. A policy instructs the OCI IAM to provide access to the dynamic group. To understand OCI Policies in detail, visit How Policies Work (without Identity Domains). Policies can be created via the OCI Console by navigating to Identities → Policies → Create Policy, where you can specify the Name, Description, Compartment, and Policy Statement.
The policy should allow the dynamic group to manage and inspect buckets and objects within a specified compartment. Here is an example of a policy statement:
Allow dynamic-group <dynamic group name> to manage buckets in compartment id <compartment id> where target.bucket.name=<regex for bucket name>
Allow dynamic-group <dynamic group name> to inspect buckets in compartment id <compartment id>
Allow dynamic-group <dynamic group name> to manage objects in compartment id <compartment id> where target.bucket.name=<regex for bucket name>
Once the setup is complete, instances launched in the specified compartment with the defined tag will have access to manage object storage objects within that compartment.
Testing permissions
You can demonstrate the use of instance principals with the OCI CLI, which does not require managing security credentials. The OCI CLI can be installed on various operating systems following the Quickstart guide. With the CLI, you can make calls using the --auth instance_principal parameter. Here are some example commands:
# Get details of a bucket
oci os bucket get -bn prodbucket --auth instance_principal

# Upload an object to a bucket
oci os object put -bn prodbucket --auth instance_principal --file object.txt
Setting OCI_CLI_AUTH=instance_principal as an environment variable is also an option.
Instance principals are compatible with OCI CLI and SDKs such as Python and Java but do not work with the Amazon S3 Compatibility API, which requires customer secret keys.