
The replication user interface helps users manage replication on both the source and the target. Replication consists of a profile-replica pair. You can view and edit the replication profile on the source engine, and view the replica on the target engine.
Replication sources
The Replication Profiles section provides you with several configuration options for your replication profiles. This makes it possible to replicate objects from a single source to multiple targets. Each profile defines the set of data objects and the associated configuration between a single source and target.
Replication targets
The Received Replicas section shows the set of all objects in the replica and allows you to initiate failover.
Replication user interface
Replication profiles
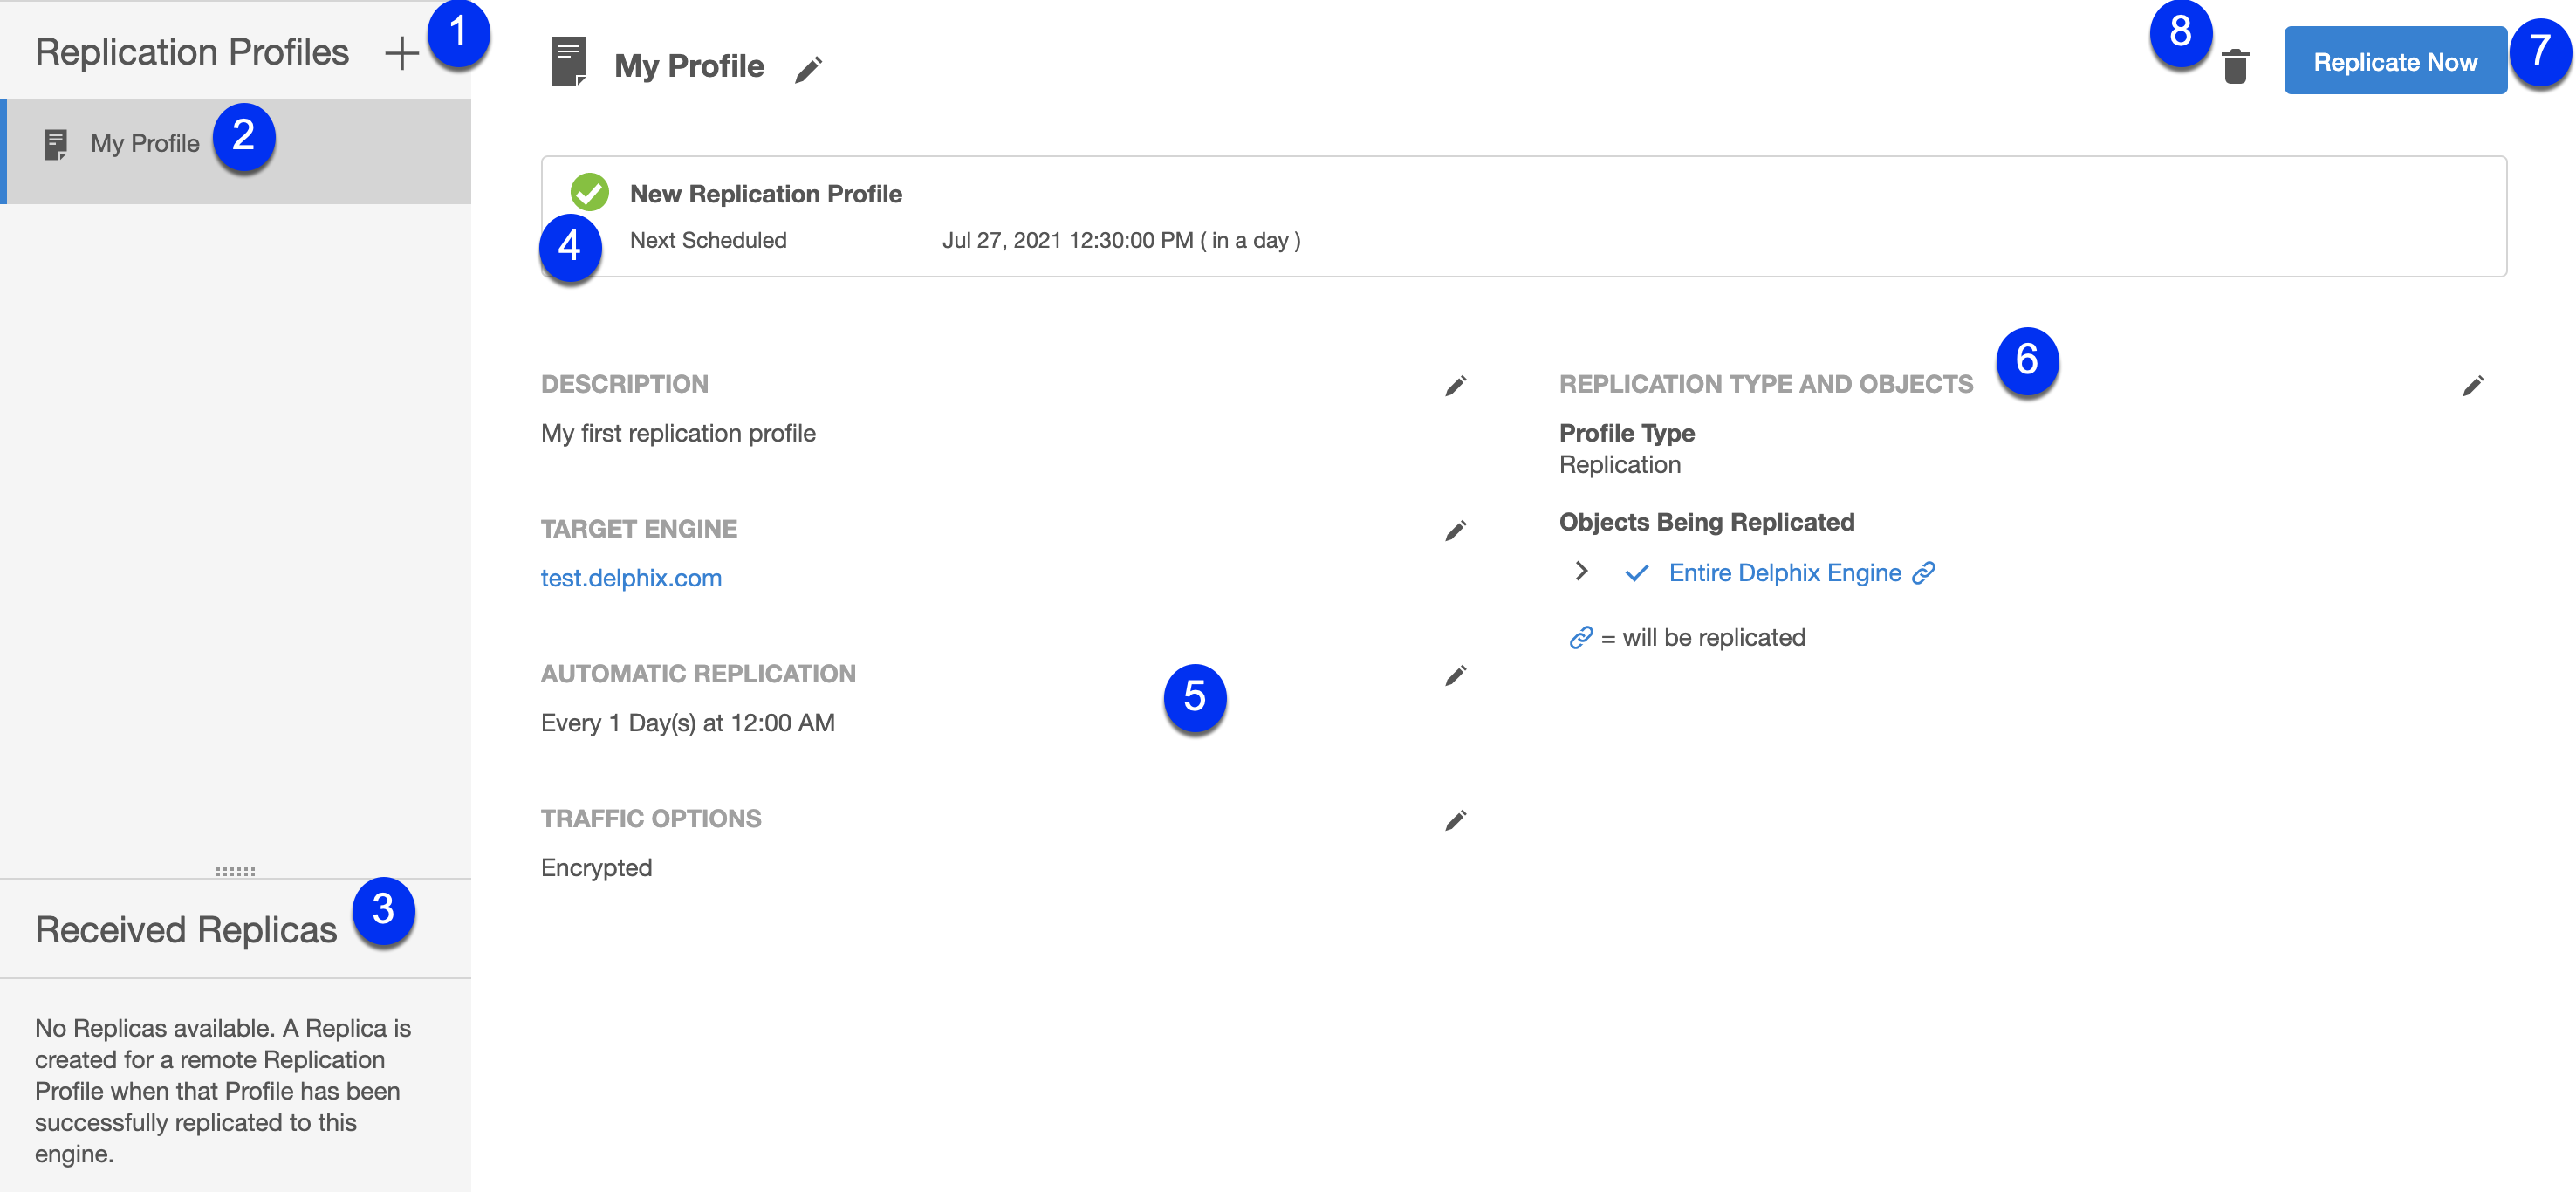
The screenshot and descriptions below illustrate the capabilities in the Replication profiles section.
-
Create profile button
It allows you to configure a Replication Profile. -
Replication profiles list
Provides a list of existing replication profiles. Click a profile in this list to view its details. -
Received replicas list
Provides a list of all existing replicas on this Delphix Engine. Click a replica in this list to view its details. -
Status box
Shows the replication status of the selected profile. This includes the result of the most recent or current replication event and statistics for the replication run (i.e. data transferred, duration, average throughput, etc.).
-
Configuration options
Additional configuration options for the selected replication profile.-
Description: Free text field for a profile description.
-
Target Engine: The Delphix engine on the receiving end of this replication pair.
-
Automatic Replication: If enabled, shows the frequency and time that regular replication will be run.
-
Traffic Options: Summarizes the traffic options with which this profile has been configured.
-
-
Objection selection tree
Shows all of the objects, such as groups, dSources, VDBs, and Self-service (JetStream) data layouts, that you have selected for replication in this replication profile. Selecting Entire Delphix Engine will cause all objects on the engine to be replicated, and thus the tree is collapsed. -
Replicate now button
Begins the replication process -
Delete button
Allows you to delete the current profile.
Received replicas
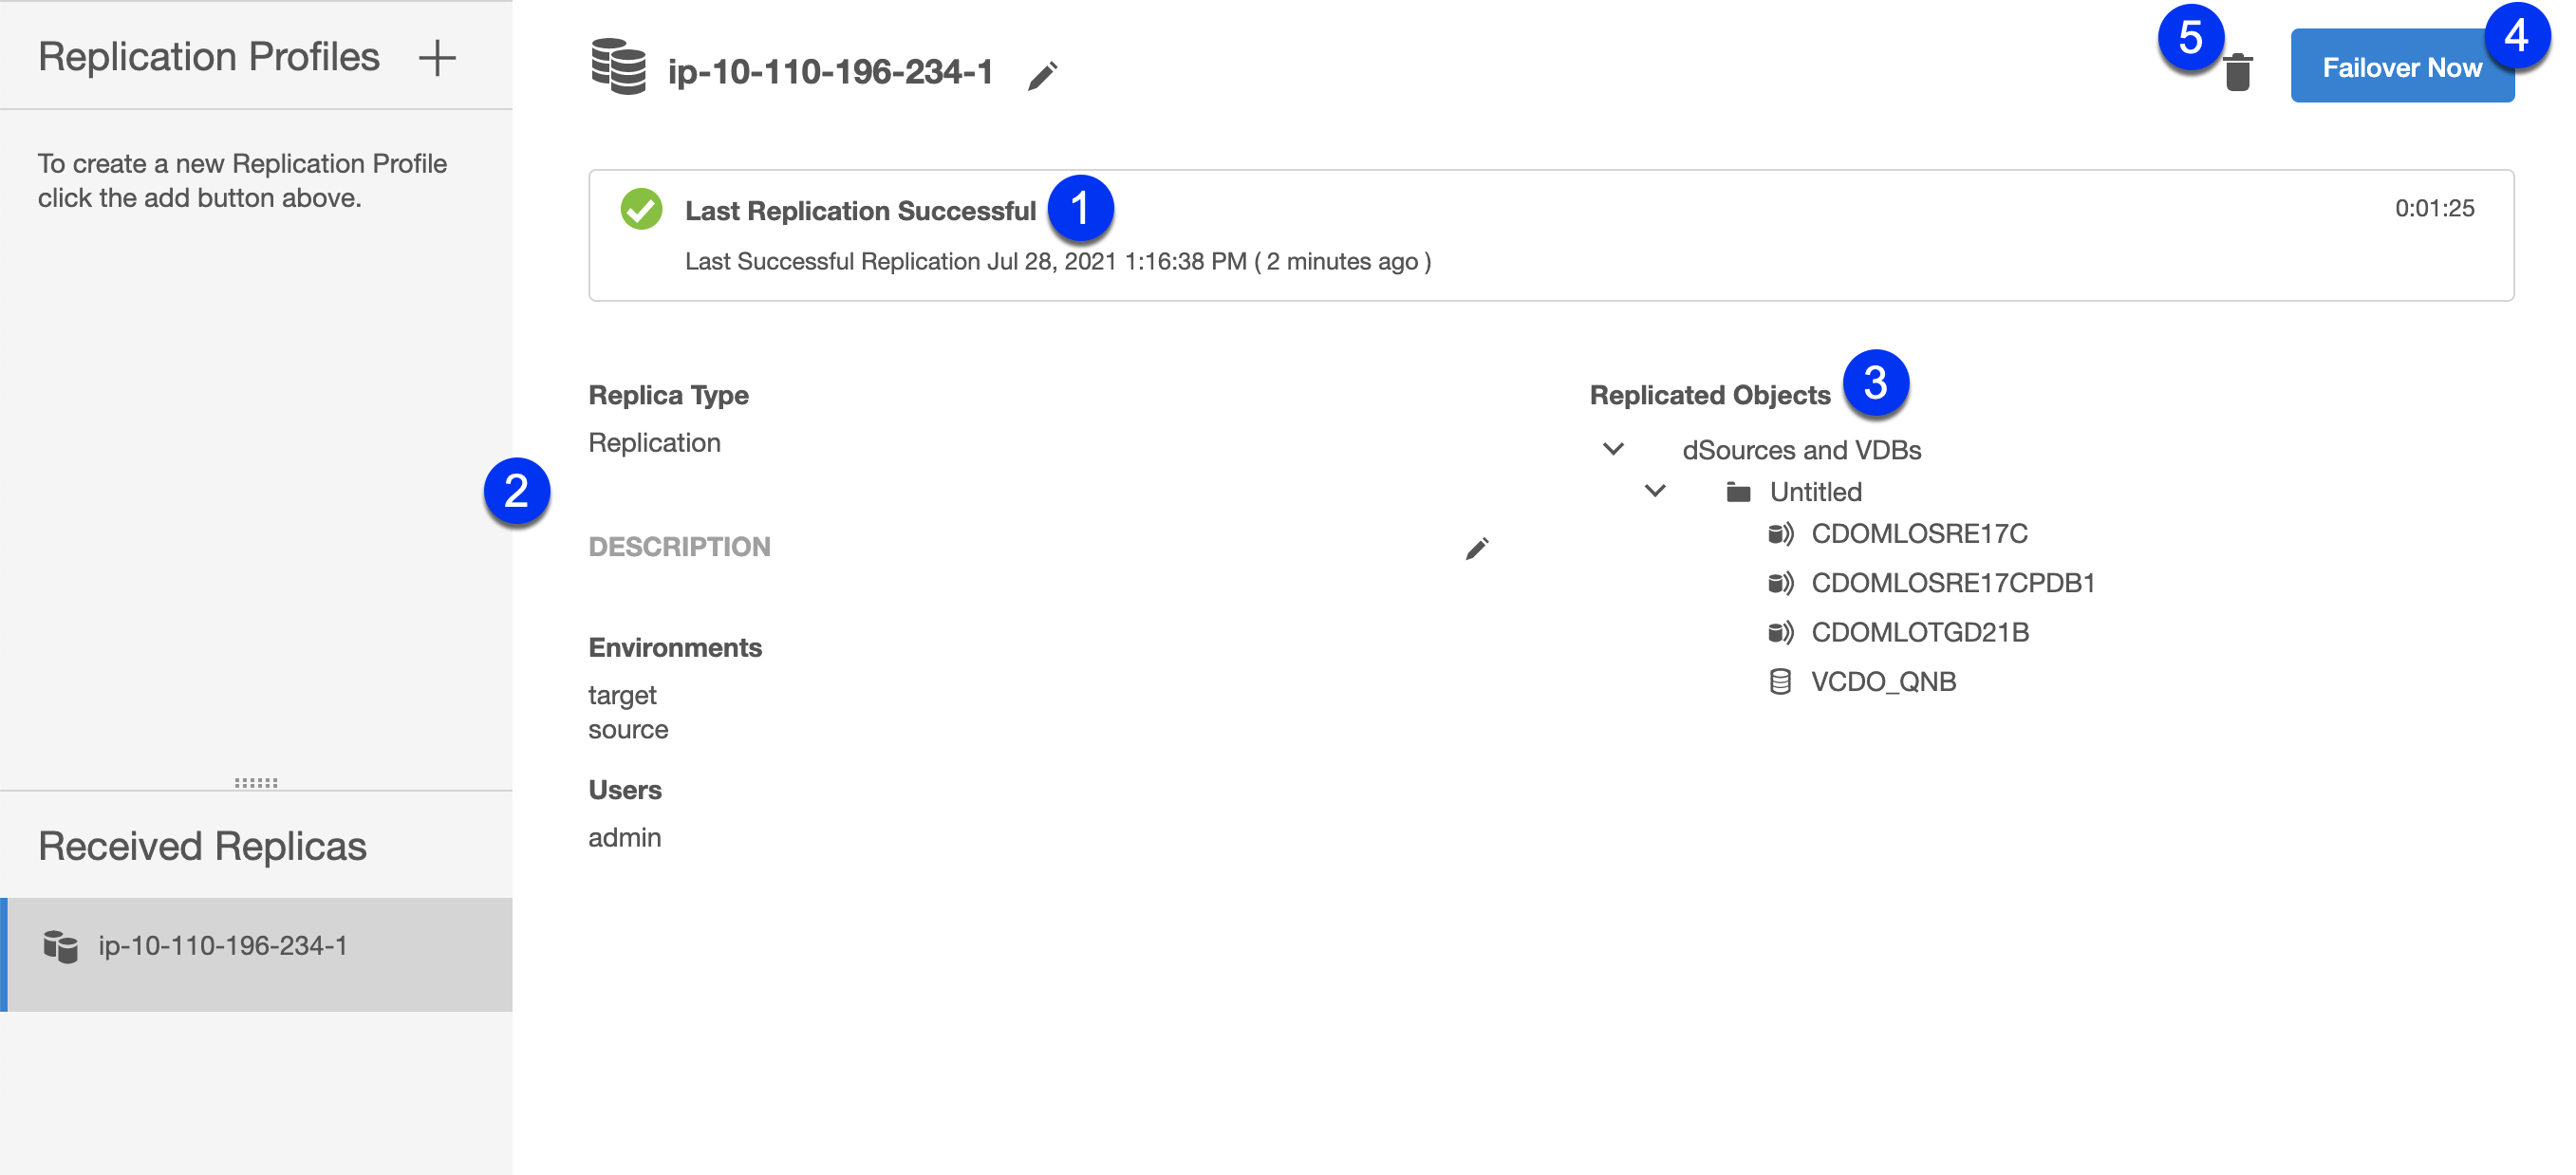
The screenshot and descriptions below provide more details of the functionality of this section.
-
Status box
Similar to the Replication profile status box, this shows the most up-to-date status information for the replica on the target -
Replicated environments
Replicating a dSource or VDB will automatically replicate any environments associated with those objects. For more information, see Replication overview -
Replicated objects tree
A read-only view of the objects in this replica. -
Failover button
Initiates a failover for this replica -
Delete button
Deletes this Replica on the target. This does not have an effect on the corresponding profile on the source engine.
Create new replication profile wizard
Perform the following steps to create a new replication profile.
-
Login to the Delphix Management application.
-
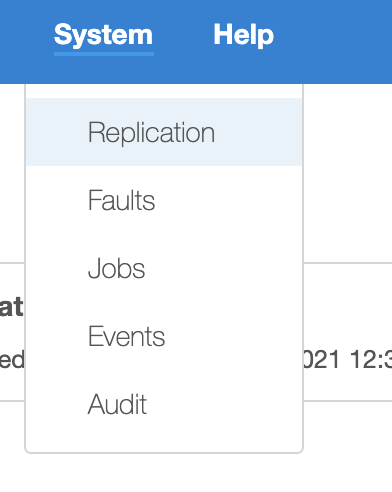
Navigate to System > Replication.
-
Next to Replication Profiles, Click the plus icon. The Add Replication Profile wizard screen appears.
-
Enter the Name of the replication profile and an optional Description, and click Next.
-
To specify the Object, select the Profile Type as Replication Profile and select from the Objects Being Replicated to a target engine. Click Next.
Note:
Selected Objects-
Some selected objects may have dependencies – other objects that will be pulled into replication because they share data. Objects that will be replicated are confirmed with a blue chain link icon.
-
Note that this is not guaranteed to be the full set of dependent objects, but rather is the best guess. The full set of objects and their dependents will be calculated at the time of replication.
-
-
When selecting objects, you can select the entire server (Entire Delphix Engine) or a set of groups, dSources, VDBs, and Jet Stream data layouts.
-
When replicating a group, all dSources and VDBs currently in the group, or added to the group at a later time, will be included.
-
If you select a Delphix Self-Service data template, all data containers created from that template will be included. Likewise, if you select a data container, its parent data template will be included.
-
If you select the entire server, all groups and Delphix Self-Service objects will be included.
-
Regardless of whether you select a VDB individually or as part of a group, the parent dSource or VDB (and any parents in its lineage) are automatically included. This is required because VDBs share data with their parent object. In addition, any environments containing database instances used as part of a replicated dSource or VDB are included as well.
-
When replicating individual VDBs, only those database instances and repositories required to represent the replicated VDBs are included. Other database instances that may be part of the environment, such as those for other VDBs, are not included.
-
Non-data objects (Delphix users, roles, permissions, authorizations, policies, database configuration templates) that are associated with selected objects will be automatically included during replication. They will not be shown on the selection interface.
-
-
For Target Engine, enter the hostname or IP address for the target Delphix Engine. Enter the username and password of a user who has Delphix Admin-level credentials on the target Delphix Engine. If the username or password changes on the target Delphix Engine, you must update these settings on the source Delphix Engine. Click Next.
-
By default, automatic replication is disabled and you must trigger replication updates manually. To Schedule automatic replication, click the Enabled checkbox.
In the Automatic Replication field, enter the frequency and starting time for replication updates to the target Delphix Engine. Once you have entered and saved your replication settings, you will also see an option to trigger replication immediately with the Replicate Now button.
Under Traffic Options, select whether you want to Encrypt traffic or Limit bandwidth during replication updates. Click Next. -
The final summary tab will enable you to review your configurations. Click the Back button to go back and to change any of the configurations or click Submit to complete the wizard.
Viewing and editing an existing replication profile
Perform the following steps to view and edit existing replicas.
-
Login to the Delphix Management application.
-
Navigate to System > Replication.
-
Under the Received Replicas section, select a replica.
-
You can edit the Name and Description fields. All other fields are view-only.
Perform the following steps to edit the fields.
-
Click the pencil icon next to the corresponding field or group of fields to edit the fields.
-
To save the edits and/or selections, click the Checkmark icon.
-
To cancel the edits and/or selections, click the cross icon.
Canceling a replication job
You must cancel the replication job at the source engine. Canceling the replication job at the target engine results in the re-starting of the receiving job at the target engine. If the source engine is down, then you can cancel the replication job at the target engine. If you re-start the source engine where the replication job was previously running, the source engine will attempt to restart the replication send job.