SAP HANA staging push
The Staging Push transfers the responsibility of creating the staging database and providing data into the database's mount point (aka dSource) to the end user. The Staging Push implementation for SAP HANA does NOT create its own SAP HANA instance. It relies on the user to supply the instance.
This ingestion method gives users better control over how data is sent into Delphix Storage. This is an alternative approach to the Staging Pull model where the Delphix Continuous Data Engine takes care of preparing the dSource.
Supported ingestible sources
The Staging Push ingestion method supports ingesting data from the staging host’s SAP HANA database with data populated by the user. The user may provide this data through external backups, such as data and log backups, or a third-party data recovery tool, such as Commvault.
To validate if the data provided is correct, the staging host’s SAP HANA database must be able to start and run successfully. The sections below will guide you in further detail.
Prerequisites
Ensure that you meet the following requirements before you begin creating a dSource.
The environment requirements are met by the staging/target environments as described in Requirements for SAP HANA Staging/Target environments.
For more information, refer to Requirements and Prerequisites.
Create a dSource
Perform the following steps to create a dSource using the Staging Push ingestion method.
Login to the Delphix Management application.
Navigate to the Manage > Environments page.
On the Databases tab, choose a repository for your dSource and click the  icon. icon.
In the Add Database dialog window, provide the name of your source configuration and click Add.
Select your source configuration and click the Add dSource link located on the right.
In the Source tab, do the following:
In the NFS Mount Location field, provide a mount location on the staging environment.
SAP HANA Source Tenant Database Name. The tenant's name should contain at least one alphanumeric character or one underscore. Also, it should not start with a digit.
Select the Use Staging Push checkbox.
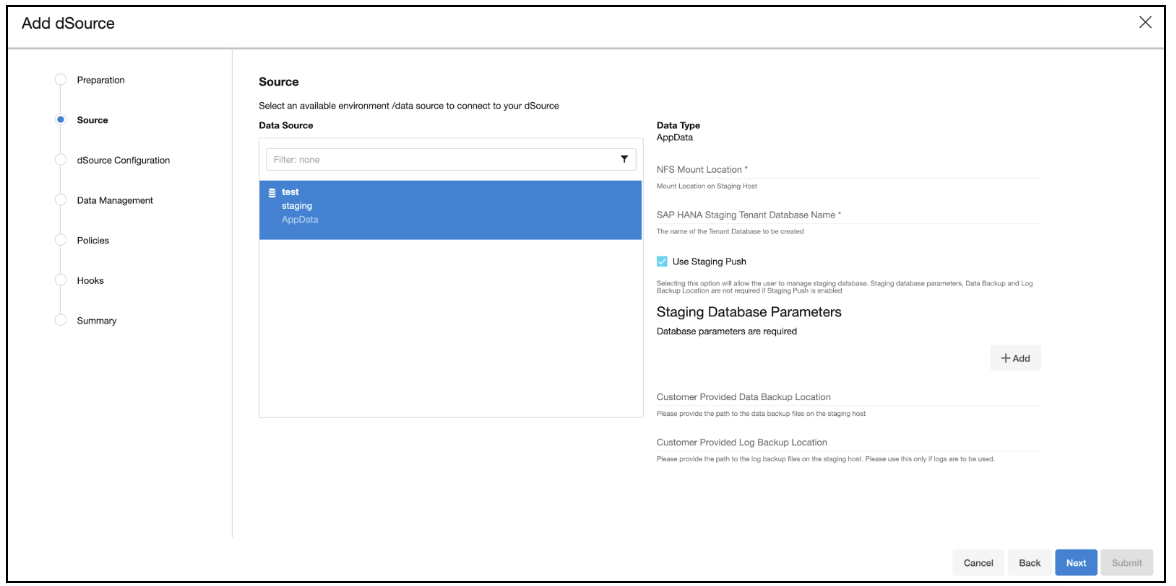
Click Next.
In the dSource Configuration tab, provide a dSource name and then select a Dataset Group for your dSource.
In the Data Management tab, specify your staging environment, user, and snapshot parameters. Select the Resynchronize dSource checkbox if you want to resynchronize the dSource. This operation will force a non-incremental load of data from the source. This operation is similar to creating a new dSource but prevents duplication of storage and maintains Timeflow history. Click Next to proceed.
In the Policies tab, apply policy details to the dSource if needed, and then click Next to continue.
In the Hooks tab, select a Hook Point and then click + to add a script that you want to run at that hook point. You have the flexibility to define scripts to run at multiple hook points in the process.
In the Summary tab, review the configuration profile for your dSource.
Click Submit. The Continuous Data Engine will initiate two jobs, namely DB_Link and DB_Sync to create the dSource. You can monitor the progress of these jobs on the Running Actions section on the top right panel, or by navigating to System > Jobs. Upon successful completion of the DB_link job, the database icon will change to a dSource icon on the Environments > Host > Databases screen. The dSource will also be listed under Datasets within its assigned group.
After dSource creation using the Staging Push mechanism, an empty snapshot will be created but users can not create VDBs from this empty snapshot . Also, before creating the subsequent snapshots, users will have to create the database and point in the database to the Delphix-provided mount point.
Ingest and snapshot
Unlike the staging pull model, the first snapshot created with staging push will be an empty set of directories. This is because the dSource has not yet been populated with your dataset. In this section, you will inspect the empty contents of the newly created dSource, understand how it is organized, copy your latest dataset into the dSource’s mount point, and then take a snapshot.
Follow the steps and commands below as a system user to ingest and take a snapshot. Note: Replace the values for all the parameters provided within curly braces ( { } ).
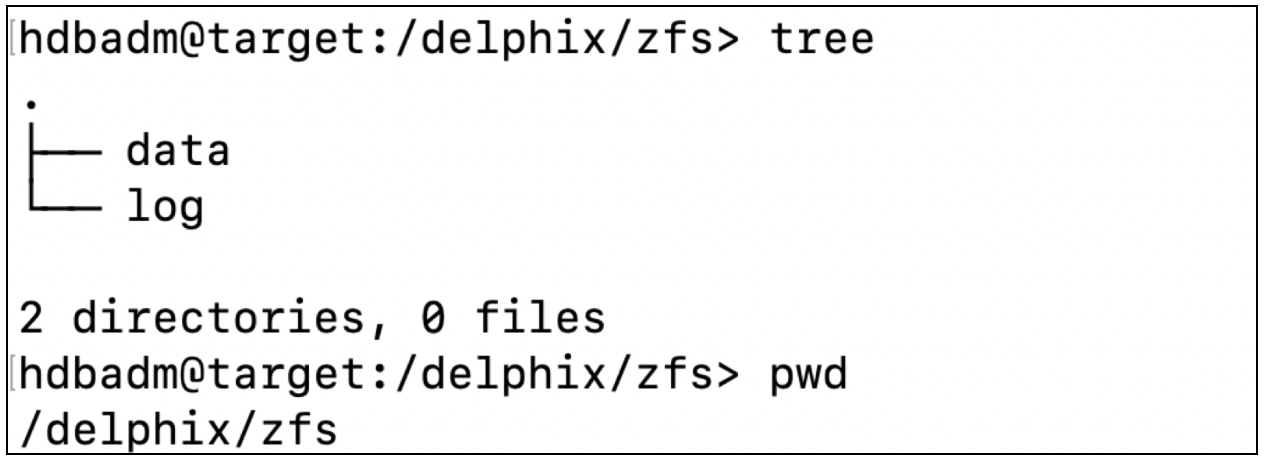
Confirm the dSource’s mount point was created successfully. Authenticate into the staging environment and view the dSource mount point’s folder that was created in the prior section. The location should be composed of two empty folders: data and log.
Create a database in "no start" mode. Here, "no start" implies that the database is not started.
CODEcreate database {DATABASE_NAME} SYSTEM USER {DATABASE_PASSWORD} no startThe parameters used in the above query are:
DATABASE_NAME - Refers to the database name to be used for staging Push. This is the same name that was provided by the system user on the UI while creating the dSource.
DATABASE_PASSWORD - Refers to the password to be used for the staged database.
Set the SAP HANA database to use the dSource’s mount point to store the data and log volume files. This mount point was created in the prior section. This is done by setting the basepath_datavolumes and basepath_logvolumes to data and log directory under the mount point, respectively. All the tenant data volumes and log volumes reside in the single mount point provided by the Delphix Continuous Data Engine.
//This query sets the value of basepath_datavolumes to within the delphix storage.
alter system alter configuration('global.ini', 'DATABASE','{DATABASE_NAME}') SET ('persistence','basepath_datavolumes') = '{DELPHIX_MOUNT_LOCATION}/data'//This query sets the value of basepath_logvolumes to within the delphix storage.
alter system alter configuration('global.ini', 'DATABASE','{DATABASE_NAME}') SET (''persistence','basepath_logvolumes') = '{DELPHIX_MOUNT_LOCATION}/log'Example:
Once the basepath_datavolumes and basepath_logvolumes parameters are set for the tenant, then their values are reflected in the global.ini file in the tenant database. The location of the global.ini file is <sapmnt>/<SID>/SYS/global/hdb/custom/config/DB_<tenantdbname>.
Example:

Create a backup catalog. This is used by SAP HANA to determine whether recovery is possible and which backups are to be used to recover the database.
Note: Creating a backup catalog is not applicable for third-party backups. For example, Commvault-based backups.CODEhdbbackupdiag --generate --logDirs "${LOG_BACKUP_LOCATION}" --dataDir "${DATA_BACKUP_LOCATION}" -d “{DATA_BACKUP_LOCATION}"The parameters used in the example are:
logDirs - Refers to the location where logs are present for the database. If the system user does not intend to use logs then an empty directory can be created and the location of the empty directory can be provided here.
dataDir - Refers to the location where backups are present.
-d - Refers to the location where the catalog backup will be created.
Perform recovery on the tenant database. This can be done in the following two ways:
Recovery using data backups only.
CODERECOVER DATABASE FOR {DATABASE_NAME} UNTIL TIMESTAMP '{TIMESTAMP}' CLEAR LOG USING CATALOG PATH ('{CATALOG_PATH}') USING DATA PATH ('{DATA_PATH}') IGNORE WORKERGROUPS;For example:
CODERECOVER DATABASE FOR TEST UNTIL TIMESTAMP '2021-09-16 08:41:50.311000' CLEAR LOG USING CATALOG PATH ('/usr/sap/HDB/HDB00/source_backup') USING DATA PATH ('/usr/sap/HDB/HDB00/source_backup') IGNORE WORKERGROUPS;The following parameters for the recovery command are listed below:
Recover database for {DATABASE_NAME} - Represents the name of the database for which recovery is to be performed.
Until timestamp `{TIMESTAMP}' - Represents the timestamp value till which recovery is to be performed.
Clear log using catalog path ('{CATALOG_PATH}') - Refers to the path where the catalog backups are kept.
Using data path ('{DATA PATH}') - Refers to the path where the data backups are kept.
Recovery using both data and log backup Along with the above parameters, you need to specify the below parameter:
Using log path ('{LOCATION_OF_THE_LOG PATH}') - Refers to the location of log backups.
Recovery using third-party data backups. For example, Commvault-based backups.
CODERECOVER DATABASE FOR ${STAGING_DATABASE_NAME} UNTIL TIMESTAMP '${RECOVER_TIMESTAMP}' CLEAR LOG USING SOURCE '${SOURCE_TENANT_DATABASE}@${SOURCE_SID}' CHECK ACCESS USING BACKINT IGNORE WORKERGROUPS;The following parameters for the recovery command are listed below:
STAGING_DATABASE_NAME - Represents the name of the tenant database to be created on the staging area.
RECOVERY_TIMESTAMP - Represents the time limit until which recovery has to be performed. The time has to be in the YYYY-MM-DD HH:MM:SS format.
SOURCE_TENANT_DATABASE - Represents the name of the source tenant database.
SOURCE_SID - Represents the SID of the source HANA installation. Example:
Once the recovery is done, data will be available inside the dSource’s mount point and the database will be in an active state. The below snippet shows an example file system after the recovery.
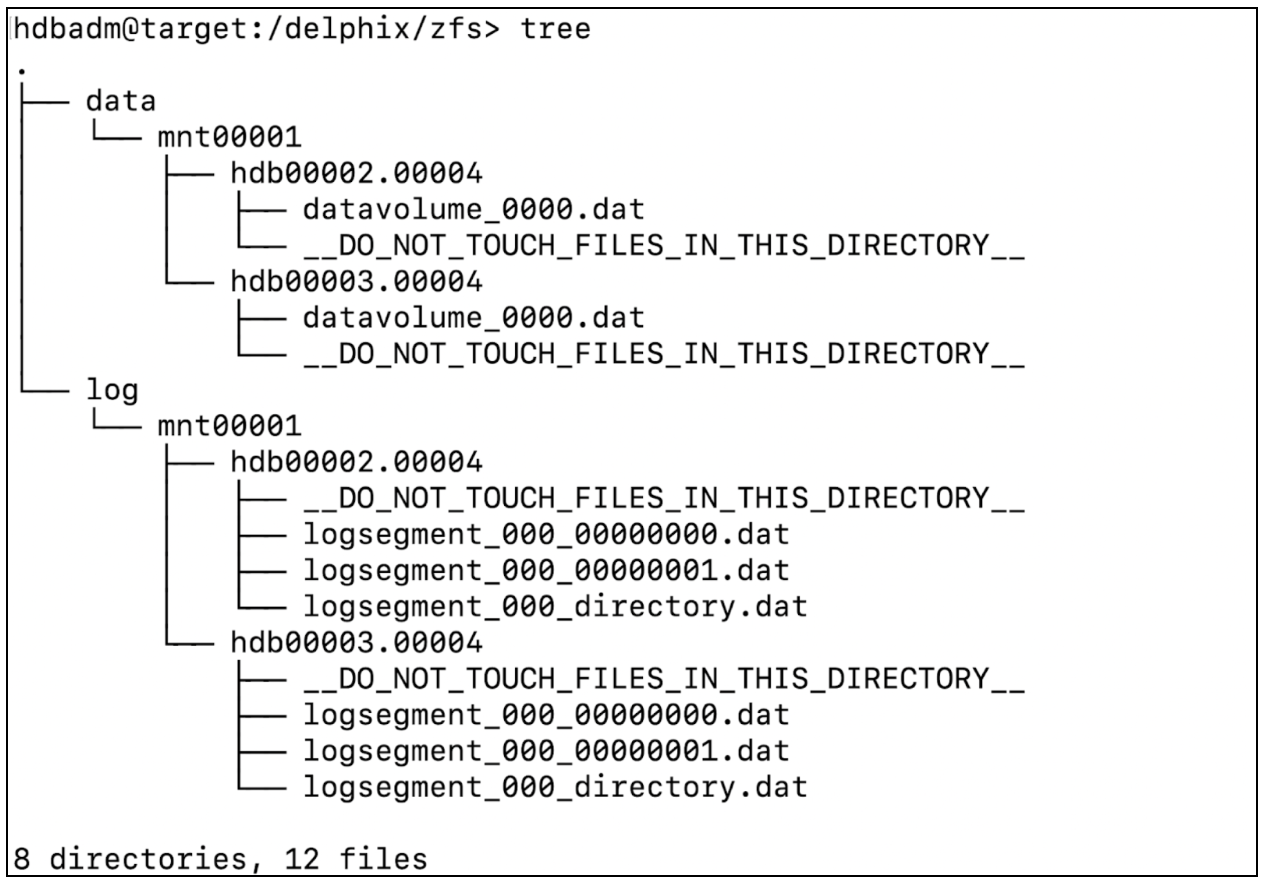
You can now proceed to take a snapshot and the VDB creation using the new snapshot.
Troubleshooting
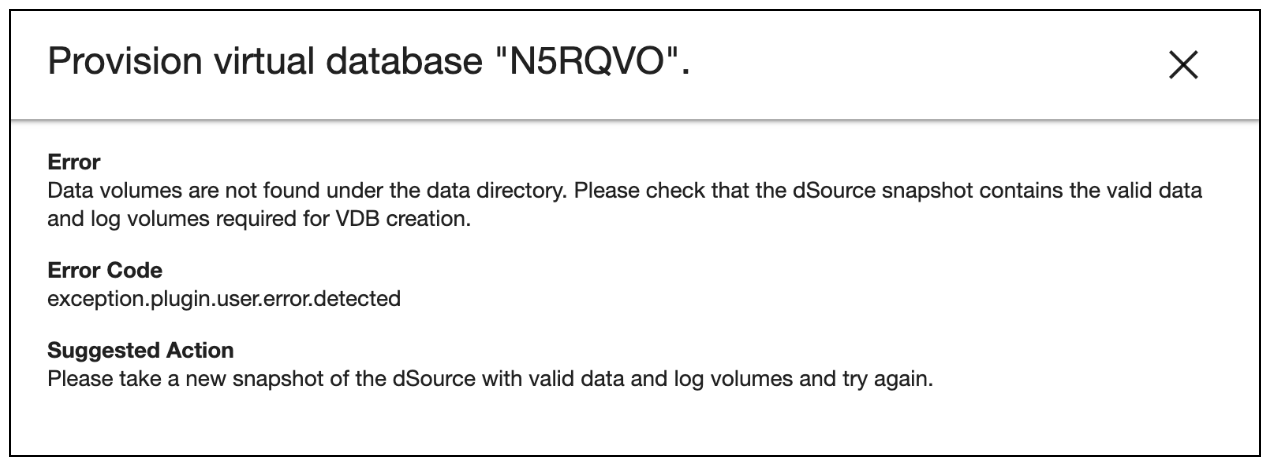
If a user attempts to create a VDB from an empty snapshot, it will fail with the “Data volumes are not found under the data directory. ...” error message as shown below.