
This topic provides implementation details of Staging Push for SQL Server. Staging Push eliminates the need to access the customer’s production environment and hence the dependency on it. For end-users with various architectural requirements such as an unsupported backup appliance, complex ingestion requirements, and supporting alternate replication methods, Staging Push increases flexibility by ensuring that Delphix can work with most of these unique requirements while maintaining Delphix standard product support.
The Delphix appliance provides storage savings via combination of compression and storing new data by only writing file system blocks that are different from the current blocks. For Staging Push, Delphix operates, not at the file level, but file system level. Anything updating data on the filesystem would need to leave unchanged blocks untouched in the same place and apply updates by modifying or appending existing files. For this reason, it is recommended to choose a data synchronization method that leaves datafiles in place and only modifies or appends them.
If a data synchronization method is used which effectively recreate the datafiles, then even if the bulk of the data is unchanged, unless written to the exact same block offset on the filesystem (there is no way to guarantee that when creating new files), it is going to appear as new data to the Delphix appliance and data deduplication is going to be less effective and the results extremely variable in terms of storage impact.
Staging Push gives end-users control over some Staging DB processes so that the nuanced, staging-based ingestion can be orchestrated externally. It will give control of the staging database to the end-user to pull from any backup provider (as a part of this, you'll be responsible for keeping the Staging DB in sync with the production database). Staging database files will be stored on Delphix Storage. Delphix will still be the one snapshotting the underlying data files, and gathering the metadata required to provision from the snapshot.
Source databases cannot be in Read-Only mode at the time that a backup is taken. While the snapshot will succeed, attempts to provision VDBs from those snapshots may fail with an error during the provision process.
Temporarily setting the database to read-write mode, and taking a new backup and snapshot while the database is in in this state, will allow VDBs to be provisioned successfully.
The below steps show how to create a dSource using the Staging Push mechanism.
Procedure
-
Login to the Delphix Management application.
-
Navigate to Manage > Datasets.
-
Click the plus icon and select Add dSource.
-
On the Preparation tab, click Next.
-
From the dSource Type tab, select the MSSQL Staging Push option and click Next.
-
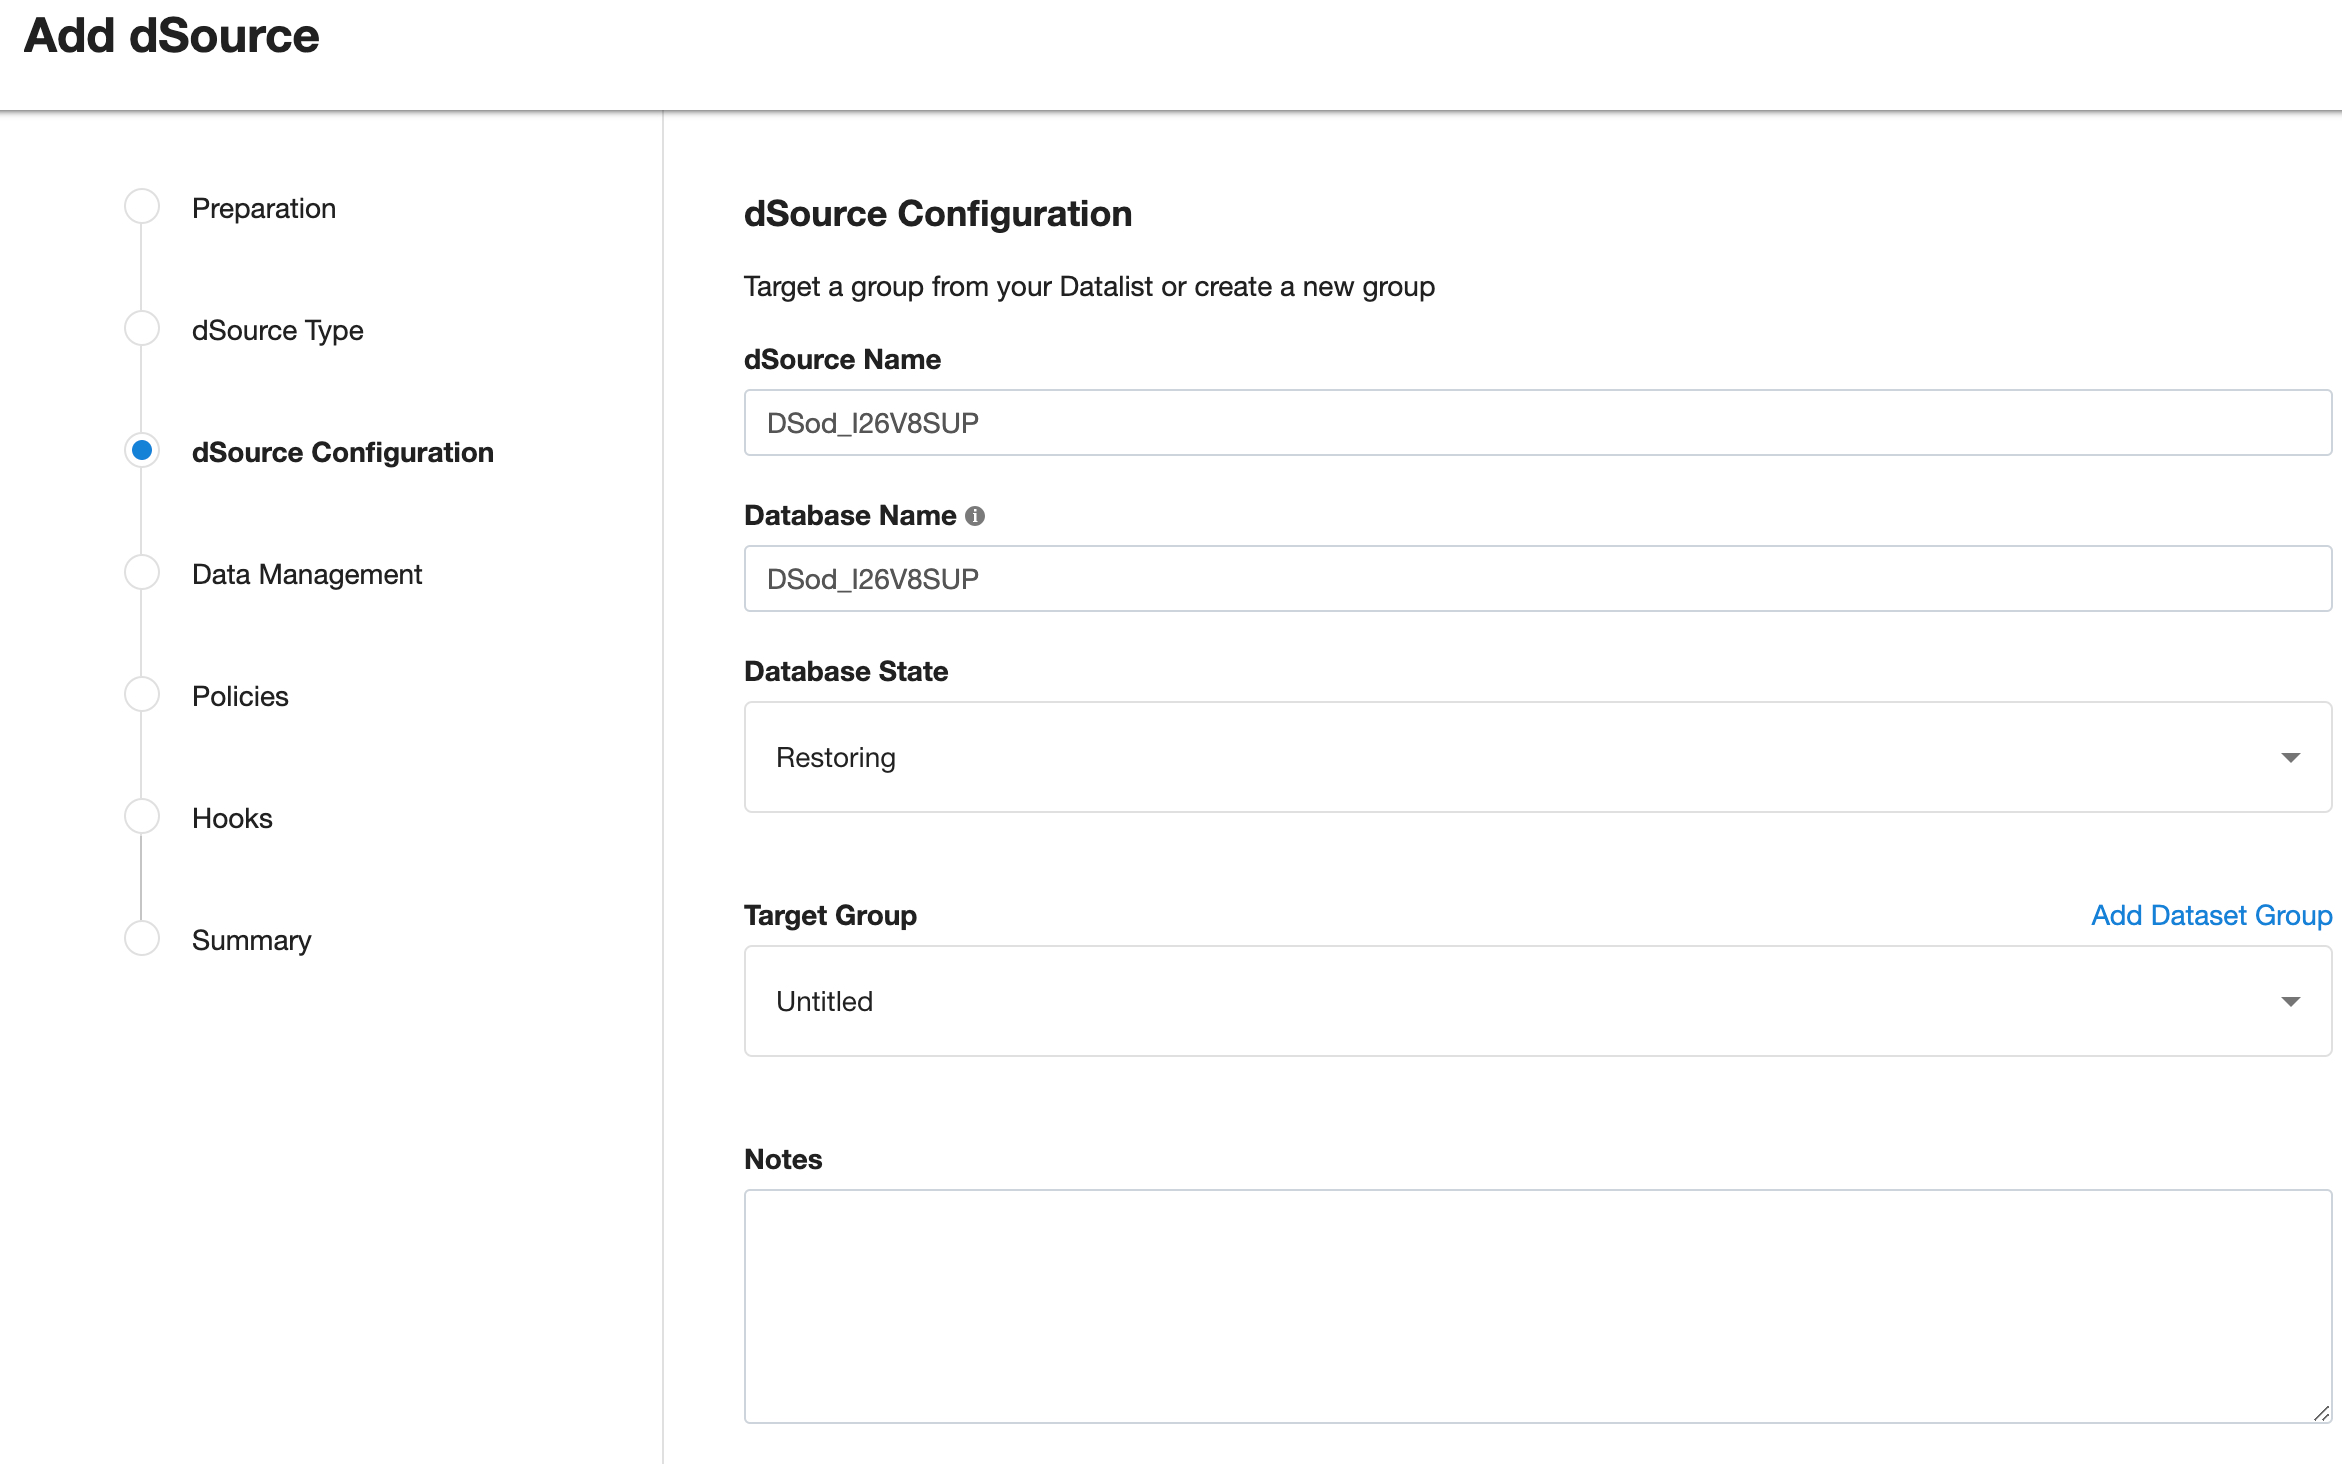
From the dSource Configuration tab, enter the following dSource configurations, also shown in the screenshot below, and click Next.
-
dSource Name - This name will be available on the Delphix Engine interface.
-
Database Name - This is the name of the staging database that is created on the staging host after linking. It is suggested to use the word "staging" while assigning a name to the staging database as this will help to distinguish it from other end-user databases.
-
Database State - Select one of the following: Restoring or Online.
-
Restoring: Select this option when you do not need to read or write data on the staging database. You can update the staging database by restoring backups on it.
-
Online: Select this option when the staging DB is required in online mode so that you can use the database seamlessly. The most common use case for online mode is Azure Managed PaaS database 'Azure SQL Databases'.
-
-
Target Group - Select the required target group from the dropdown list.
-
Notes - Enter notes if there are any.
-
-
From the Data Management tab, select the staging environment and repository details. The staging environment is where the staging database will be hosted and a repository is a container for the SourceConfigs objects. Each environment in Delphix can contain any number of SQL Server instances and each SQL Server instance can contain any number of databases.
-
Select any policy for the new dSource. SnapSync policy is used as a default policy for taking snapshots. For more details on SnapSync policy, see Policies for Scheduled Jobs.
-
Enter any script that should be run on the Hooks page. For staging push dSources, a restore backup script can be added as a part of the hooks script to automate backup restore. Refer to the below section for more details.
-
Review the Staging Push dSource Configuration and Data Management information, and then click Submit.
Importing Azure bacpac file
After creating staging push dsource in online mode and before taking a snapshot, if you want to align the staging database with the source database automatically, you can do so by providing the script in the hook.
You can also manually import an Azure SQL database bacpac file on the staging host.
Prerequisites
Before importing the bacpac file make sure that all the database files are present at the mounting location.
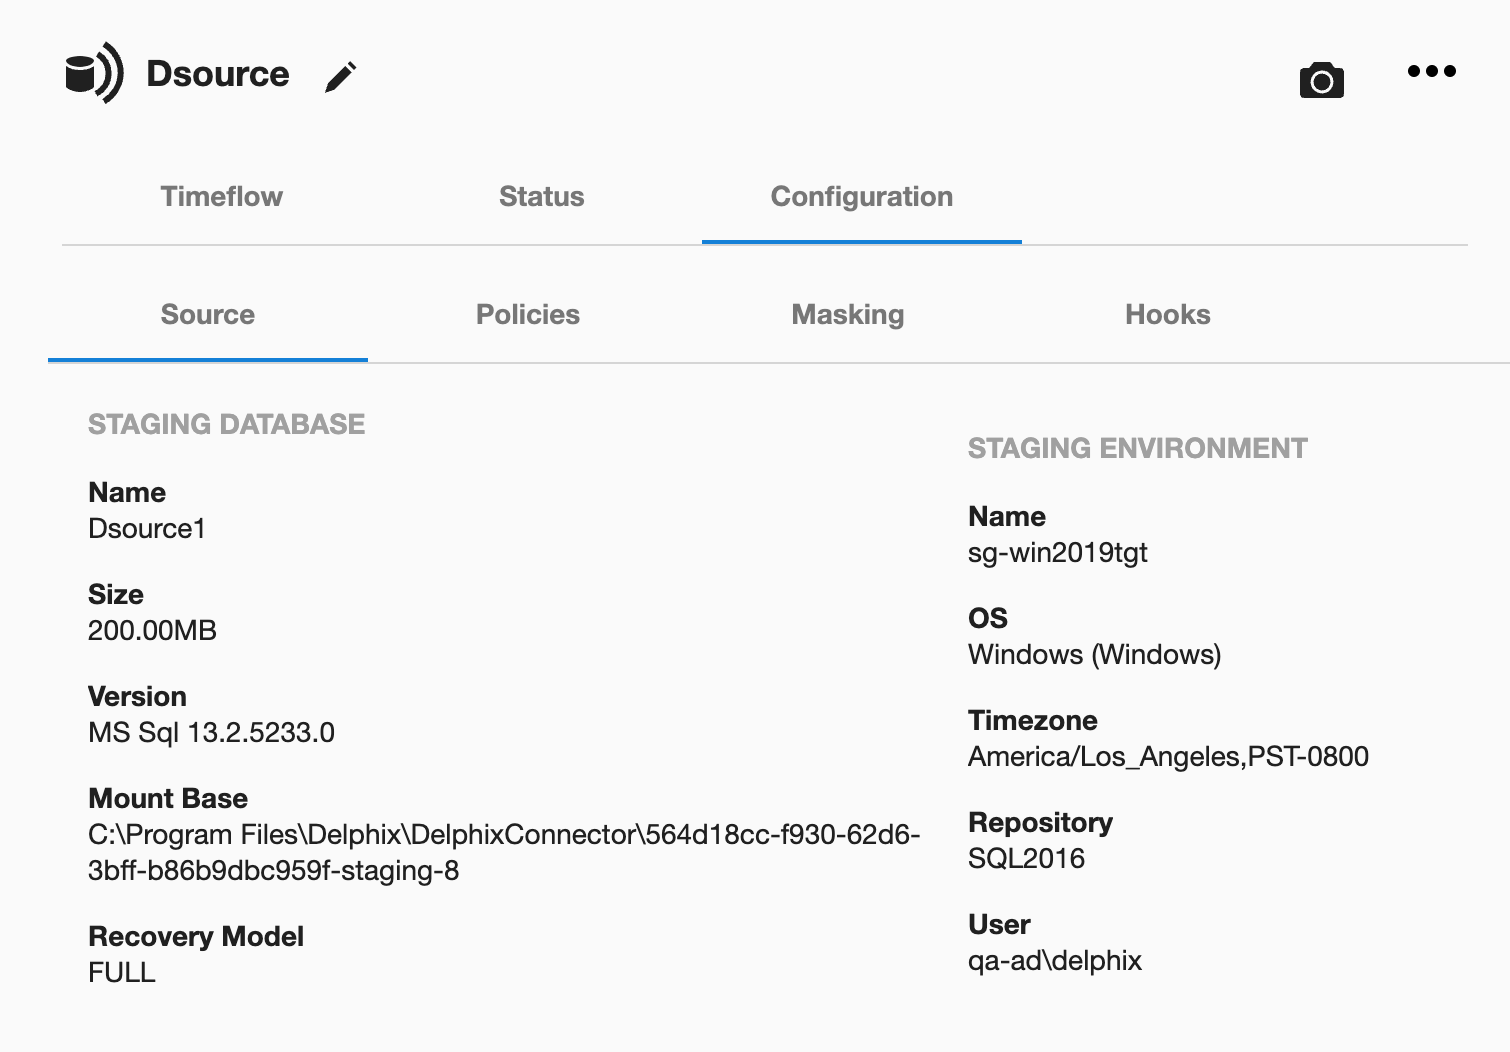
The mounting location is available as a mounting base under the Configuration tab of the newly created dSource. i.e. staging push dsource needs to be created in online mode it will create an empty dsource along with the mount location.
Procedure
-
Extract an Azure SQL backup i.e. bacpac file.
-
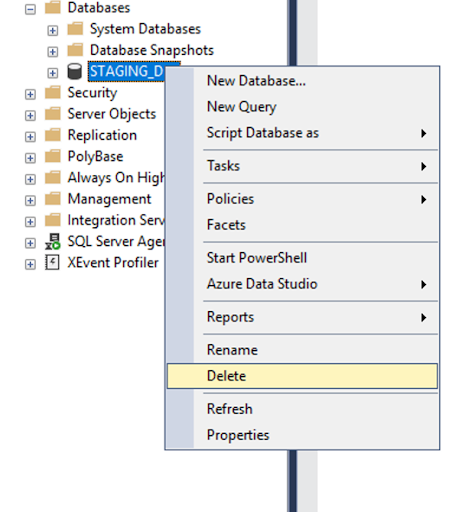
Delete the existing staging database from SSMS.
-
Do not delete dSource on Delphix Continuous Data Engine.
-
-
Once the staging database gets deleted, follow the steps mentioned below:
-
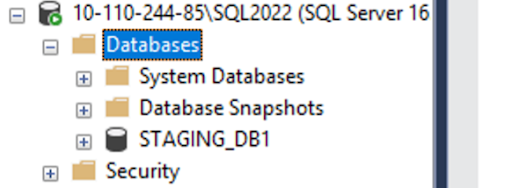
Create Staging DB for dSource
-
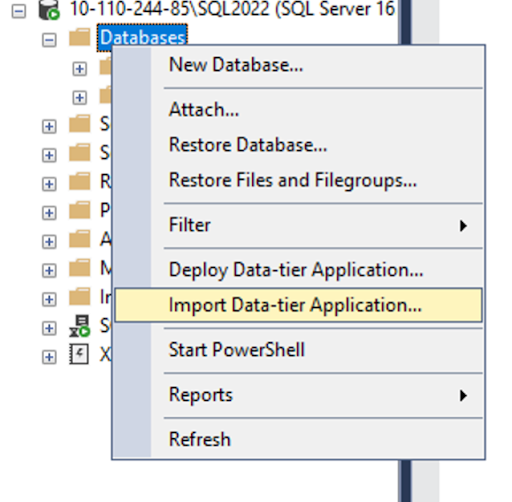
On Staging SQL Server Instance, right-click on Databases & choose Import Data-tier Application.
-
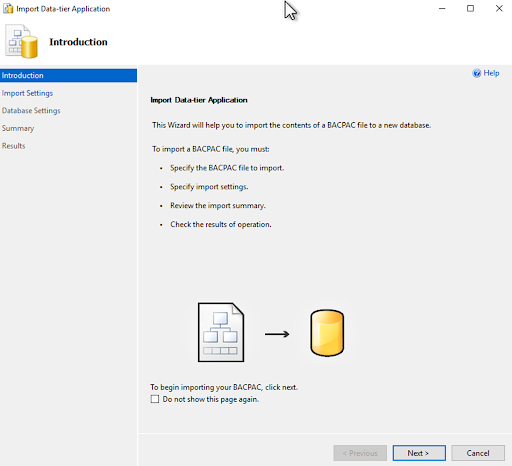
Follow the instructions to import the BACPAC file on the staging server, and hit Next.
-
Choose the option to Import from Windows Azure, provide the required details, choose the required bacpac file, and hit Next.
-
Provide the database name, and under SQL Server Settings, point Data file path & Log file path to the staging mount created by Delphix, during staging push online dSource creation.
<Delphix Connector Path>\<Engine UUID>-Staging-<Container ID>\DATA\DB -
Verify the settings and click Finish.
-
Wait for the operation to complete.
-
Once the operation completes, verify the staging database exists on SQL server instance.
-
-
Restoring backups
After linking and before taking a snapshot, if the user wants to align the staging database with the source database automatically they can do so by providing the restore script in the hook, as shown below.
They can also manually restore a database backup on the staging host.
First backup restoration needs to be a full backup with the REPLACE keyword.
Prerequisites
When restoring the backup, make sure that all the database files are present at the mounting location.
The mounting location is available as Mount Base under the Configuration tab of the newly created dSource.
Procedure
Manually restore a backup on the staging host or provide the restore script in the hook script. A sample pre-sync hook for native backup is shown below. It also lists the following keywords.
-
NORECOVERY - Keeps the database in restoring state.
-
REPLACE - Overwrites existing database created during linking with whichever source database that is in the backup set and is getting restored.
-
MOVE - Restores the data and log file to the specified locations.
-
BACKUP_FILE_LOCATION - The location of the backup file of the source database from where the backup is restored and it should be accessible from the staging host. For example, \\10-43-89-18\Backup\sp.bak.
Sample hook to illustrate restore script usage for restoring backups
#
# Copyright (c) 2022 by Delphix. All rights reserved.
#
#Set-Variable UTF8_CODEPAGE 65001 -option readonly
#Set-Variable UTF8_ENCODING "System.Text.UTF8Encoding" -option readonly
# Uncomment the following log to turn on debugging
# Set-PSDebug -Trace 2;
$DSOURCE_HOST = $env:STAGING_INSTANCE_HOST
$DSOURCE_PORT = $env:STAGING_INSTANCE_PORT
$DSOURCE_INSTANCE = $env:STAGING_INSTANCE_NAME
$CONNECT_STRING = "$DSOURCE_HOST\$DSOURCE_INSTANCE,$DSOURCE_PORT"
$DSOURCE_NAME = "$env:STAGING_DATABASE_NAME"
$DataDbFilePath = "$env:STAGING_MOUNT_BASE"
$SQL_SCRIPT= "RESTORE DATABASE $DSOURCE_NAME FROM DISK = '\\BACKUP_FILE_LOCATION' WITH NORECOVERY, REPLACE, MOVE N'<Source_db_name>' TO '$DataDbFilePath\DATA\db\$DSOURCE_NAME.mdf', MOVE N'<Source_db_name>_log' TO '$DataDbFilePath\DATA\db\" + $DSOURCE_NAME + "_log.ldf'"
function die {
    Write-Error "Error: $($args[0])"

    # run exit handler, if defined
    if (Get-Command -type Function -name atExit 2> $null) {
        atExit
    }
    exit 1
}

function verifySuccess {
    if (!$?) {
        die "$($args[0])"
    }
}

### Restore database.

echo $SQL_SCRIPT
Sqlcmd  -b -S $CONNECT_STRING -U sa -P <PWD>  -Q $SQL_SCRIPT
verifySuccess "Failed to restore backup"

# Uncomment the following line to turn off debugging
# Set-PSDebug -Trace 0;

exit 0
Snapshot
The first snapshot is created as a part of dSource creation and contains data and log files within the Delphix created mount point.
The first snapshot created is of an empty database and does not contain any source database’s data. (Unless a source backup was restored via a pre-sync hook. In that case, the initial snapshot will be that of source backup and won’t be empty).
Prerequisites
-
The database should be present on the staging host.
-
The DATA directory should be mounted.
-
The DB files should be present on Delphix mounted DB directory. For example,
C:\Program Files\Delphix\DelphixConnector\ec2197b2-e0c6-48d2-bd14-265e6fa9b5ab-staging-1\DATA\db -
The database should be in Restoring state.
-
No other restore operation should be in progress on the staging database.
SnapSync criteria
-
Delphix tries to fetch the last restored backup. If no backup is found, the snapshot is skipped with a warning.
-
If a snapshot already exists for the backup in the current timeflow, the snapshot is skipped with a warning.
Snapshots display the Staging Host timezone, as opposed to Linked dSources, where snapshots display the Source Host timezone. Here, the Staging timezone is displayed for Staging Push as we don't have the Source host to fetch the timezone information. This functioning might change in the future.
Perform the following steps to take a snapshot:
-
Login to the Delphix Management application.
-
Click Manage and select Datasets from the dropdown list.
-
Select the dSource created using the Staging Push mechanism to Snapshot.
-
Click the Camera icon.
-
From the Snapshot dialog box, select Yes.
-
Navigate to the Timeflow tab and click View: All snapshots to verify the Snapshot you just created.
You can now proceed to provision the VDB using the snapshot.
Disabling and enabling the dSource
When a disabled dSource is later enabled, it will resume communication and incremental data updates from the staging database according to the original policies and data management configurations that you set.
Procedure
Disabling a dSource will stop further operations on the Delphix Engine related to the staging dSource.
-
Login to the Delphix Management application.
-
Click Manage.
-
Select Datasets.
-
Select the dSource you want to disable.
-
In the upper right-hand corner, from the Actions menu (...) select Disable.
-
In the Disable dialog select Disable.
When you are ready to enable the dSource again, from the Actions menu (...) select Enable, and the dSource will continue to function as it did previously.
Keep a note of the following:
-
If you want to import a new .bacpac file after disabling and enabling it, you will have to manually delete the existing staging database and then import the .bacpac file. Alternatively, you can unlink and relink the dSource with a different staging database name, and follow the same procedure as creating a staging database for dSource.
-
During enable, if there exists a database with the same staging database name as the user entered and it is not Delphix managed, or if it is but Delphix Engine is unable to drop it, the enable operation will not be terminated.
-
Storage mounting will be attempted for the dSource and a new job event
SKIP_ATTACH_OPERATIONwill be displayed. This means the job is updated with a warning and attach operation is skipped. The enable operation will be marked as successful.Note : You can drop the database that is outside Delphix or that wasn’t dropped and try again the disable/enable option.
-
Delphix will attempt to mount the staging database’s storage during the enable job. Even if the attach job fails, the storage will remain mounted (if Delphix was able to successfully mount it) and the enable job will be marked as successful.
Unlink(Detach)/link(attach) a dSource
Each dSource contains metadata that associates it with the staging database, as well as the data it has ingested from the staging database in the form of snapshots up to that point. It is possible to detach, or unlink, a dSource from its staging database.
-
A detached dSources can still be used to provision a virtual database (VDB).
-
You can re-link the staging push dSource with a different staging database name than before. In that case, the staging database will be created with the new name provided. However, DB file names will remain the same as before.
-
(Applicable for online mode only) Delphix Continuous Data Engine supports converting existing Linked dSource to Staging push dSource and vice versa.
-
If a database changes from a supported state to an unsupported state, a fault will be generated.
Unlinking or detaching a dSource
-
Login to the Delphix Admin application.
-
Click Manage.
-
Select My Datasets.
-
Select the database you want to unlink.
-
From the Actions ... tab, click Unlink.
-
Click Yes to confirm.
Attaching a previously detached dSource
-
Login to the Delphix Admin application.
-
Click Manage.
-
Select My Datasets.
-
Select the database you want to link.
-
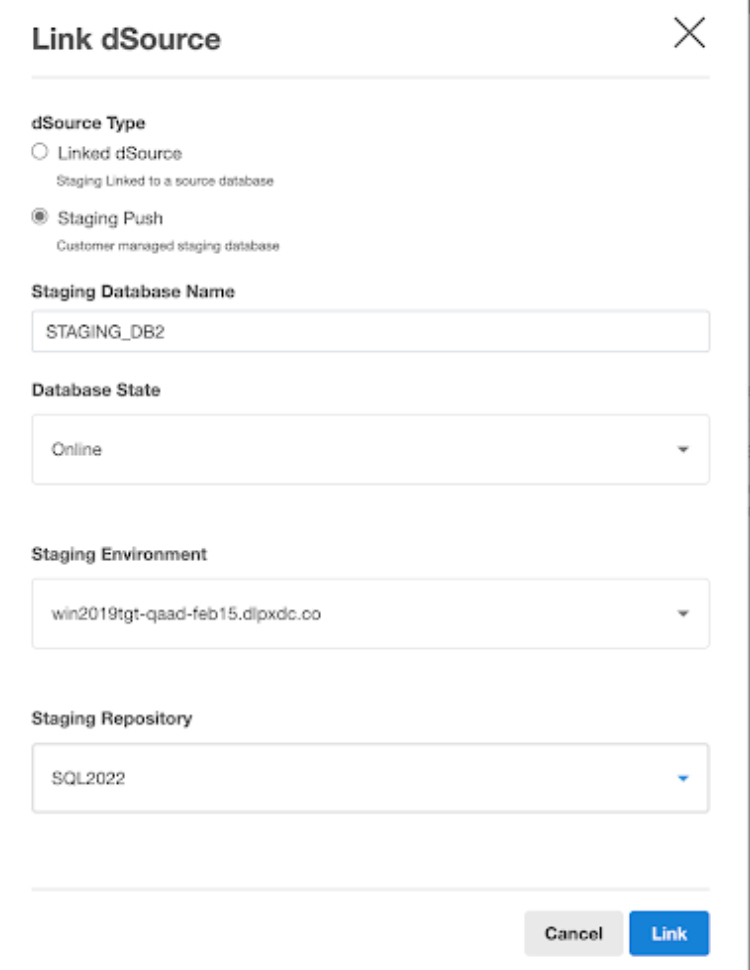
From the Actions ... tab, click Link dSource. Select Staging Push and enter staging database Name, select Database State, Staging Environment and Staging Repository.
-
Click Link to confirm.
Keep a note of the following:
-
While unlink/link database state conversion is not supported. The attach job will be successful, but you will not be able to enable the dSource, as you will get the database state changed exception. Therefore, you should always provide the same database state that was given while creating the dSource.
-
If staging push dsource is created in the online mode, then the staging database states other than Online such as Restoring, ReadOnly, StandBy, and Emergency are not supported. If a database is in any of these unsupported states, dSource will go into the cannot monitor state on the Delphix Continuous Data Engine interface, and sync operation will fail.
Attaching a previously detached dSource using CLI
You can only re-attach databases that represent the same physical database.
-
Login to the Delphix CLI as delphix_admin or a user with OWNER privileges on the dSource, group, or domain.
-
Select the dSource by name using
database select <dSource Name>.. -
Run the
attachSourcecommand. -
Set the source config you want to attach to, using
set source.config=<Source Database Unique Name>. Source configs are named by their database unique name. -
Set any other source configuration operations as you would for a normal link operation.
-
Run the
commitcommand.
Limitations
-
Restore backups fails on staging database due to mount issues. When a critical threshold is enforced due to Delphix storage and later resumed successfully, a transactional log will not be applicable on the staging database directly. A generic warning will be displayed for the resume job only for staging push dSources on the Delphix interface that after the mount, the user might face issues in restoring a transaction log. SQL server error when restoring the Tlog after resume:
Msg 4320, Level 16, State 3, Line 13The file "
SourceDB4_log" was not fully restored by a database or file restore. The entire file must be successfully restored before applying this backup set.Msg 3013, Level 16, State 1, Line 13RESTORE LOG is terminating abnormally.
RESOLUTION: Full or differential backup will be successfully restored.
-
Attach operation fails during the Enable operation.
If the attach operation fails for staging push dSource, any exception is consumed and the enable operation is marked as a success.For example, if DB files were changed for the staging database but a snapshot was not taken on the Delphix engine and disable was performed directly, the enable will succeed with an attach failure that will be shown as a warning. The previous DB files will be available on the mount path.
RESOLUTION: The customer can apply a full restore at this point to bring the database in restoring mode before trying to run a sync.
-
Point-in-Time provisioning is not supported.
-
The sub-directory structure for DB files is not supported.
For example, If a staging database is restored with DB files inside another folder within the DB directory (C:\Program Files\Delphix\DelphixConnector\ec2197b2-e0c6-48d2-bd14-265e6fa9b5ab-staging-1\DATA\db\folder1\sp.mdf, C:\Program Files\Delphix\DelphixConnector\ec2197b2-e0c6-48d2-bd14-265e6fa9b5ab-staging-1\DATA\db\folder1\folder2\sp_log.ldf), then operations such as to enable, relink, VDB provisioning, and export will fail. -
The validated sync process is not supported for Staging Push dSources.
-
If staging push dsource is created in the restoring mode, then the staging database states other than Restoring such as ReadOnly, StandBy, and Online are not supported. If a database is in any of these unsupported states, dSource will go into the Cannot Monitor state on the Delphix Engine interface, and Sync operation will fail.
-
We have limited the online dSources to follow a single timeflow, i.e. new timeflows will not be created when the recovery fork guide is changed. After restoring a full backup, you will have to delete old snapshots before using the new snapshot for provisioning.