
VDB operations allows you to interact with and manipulate virtualized instances of databases. These operations are pivotal in ensuring the effective utilization, maintenance, and synchronization of virtual databases. Common VDB operations include:
Provision a VDB
Virtual databases are a significant part of the Delphix Continuous Data solution. In order to create or provision a virtual database, you will need a linked dSource from a source host and a compatible target environment, as described in the overview for Managing environments and hosts. Since provisioning VDBs vary significantly across connectors, details on this process can be found within the documentation for the specific connector.
At the core, virtual databases are fully functional copies of data sources that can be created and managed at a fraction of the storage and time that are typically required. To end-users, VDBs act and perform just like a standard database.
Disable and enable a VDB
The act of disabling a VDB serves as a necessary prerequisite for procedures like VDB migration or upgrade. When a VDB is disabled, it consists of the complete removal of all its traces, including configuration files from the target environment in which it was originally provisioned. It's important to note that while the VDB itself, along with its associated metadata, remains intact on the Delphix Continuous Data engine, the configuration files are temporarily eliminated from the target environment.
Subsequently, when you decide to re-enable the VDB, these previously removed configuration files are reinstated within the target environment, facilitating the VDB's return to operational status with its settings and parameters restored.
When enabling a SQL Server VDB, both the DB_CHAINING and TRUSTWORTHY database parameters will be disabled (even if they were enabled on the dSource).
If these parameters are used, Delphix recommends a Post Start Hook to set them as desired. For more information, read the Inheritance of Database Properties During SQL Server VDB Operations KB article.
Procedure
Perform the below steps to disable a VDB.
-
Login to the Delphix Management application.
-
Select the VDB you want to disable.
-
From the Actions menu, select Disable.
-
Click Disable to acknowledge the warning.
When you are ready to re-enable the VDB again, select Enable from the Actions menu, and the VDB will continue to function as it did previously.
Start and stop a VDB
Stopping your virtual databases is essential when executing actions on the database that requires it to be in an offline state. Beyond simply ensuring the database's proper shutdown, the Delphix Continuous Data engine stop and start actions encompass additional functions, including unmounting and mounting the filesystems supplied by the Delphix Continuous Data engine.
Procedure
Perform the below steps to start/stop a VDB.
-
Login to the Delphix Management application.
-
Select the VDB you want to manage.
-
To stop an active VDB, click the stop icon at the top right-hand corner. Conversely, to start an inactive VDB, click the start icon at the top right-hand corner.
-
In cases where stopping or starting the VDB requires credentials distinct from the default environment user, then do the following:
-
Check Provide Privileged Credentials.
-
Enter the username and password.
-
Click Validate Credentials.
-
-
Click Yes to stop or start the VDB.
-
To view the status of the stopping or starting of the VDB, you can use one of the below ways:
-
View the Active Jobs on the right-hand corner of the screen
-
monitor the progress bar from the VDB Status tab.
-
Refresh a VDB
Refreshing a VDB will re-provision it from the dSource. As with the normal provisioning process, you can choose to refresh the VDB from a snapshot or a specific point in time. However, you should be aware that refreshing a VDB will delete any changes that have been made to it over time. When you refresh a VDB, it will revert to its previous state in the specified snapshot or point in time.
When performing a VDB refresh, there is an option to choose between either the faster or more accurate point in time for that database.
Note: Although the VDB no longer contains the previous contents, the previous snapshots and timeflow still remain in the Delphix Continuous Data engine and are accessible through the Command Line Interface (CLI).
Prerequisites
To refresh a VDB, you must have the following permissions:
-
Provisioner permissions on the dSource associated with the VDB
-
Provisioner permissions on the group that contains the VDB
-
Owner permissions on the VDB itself
-
Data is a role that allows DB_ROLLBACK, DB_REFRESH, READ_ACTION, DB_SYNC, JOB_CANCEL.
-
Read is a role that allows the user to inspect objects via the READ_ACTION permission.
A user with admin credentials can perform a VDB Refresh on any VDB in the system.
Procedure
Perform the following below to refresh a VDB.
-
Login to the Delphix Management application.
-
Navigate to Manage > Datasets.
-
Select the VDB that you want to refresh.
-
Click the Refresh VDB button. The Refresh VDB screen appears.
-
Select one of the refresh options and click Next.
-
Faster - This option will utilize the most recent snapshot in the timeflow.
-
More accurate - This option allows you to select a snapshot, a point in time, or a specific log ID.
-
-
Click Submit to confirm.
-
Click the Actions button to watch the progress of the refresh job.
-
If you want to know when the VDB was last refreshed/provisioned, check the Time Point on the Status page.
Rewind a VDB
Rewinding a VDB rolls it back to a previous point in its timeflow and re-provisions the VDB. The VDB will no longer contain changes after the rewind point.
-
Although the VDB no longer contains changes after the rewind point, the rolled-over snapshots and timeflow still remain in Delphix Continuous Data engine and are accessible through the Command Line Interface (CLI). For instructions on how to use these snapshots to refresh a VDB to one of its later states after it has been rewound, refer to the topic CLI Cookbook: Rolling forward a VDB.
-
Delphix clones a new timeflow from the closest snapshot older than or equal to the rewind point. This creates a dependency between the new timeflow and the parent snapshot and timeflow. The parent snapshot and timeflow cannot be deleted because of this dependency. The VDB must first be refreshed before the parent snapshot and timeflow can be removed.
Prerequisites
To rewind a VDB, you must have the following permissions:
-
Auditor permissions on the dSource associated with the VDB
-
Owner permissions on the VDB itself
You do not need owner permissions for the group that contains the VDB. A user with admin credentials can perform a VDB Rewind on any VDB in the system.
Procedure
Perform the below steps to rewind a virtual database.
-
Login to the Delphix Management application.
-
Select the VDB you want to rewind.
-
Select the Timeflow tab.
-
Select the rewind point as a snapshot or a point in time.
-
Click Rewind.
-
If you want to use login credentials on the target environment other than those associated with the environment user, click Provide Privileged Credentials.
-
Click Rewind to confirm.
You can use timeflow bookmarks as the rewind point when using the CLI. Bookmarks can be useful to:
-
Mark where to rewind to - before starting a batch job on a VDB for example.
-
Provide a semantic point to revert back to in case the chosen rewind point turns out to be incorrect.
For a CLI example using a timeflow bookmark, refer to the CLI Cookbook: Provisioning a VDB from a Timeflow Bookmark.
Undo rewind or refresh operation
An accidental refresh of one or more virtual databases (VDBs) from a source database can remove the important data. To restore the data back, you can undo VDB refresh or rewind actions.
Procedure
Perform the below steps to undo a refresh or rewind operation:
-
Login to the Delphix Management application.
-
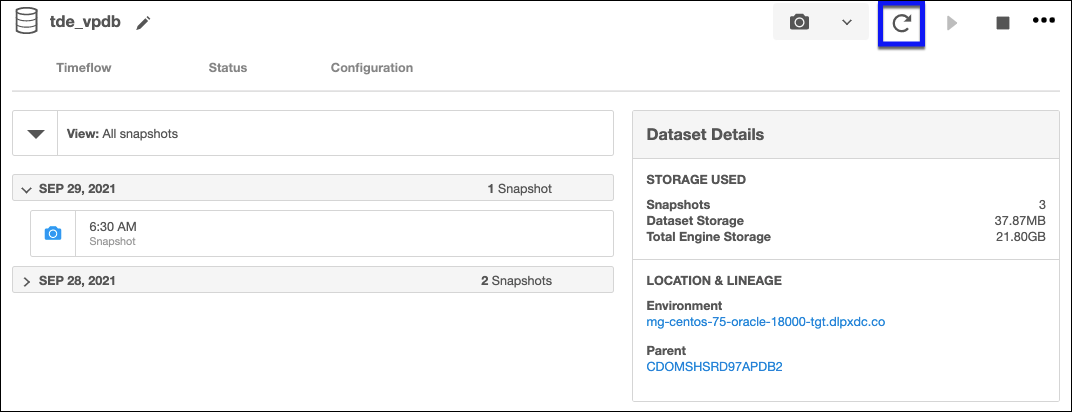
Under Datasets, select the VDB you want to undo your rewind/refresh for.
-
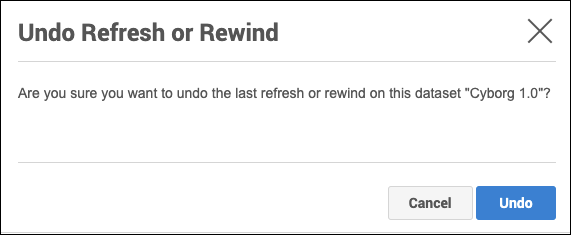
From the Actions menu, select Undo Refresh or Rewind.

-
Confirm that you want to undo the last refresh or rewind for the selected VDB, by selecting Undo.
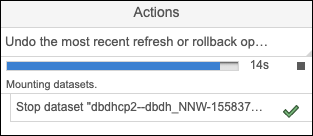
-
From the Action sidebar menu, you will be able to view the undo action.
Migrate a VDB
In certain scenarios, you might find it necessary to migrate a virtual database to a different target environment. This need can arise, for instance, when upgrading the host where the VDB is hosted or as part of a broader data center migration effort. Leveraging the VDB migration functionality enables you to relocate the VDB from its current location to a new target environment. This is easily accomplished by first disabling the database, then using the migrate VDB feature to select a new target environment.
Prerequisites
-
Set up a new target environment that is compatible with the VDB that you want to migrate.
-
Ensure that the VDB has first been disabled.
Procedure
Perform the below steps to migrate a virtual database.
-
Login to the Delphix Management application.
-
Select the VDB you want to migrate.
-
From the Actions menu, select Migrate.
-
Select the new target environment for the VDB, the user for that environment, and the database installation where the VDB will reside.
-
Select Migrate.
-
From the Actions menu, select Enable.
-
Click Enable to confirm.
Within a few minutes, your VDB will re-start in the new environment, and you can continue to work with it as you would any other VDB.
This feature may vary for different connectors. For workflow related information, refer to the connector specific documentation.
Upgrade a VDB
Much like the process of upgrading a data source, upgrading a VDB entails modifying the installation path linked to the corresponding data platform. It's important to note that this feature doesn't upgrade the VDB itself; instead, it ensures that Delphix Continuous Data engine correctly associates the VDB with the correct database version to ensure proper functionality.
By performing this upgrade, you have the capability to update the database version used for running the VDB.
This feature may vary for different connectors. For workflow related information, refer to the connector specific documentation.
Procedure for VDB In-Place Upgrade
Perform the below steps to upgrade a virtual database.
-
Remove any VDB refresh policy assigned to the VDB.
-
Upgrade the target database instance.
-
Refresh the target environment.
Delete a VDB
Deleting a VDB will remove it and its timeflow and snapshots from the Delphix Continuous Data engine entirely. This operation is non-reversible.
Prerequisites
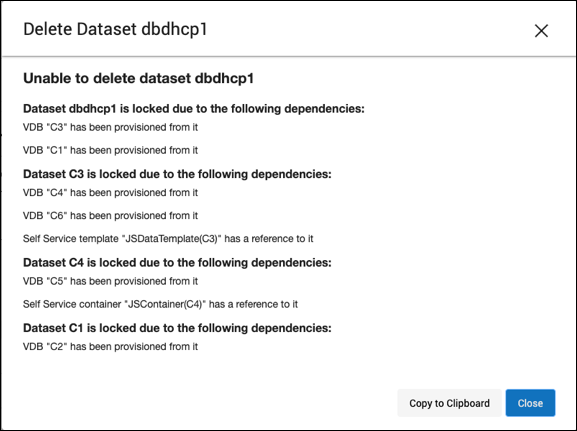
You cannot delete a VDB that has dependent VDBs. Before deleting a VDBs, make sure that you have deleted all dependent VDBs. Otherwise, the delete option will be grayed out.
Deleting a VDB is an unrecoverable operation. Proceed only if you want to permanently destroy the unique data that was created in the VDB.
Procedure
Perform the below steps to delete a virtual database.
-
Login to the Delphix Management application.
-
Select the VDB you want to delete.
-
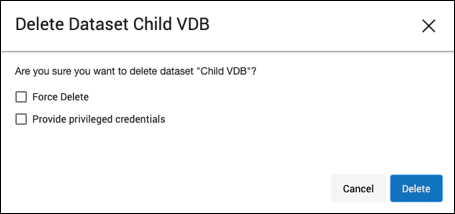
From the Actions menu, select Delete.
-
Click Delete to confirm.
Force Delete
Deleting a vFiles may fail if it cannot be unmounted successfully from all target environments. You can use the force delete option to ignore all failures during unmount.
Using Force Delete
Deleting unused or outdated objects should be a regular part of Delphix Continuous Data engine administration. This is especially important to prevent low space errors, which can cause the Delphix Continuous Data Engine to stop. The Delphix Continuous Data engine holds a maximum of 750 objects.
Force Delete can be used when:
-
The staging host/container is not accessible via Delphix Continuous Data engine anymore.
-
The Delphix Connector service is not running (applicable to SQL Server only).
-
The normal delete is throwing an error and not working.
-
When the target or staging host is decommissioned.
Force Delete should not be used as an alternative to Delete in normal circumstances.
Procedure
Perform the below steps to forcefully delete a virtual database.
-
Log into the Delphix Management application.
-
Select Resources > Storage Capacity.
-
Select the Trash can next to the object you want to delete.
-
In the Delete dialog, select Force Delete. Oracle users will have the option to provide additional credentials.
-
Click Delete.
Dependencies
If there are dependencies on the snapshot, you will not be able to delete the snapshot free space; the dependencies rely on the data associated with the snapshot. These items are displayed with a lock icon next to the name.
Export a VDB (V2P)
V2P (Virtual to Physical) refers to the process of exporting a virtual database to a physical one. Once you have created a dSource or a VDB, you have the option to export its contents and log files to a physical database. This process creates a set of directories on the target environment and populates them with the database data, log files, and scripts that are used to recover the physical database.
You can automatically start the physical database recovery process as part of V2P, or you can use the scripts for manual recovery. When the export process completes, the target environment will contain a copy of the database in its unvirtualized size. Therefore, before you begin the process, ensure that the target directories specified during V2P operation have enough capacity to accommodate the database. For more information, refer to the connector specific documentation.
Provisioning with replication
The process for provisioning from replicated objects closely mirrors the standard VDB provisioning procedure, with one key distinction. Before initiating the provisioning process, you must first select the replica namespace containing the replicated object.
Prerequisites
-
You must have a dSource or VDB that has been replicated from one Delphix Continuous Data engine to another, as described in Replication overview.
-
The Delphix Continuous Data engine containing the replicated dSource or VDB must have a compatible target environment that it can use to provision a VDB from the replicated dSource or VDB.
-
On the Delphix Continuous Data engine containing the replicated dSource or VDB, login to the Delphix Management application.
Procedure
Perform the below steps to perform provisioning from replicated objects .
-
From the list of replica namespaces, select the replica namespace that contains the dSource or VDB from which you want to provision.
-
The provisioning process is now identical to the process for provisioning standard objects.