
Using LDAP with the Delphix Engine requires the following:
-
configure the Delphix Engine to use LDAP
-
add LDAP users in the Delphix Management application
Configuring LDAP on the Delphix engine
-
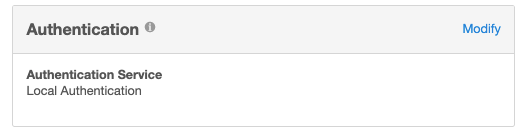
From the Delphix Setup application configure the LDAP server with the Delphix Engine by selecting Modify in the Authentication section.
-
Enter the information about the LDAP Authentication Server. This must be an LDAP server that is configured for authentication. This information should come from the LDAP admin who runs the server. As a general rule only use simple auth. If using SSL/TLS typically use port 636 and import a certificate. If not using SSL/TLS, use port 389 and you will not need a certificate. If the remote LDAP server has disabled anonymous access and the user is trying to use SSL/TLS, the user will be unable to import the certificate. If this occurs file a support case so that Delphix Support can help manually upload the certificate.
Note:
Import Server certificate option may import more than one certificate. It is recommended to import the CA certificate in the TrustStore and then click the Test Connection option to validate. For more information on adding a certificate in the TrustStore, refer to TrustStore Settings.
Test Connect will issue an anonymous login request to the LDAP server. If the LDAP server has disabled anonymous access the test will fail. Test the server by adding a valid LDAP user and try logging in.
-
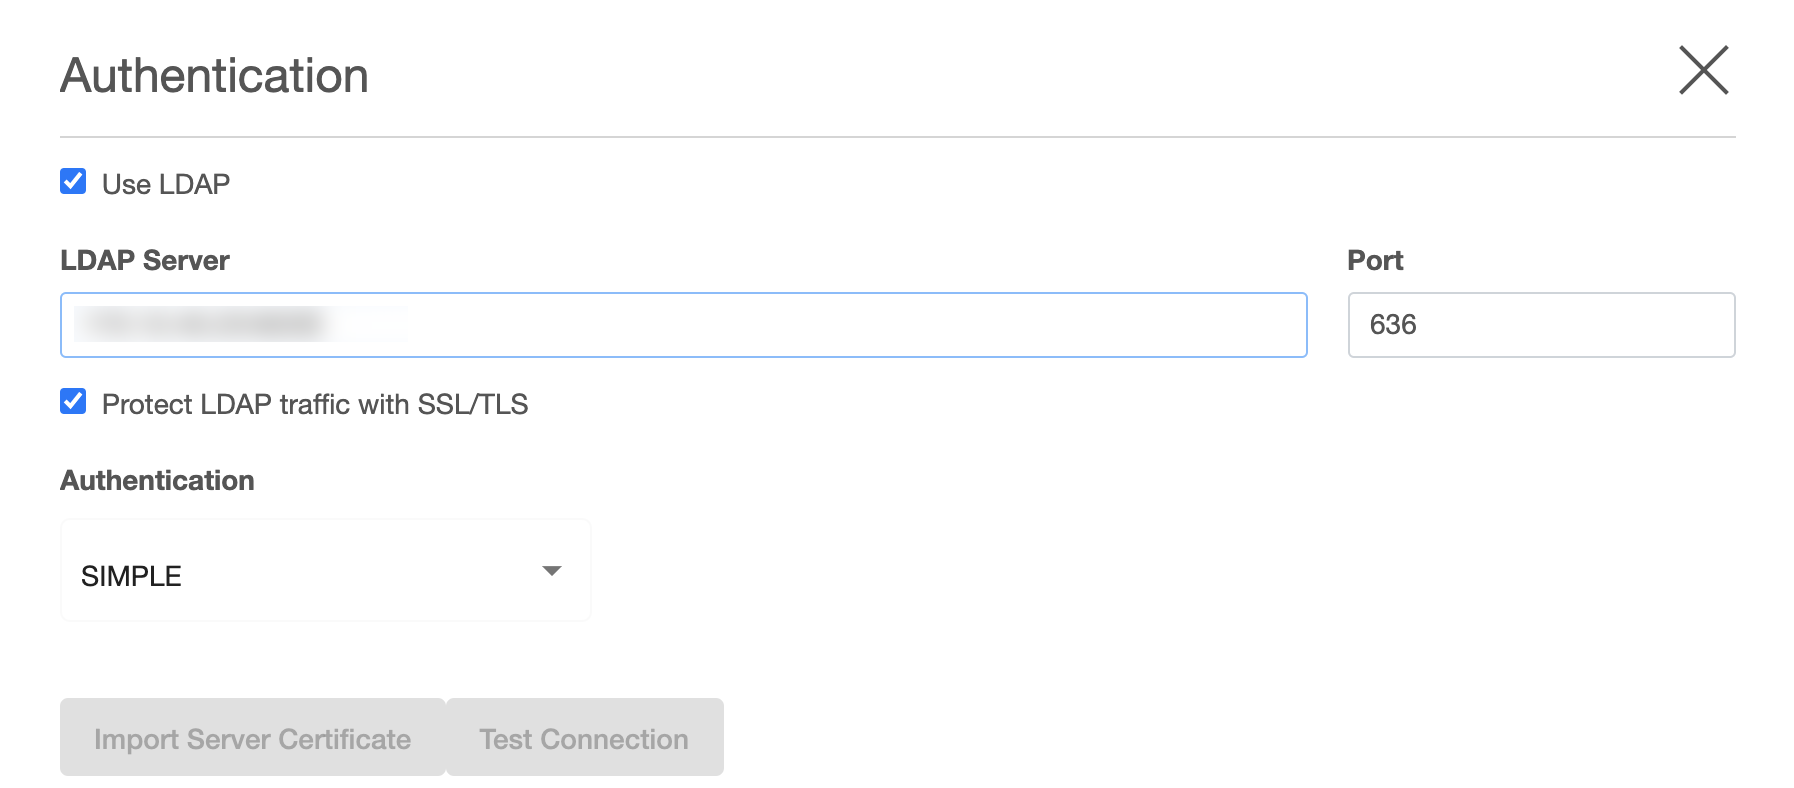
After updating the information and clicking the Save button, the Authentication Service section should reflect the proper information.
Create a new LDAP user account
-
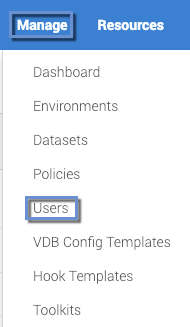
Login to the Delphix Management application and go to Manage > Users to add a new user.
-
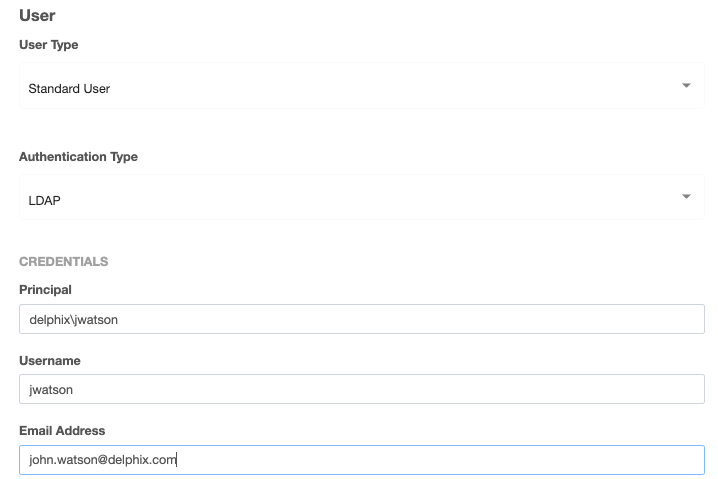
In the Users screen, click the Add User icon

and choose LDAP as the Authentication Type.

-
Fill out the data fields and decide if the user will be a Delphix Admin. For more info on the Delphix Admin setting please see Managing System Administrators. When adding the principal, it is mandatory to specify the entire DN of the user to be added.
Each entry in an LDAP tree has a unique identifier; its Distinguished Name (DN). This consists of its Relative Distinguished Name (RDN), constructed from some attribute(s) in the entry, follow the parent entry's DN. Think of the DN as the full file path and the RDN as its relative filename in its parent folder (e.g. if /foo/bar/myfile.txt is the DN then myfile.txt would be the RDN). Some users prefer to use the term fully qualified DN to emphasize that a proper DN should include all of the components.
Example of LDAP tree in which the base is:
dc=example,dc=com
and people are stored in a People subtree with RDN:
ou=people
and each individual is keyed by the cn (common name) attribute.
An example DN in this case would be: cn=Tony,ou=people,dc=example,dc=com
When adding an LDAP user you will be asked for the following information:
-
Principal - which is the DN from above
-
email address
-
username - used to login into Delphix
A password is no longer required because it will authenticate against the password already stored in the LDAP entry, which is presumably known to the individual already. It is probably best if someone familiar with the LDAP tree and using it for authentication were involved at least initially to help understand how to describe the fully qualified DN for users.
Using Microsoft AD as an LDAP server
Using Microsoft AD as a modified LDAP server is also possible. Microsoft AD allows some shortcuts in the specification of the DN when binding.
Examples:
-
<domain>\<user logon name>
-
<user logon name>@<domain>.com
As with generic LDAP, it is probably best if someone familiar with using the AD LDAP instance for authentication was involved.
When users log in, they will enter the username as chosen above, and the password that matches the principal entered above.