
Getting started
Delphix storage migration allows you to remove storage devices from your Delphix Engine, provided there is sufficient unused space, thus allowing you to repurpose the removed storage device to a different server. You can also use this feature to migrate your Delphix Engine to different storage by adding the new storage devices and then removing the old storage devices.
Feature compatibility
This feature is only compatible with Delphix Engine Releases 5.0.4 and later. This feature is not supported on Delphix Elastic Data Engines (engines backed by blob/object storage).
Possible Migration Methods
|
Method |
Pros |
Cons |
|---|---|---|
|
Delphix Storage Migration |
|
|
|
vMotion |
|
|
|
Delphix Replication |
|
|
Understanding Delphix storage migration
Delphix storage migration is a multi-step process:
-
Identify a storage device for removal. The device you choose will depend on your use case.
-
To remove extra storage that is unused, you can select any device for removal. For best performance, select the device with the least allocated space; typically, this is the device that you added most recently. The allocated space is defined by the
usedSizeproperty of the storage device:test-env@delphix 'Disk10:2'> ls Properties type: ConfiguredStorageDevice name: Disk10:2 bootDevice: false configured: true expandableSize: 0B model: Virtual disk reference: STORAGE_DEVICE-6000c293733774b7bb0e4aea83513b36 serial: 6000c293733774b7bb0e4aea83513b36 size: 8GB usedSize: 7.56MB vendor: VMware -
To migrate the Delphix Engine to new storage, add storage devices backed by the new storage to the Delphix Engine. Then remove all the devices on the old storage.
-
-
Use the Delphix command-line interface (CLI) to initiate the removal of your selected device.
-
Data will be migrated from the selected storage device to the other configured storage devices. This process will take longer the more data there is to move; for very large disks, it could potentially take hours. You can cancel this step if necessary.
-
The status of the device changes from configured to unconfigured and an alert is generated to inform you that you can safely detach the storage device from the Delphix Engine. After this point, it is not possible to undo the removal, although it is possible to add the storage device back to the Delphix Engine.
-
Use the hypervisor to detach the storage device from the Delphix Engine. After this point, the Delphix Engine is no longer using the storage device, and you can safely re-use or destroy it.
Limitations of Delphix storage migration
After removal, the Delphix Engine uses memory to track the removed data. In the worst-case scenario, this could be as much as 2-3 GB of memory per TB of used storage. Note that this is used storage; the overhead of removing a 1TB device with only 500MB of data on it will be much lower than the overhead of removing a 10GB device with 5GB of data on it.
User interface
Delphix storage migration is currently available exclusively via the CLI. There are two entry points.
-
verifyStorageDeviceRemoval- Verifies available pool space and available memory. -
startStorageDeviceRemoval- Kicks off job, detailed discussion of job concurrency/recovery.
Device removal for storage migration
Do not remove a configured storage device
Do not remove a configured storage device or reduce its capacity. Removing or reducing a configured storage device will cause a fault with the Delphix Engine, and will require the assistance of Delphix Support for recovery.
-
Identify which device you want to remove.
-
If you are using a VMware RDM disk, note the UUID of the device by looking at its name in the vSphere GUI. For more information, see the Getting the UUID of a RDM Disk from VMware, via the vSphere GUI article.
-
If you are using a VMware virtual disk, note the UUID of the device via the vSphere API. See the section of this VMware KB article on how to get the UUID of your virtual disk.
-
In EC2, note the attachment point – e.g.,
/dev/sdf. -
In KVM, note the UUID.
-
-
Login to the Delphix CLI as a sysadmin user.
-
Navigate to the storage/device directory with
cd storage/device. -
Select one or more devices to remove and make note of the name (e.g., select "Disk10:2" and "Disk10:3").
test-env@delphix storage/device> ls Objects NAME CONFIGURED SIZE EXPANDABLESIZE Disk10:2 true 8GB 0B Disk10:0 true 24GB 0B Disk10:1 true 8GB 0B Disk10:3 true 8GB 0B -
(For VMware only) Confirm the disk selection is correct by validating that the serial matches your UUID:
test-env@delphix storage device 'Disk10:2'> ls Properties type: ConfiguredStorageDevice name: Disk10:2 bootDevice: false configured: true expandableSize: 0B model: Virtual disk reference: STORAGE_DEVICE-6000c2909ccd9d3e4b5d62d733c5112f serial: 6000c2909ccd9d3e4b5d62d733c5112f size: 8GB usedSize: 8.02MB vendor: VMware -
Navigate to
storage/remove. Runverifyand set the devices to be removed, as shown below.test-env@delphix storage remove > verify test-env@delphix storage remove verify *> set devices="Disk10:2,Disk10:3" test-env@delphix storage remove verify *> commit type: StorageDeviceRemovalVerifyResult newFreeBytes: 15.85GB newMappingMemory: 3.14KB oldFreeBytes: 23.79GB oldMappingMemory: 0B -
Navigate to
storage/remove. Runstartand set the devices to be removed, as shown below.test-env@delphix storage remove > start test-env@delphix storage remove start *> set devices="Disk10:2,Disk10:3" test-env@delphix storage remove start *> commit Dispatched job JOB-4 STORAGE_DEVICES_START_REMOVAL job started. STORAGE_DEVICES_START_REMOVAL job completed successfully.Note : This does not signify that the device migration has been completed. A
STORAGE_DEVICE_REMOVALjob will start for each device to be removed, which handles the data migration from that disk. -
Wait for device evacuation to complete. Alternatively, you can cancel the evacuation.
Note:
Do not detach the device from the Delphix Engine in your hypervisor until the data evacuation is completed.You can monitor the progress of the STORAGE_DEVICE_REMOVAL job in the Management GUI under System >Jobs.
-
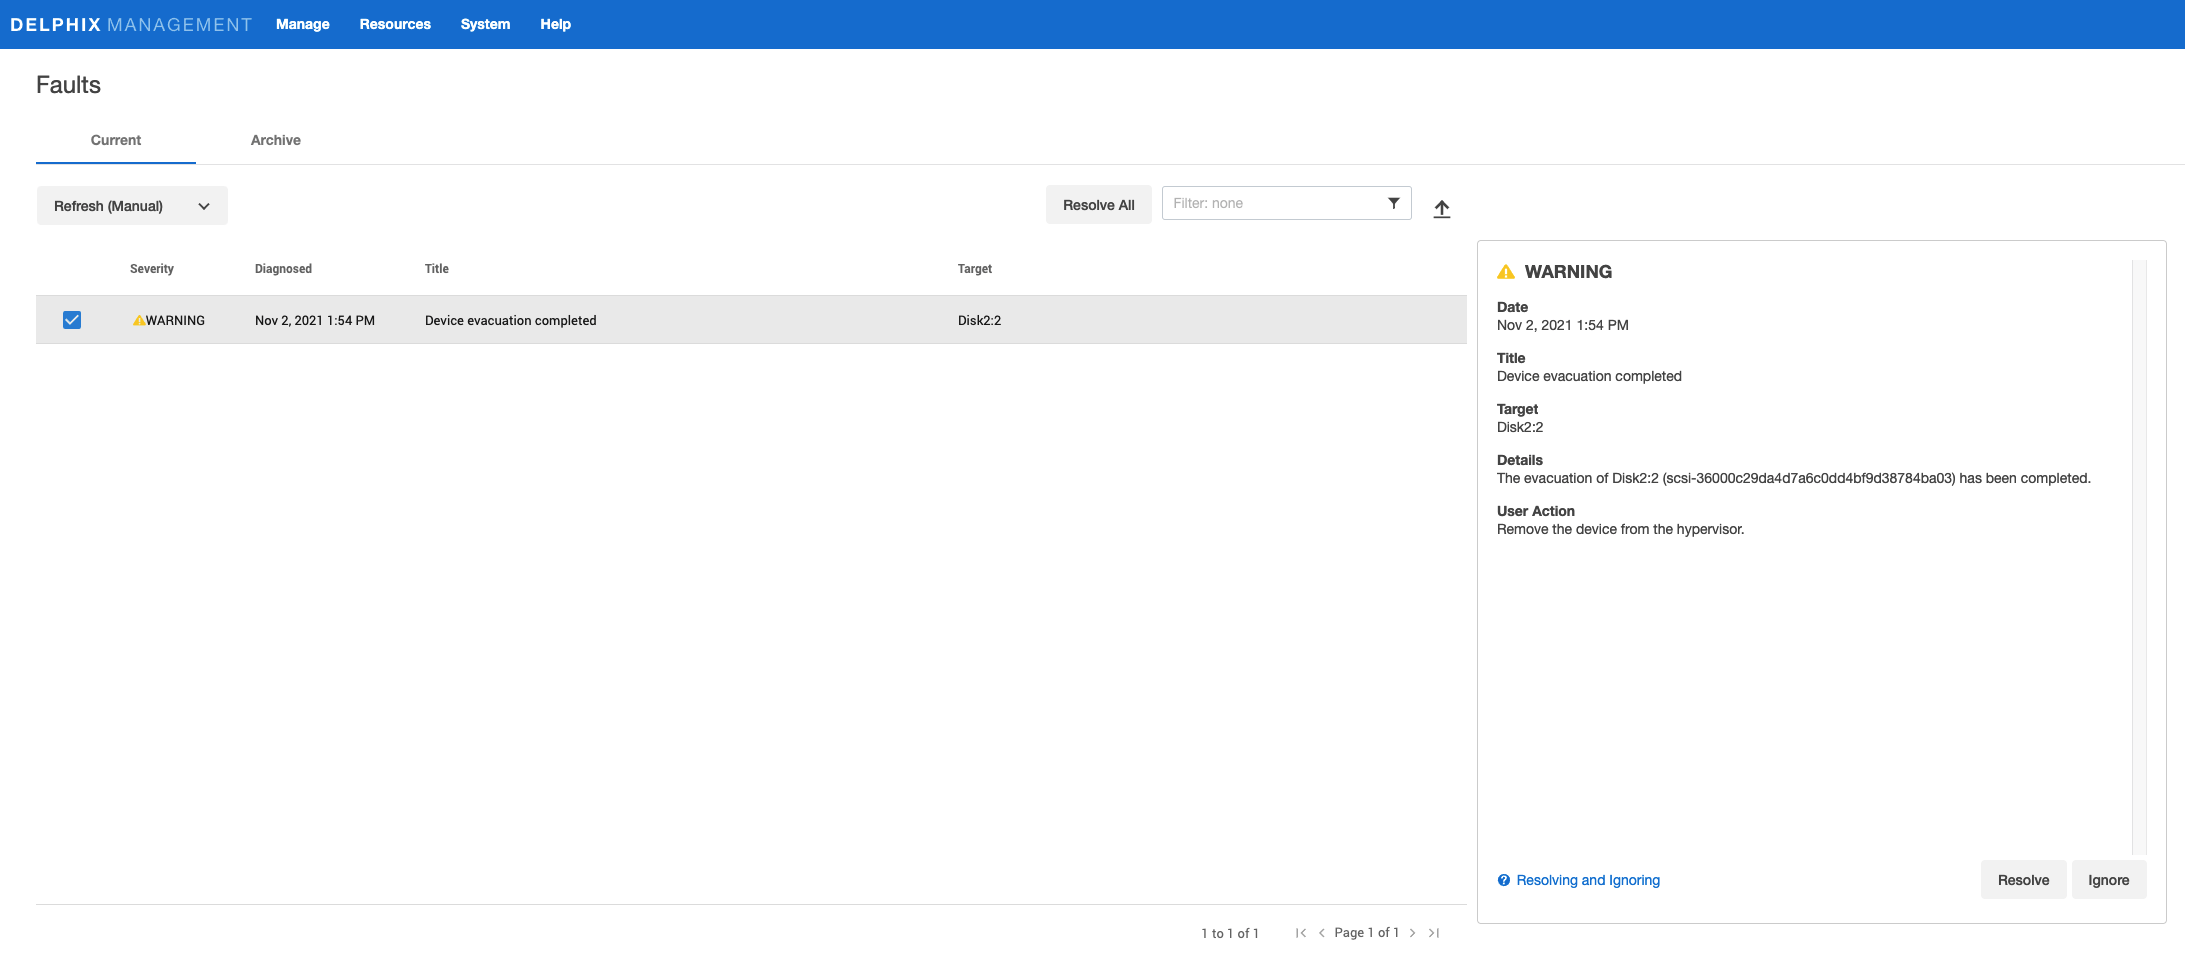
Once the device evacuation has been completed, the job will finish and a fault will be generated. Detach the disks from your hypervisor and the fault will clear on its own. An example of the fault created is shown below.
Using VMDKs
When using VMDKs, deleting the wrong VMDK could cause data loss. Therefore, it is highly advisable to detach the device, then verify that the Delphix Engine continues to operate correctly, and lastly delete the VMDK.
Getting the UUID of an RDM disk from VMware via the vSphere GUI.
In the event that the disk serial number displayed in Delphix does not match the UUID in VMware, the Delphix Engine must be powered off and back on in order to make VMware provide the correct values to the guest operating system (Delphix). This has been necessary when using vmkfstools with setuuid. When forcing the guest OS to re-read the SCSI sense data for the device, VMWare still provides the original values. Even after a simple reboot VMWare still provides the previous UUID values. It was not until the VM was explicitly powered off and back on did VMWare present the new UUID values to the guest. After which the UUIDs matched between the vmkfstools getuuid command and the CLI output.
In the ESX graphical user interface (GUI), select your VM.
-
Click Edit settings.
-
If not already displayed, select the Hardware tab.
-
Select the device you want to remove.
-
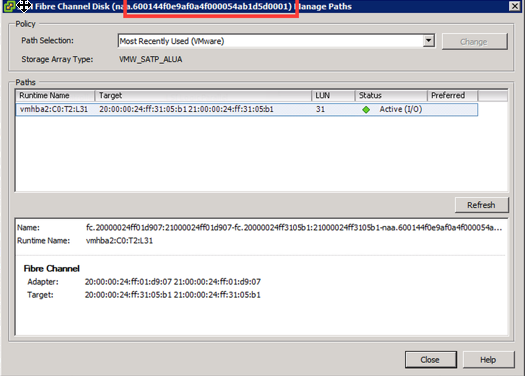
Click Manage Paths.

The UUID of the device appears in the title bar, as seen below.
Getting the UUID of a VMDK from VMware, via ssh to the ESX server
-
ssh onto the ESX server as the root user.
-
Navigate to the directory containing the .vmdk files for the Delphix VM.
Use the 'vmkfstools -J getuuid <.vmdk filename>' command to obtain the UUID, for example:/vmfs/volumes/25894daa-f7b2b044/delphix01-2356 # vmkfstools -J getuuid delphix01-2356_1.vmdk UUID is 60 00 C2 91 01 bc 8e 72-31 a4 cd b0 b3 f6 e5 74
Getting the UUID of a VMDK from VMware, via VMware PowerCLI
PS C:\> Connect-VIServer -Server durban -Protocol https -Username root -Password root_password

Name                           Port  User
----                           ----  ----
durban                         443   root


PS C:\> Get-VM delphixVM | Get-HardDisk | select name,filename,@{name="UUID";expr={$_.extensiondata.backing.uuid}}

Name                                        Filename                                    UUID
----                                        --------                                    ----
Hard disk 1                                 [zfs_delphixVM] dlpx-5.1.9.0-432-61155cf... 6000C294-a115-0327-e417-02560d86e944
Hard disk 2                                 [zfs_delphixVM] dlpx-5.1.9.0-432-61155cf... 6000C299-38fe-5050-1eb2-1ee6db62b257
Hard disk 3                                 [zfs_delphixVM] dlpx-5.1.9.0-432-61155cf... 6000C294-662d-c674-8957-03e0514b7006
Hard disk 4                                 [zfs_delphixVM] dlpx-5.1.9.0-432-61155cf... 6000C29d-0719-1072-0f85-96da2efef4a3

PS C:\> Disconnect-VIServer

Confirm
Are you sure you want to perform this action?
Performing operation "Disconnect VIServer" on Target "User: root, Server: durban, Port: 443".
[Y] Yes  [A] Yes to All  [N] No  [L] No to All  [S] Suspend  [?] Help (default is "Y"): Y